Overview: What is the bank stream?
Bank Stream is a core automation tool within AccountTECH’s darwin.cloud platform, specifically designed to eliminate manual data entry for real estate brokerages and accounting teams.
Instead of waiting for monthly statements and manually typing data or importing CSV files, Bank Stream turns the platform into a live financial aggregator.
By connecting banking and credit card feeds directly to the Banking menu, you can view all debit transactions and daily balances in real time.
📌 Note on Transaction Visibility: While income, deposits, and expenses are all imported into the platform backend, only expenses are visible and processed within the Bank Stream screen.
Pre-Setup Considerations
Before beginning the initial setup, determine which financial accounts should be connected to the platform:
- Credit Cards: These are the most common accounts connected to Bank Stream. Ensure that any credit card you connect is already established as a Liability Account in your Chart of Accounts.
- Operating/Bank Accounts: Connect these if your company frequently uses the account for debit charges (e.g., automatic payments to suppliers). If an account is primarily used for commission checks or Accounts Payable checks written directly within darwin, connecting it will offer minimal benefit.
- Escrow Accounts: It is not recommended to connect Escrow Accounts to Bank Stream.
Initial Setup
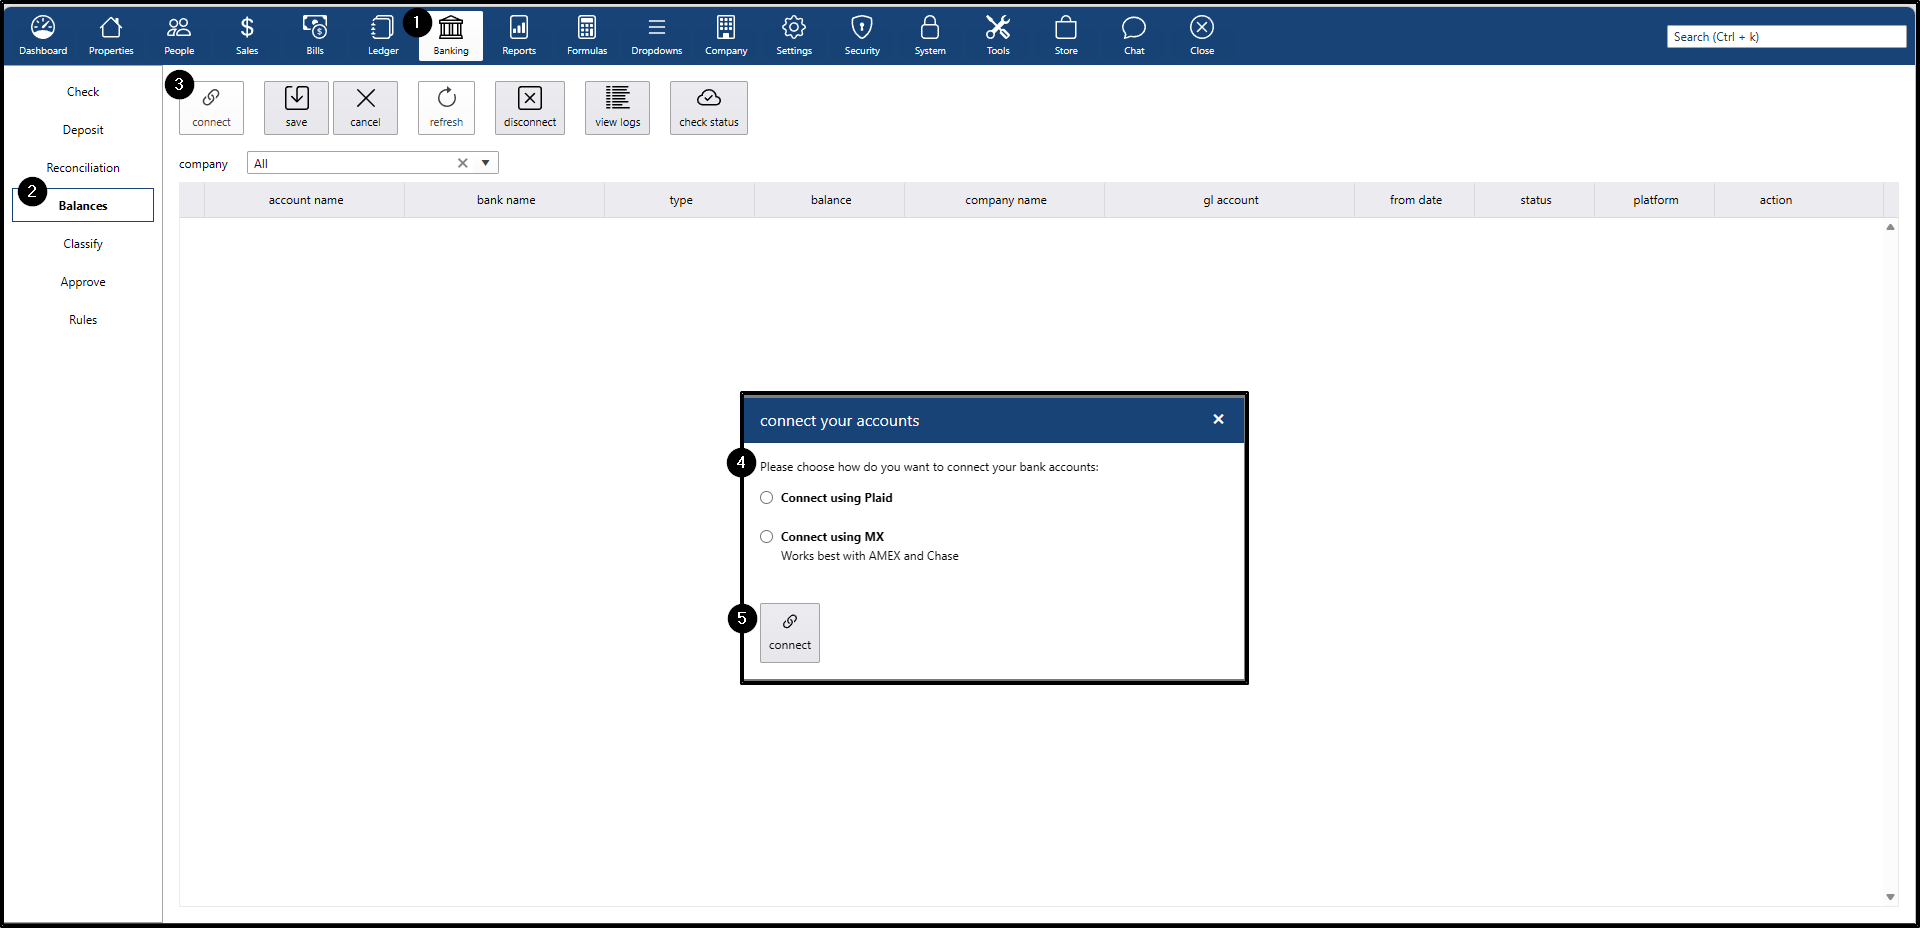
Step 1: Connect Bank and Credit Card Accounts
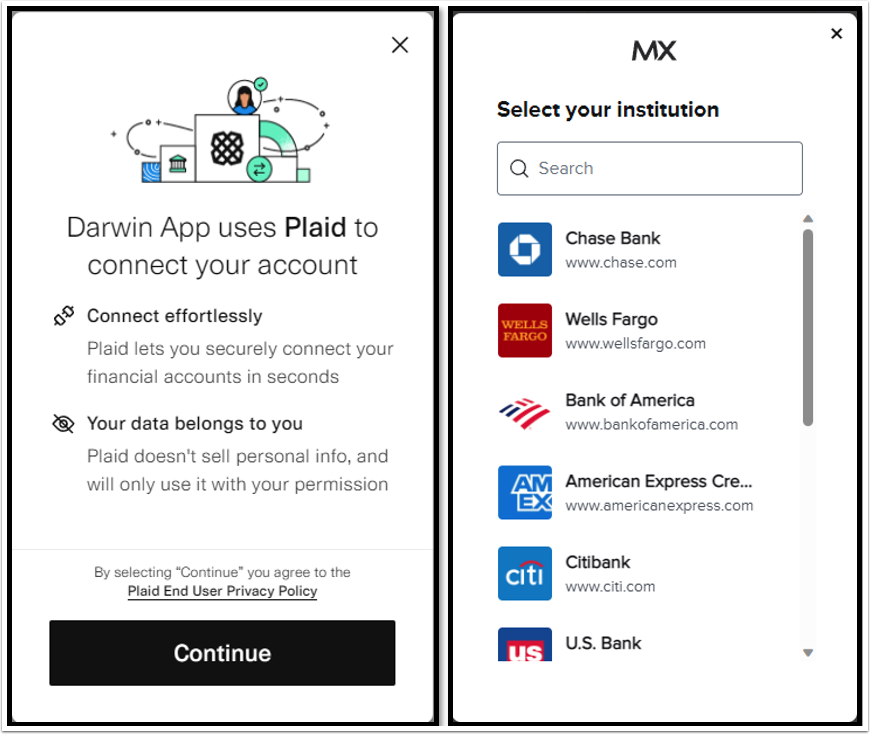
darwin utilizes secure, third-party servers (Plaid and MX) to link to your financial institutions.
- Click the Banking menu
- Click the Balances submenu
- Click the connect button
- Choose either Connect using Plaid or Connect using MX.
- Click connect
Step 2: Finalize the Configuration
Finalize the setup by selecting the company and GL accounts
- Select and assign the appropriate Company.
- Select and assign the corresponding GL Accounts.
- Choose the From Date indicating how far back the system should pull data.
- Click Save.
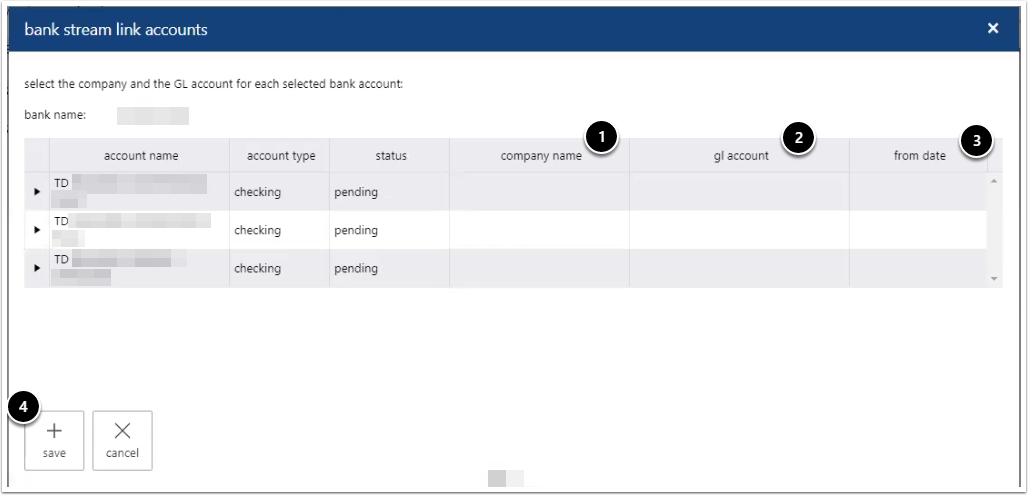
⏱️ Data Availability: Bank Stream can pull up to 18 months of historical data; however, this depends on individual institutional security restrictions. Once connected, it may take up to 24 hours for historical data to populate.
Classifying Transactions
Once transactions import into Bank Stream, they must be classified so they are properly recorded in darwin.cloud. Classification assigns each transaction to the correct category, office, division, and supplier.
Classification Categories
When handling items, users can organize them using three structural formats:
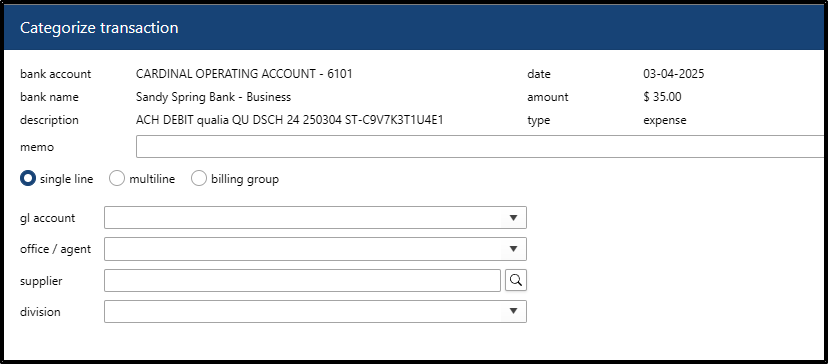
Single Line: Classifies one transaction at a time. Best for simple, unique transactions that do not require splitting.
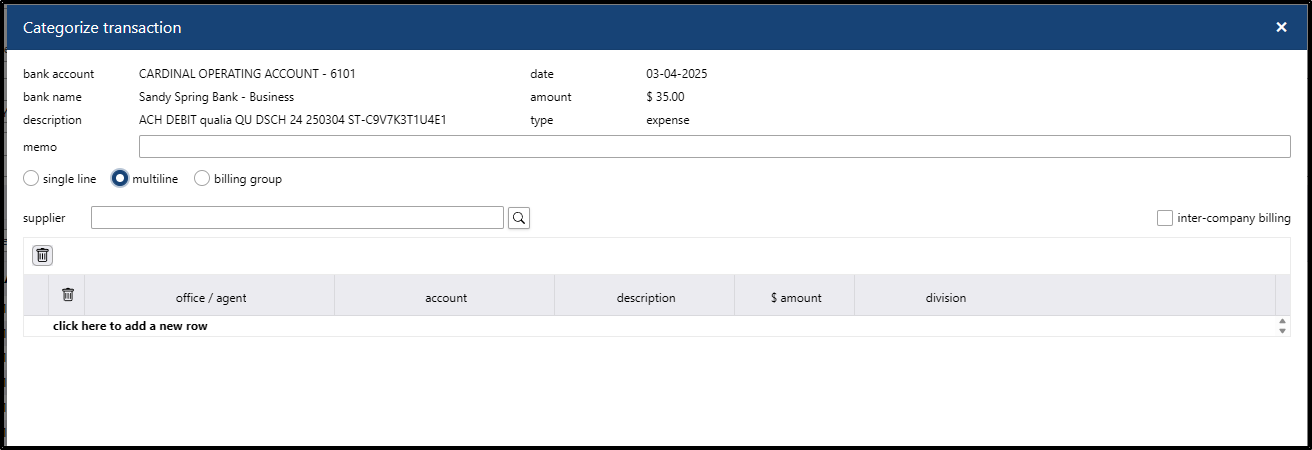
- Multiline: Splits a single transaction into multiple lines or categories. Use this when one payment covers multiple different expenses (e.g., a vendor payment covering multiple property charges).
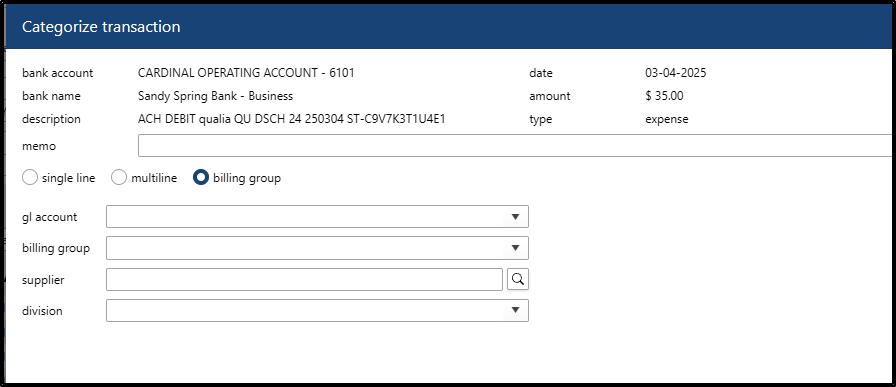
- Billing Group: Assigns transactions to a predefined billing group. This is ideal for recurring charges or common expense groupings to save time and ensure consistency.
How to Classify Transactions and Create Automation Rules
Transactions can be classified with or without creating an automation rule for future occurrences.
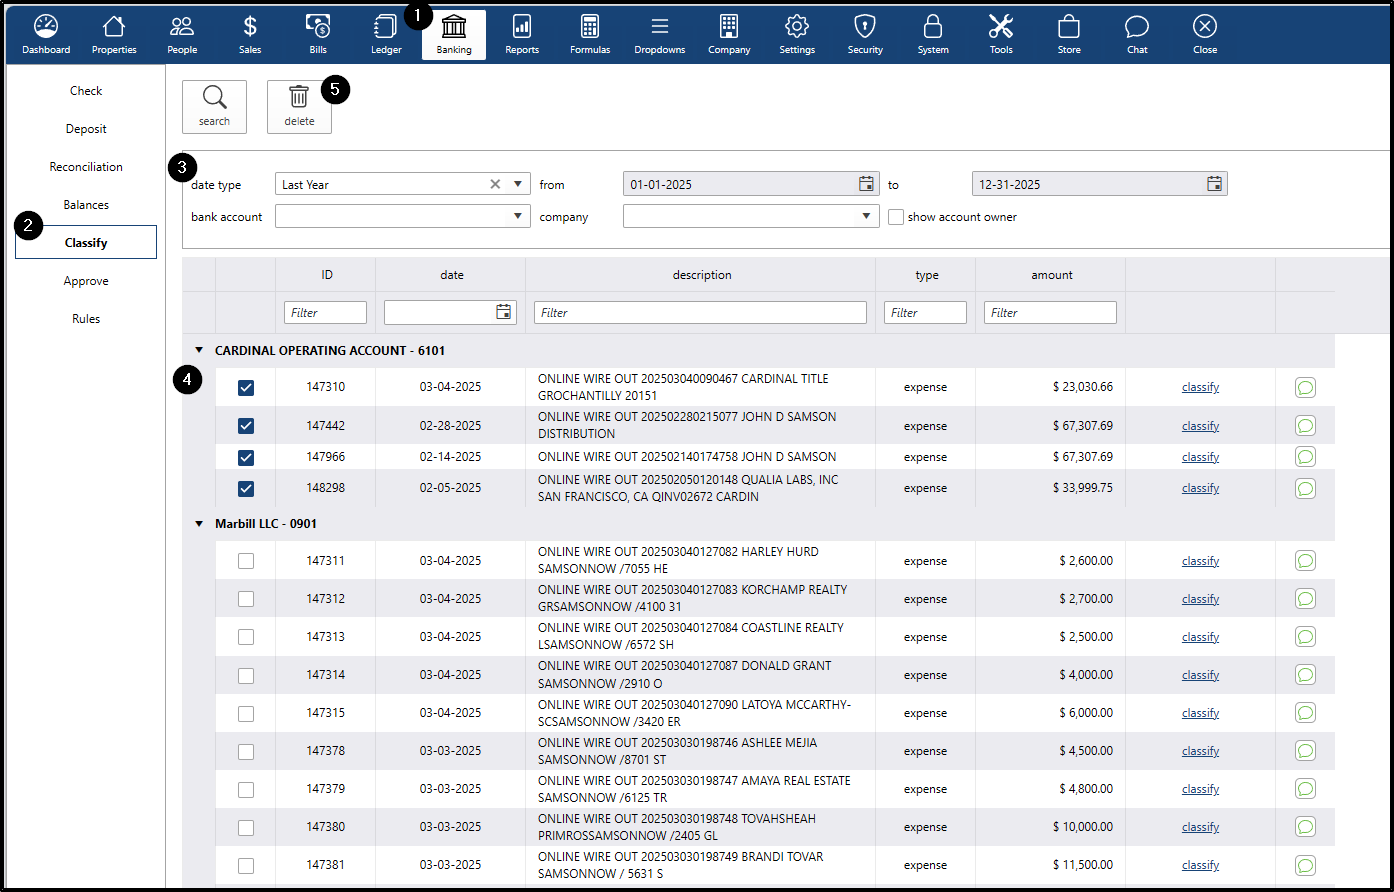
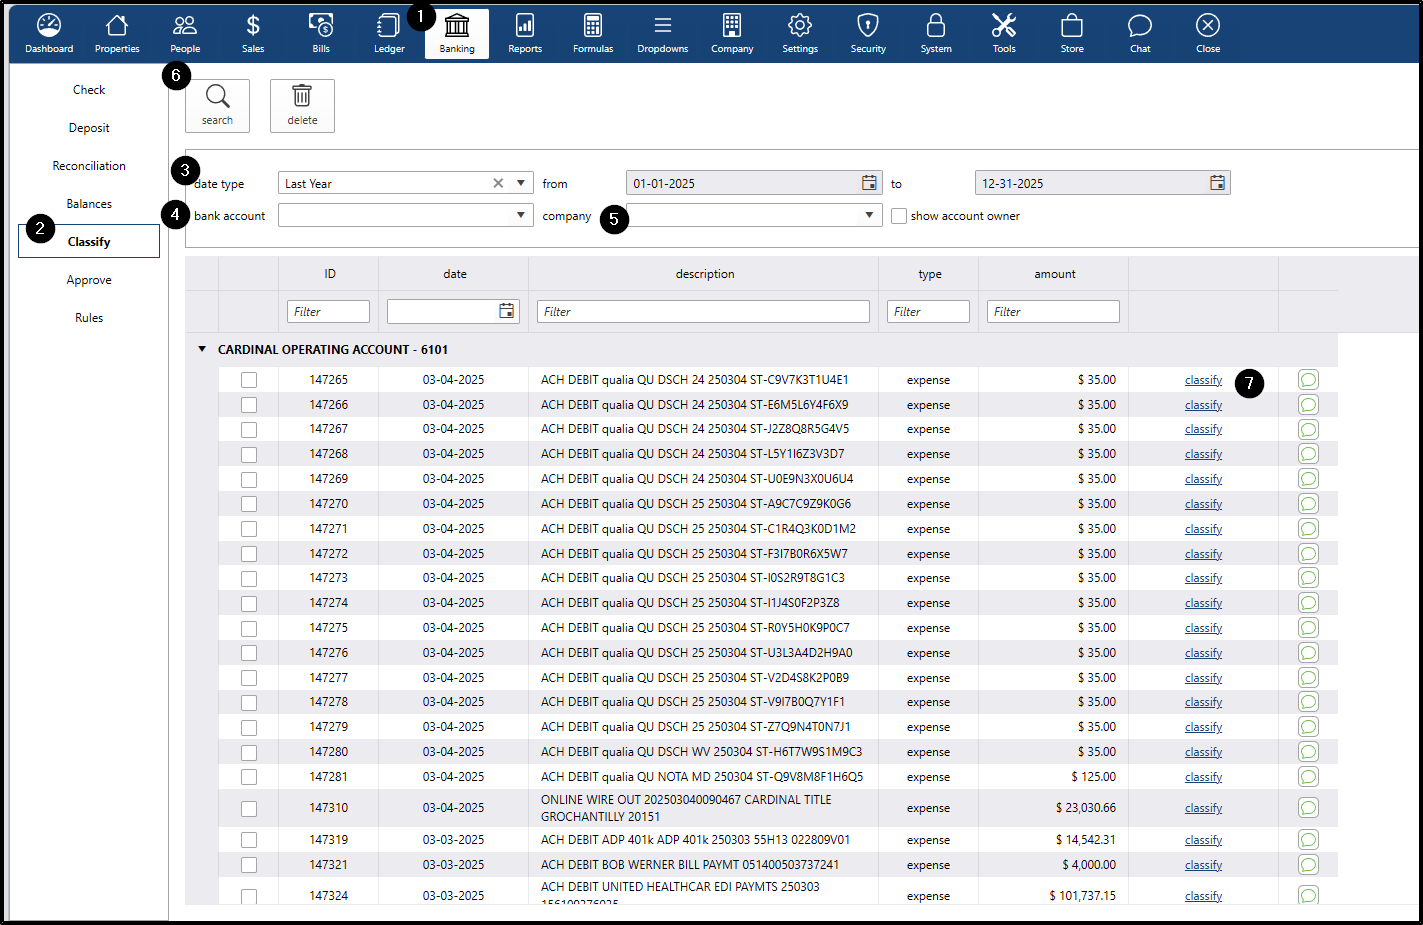
- Go to the Banking menu
- Go to the Classify submenu
- Select a date type from the dropdown list
- Choose a bank account (optional)
- Choose a company (optional)
- Click search
- Click classify hyperlink
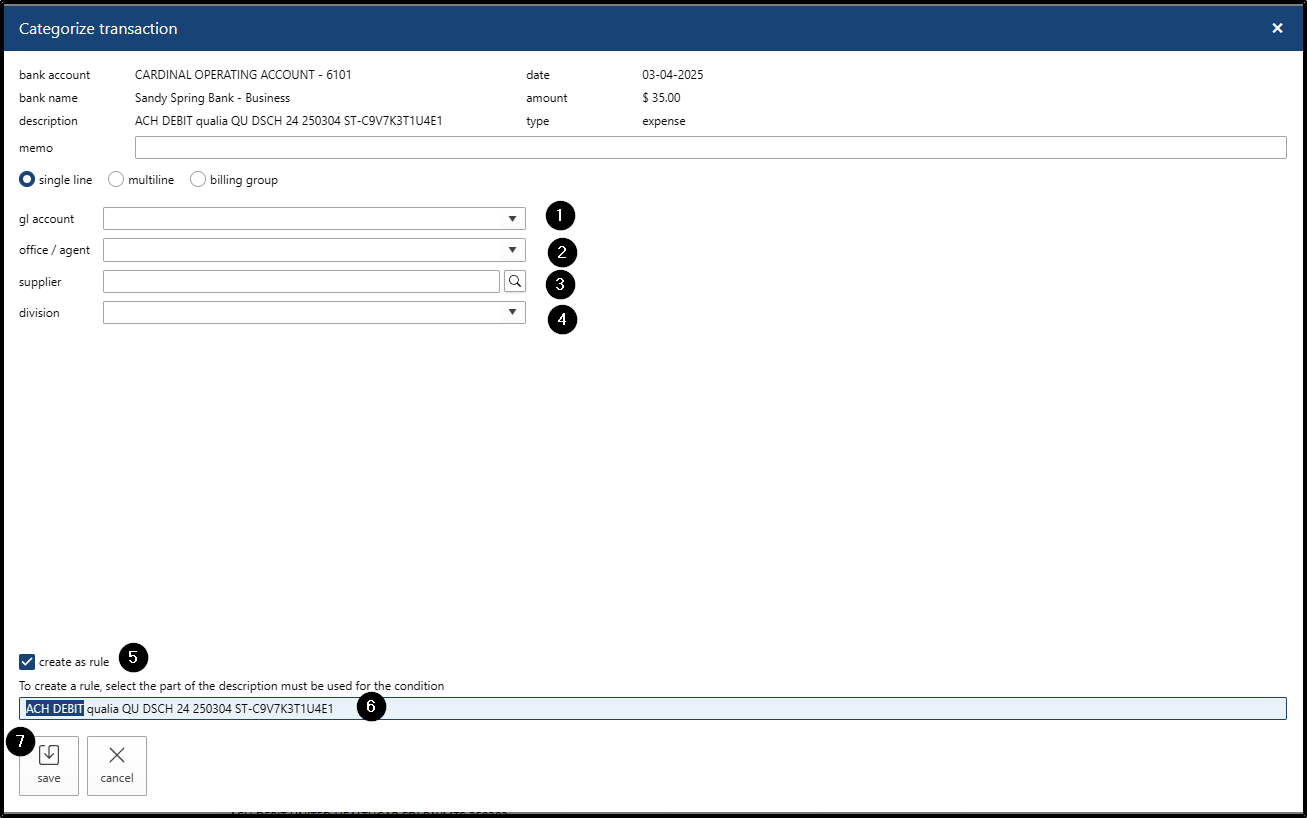
In the pop-up window, configure the following fields:
Let's try a single-line category.
- GL Account: Click the field to select from the list. This is a required field.
- Office: Click the field to select from the list. This is a required field.
- Supplier: Click the magnifying glass to search and add the person (supplier/vendor). This is a required field.
- Tying the expense to a person/supplier/vendor ensures accurate financial reporting and 1099 generation.
- Division: This is optional and only use if needed
- To automate future entries: Check the "create as rule" box
- Highlight the portion of the description you want the rule to follow
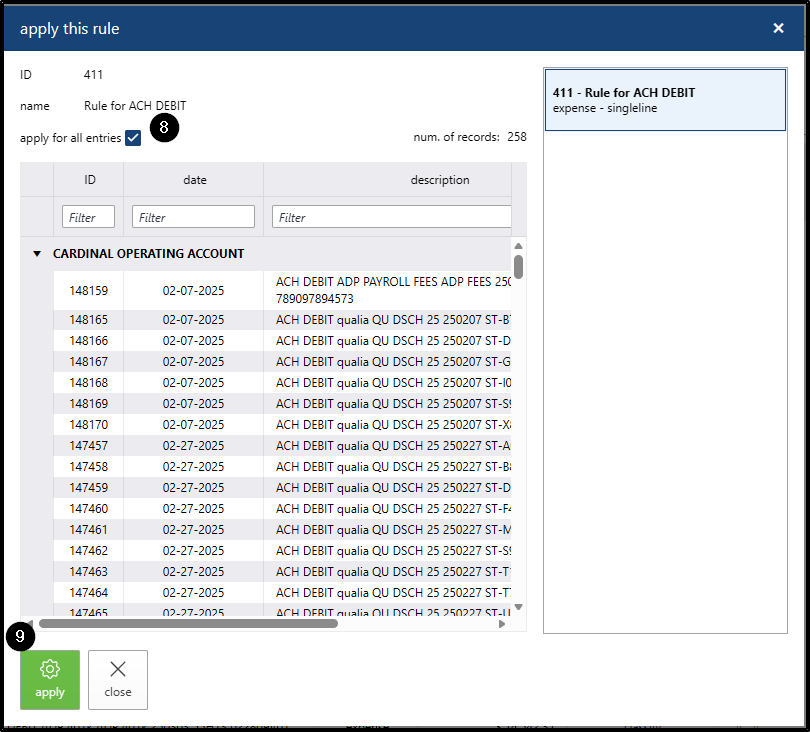
- Click the save button
- The Apply this rule window will open. Check Apply for all entries
- Click the Apply button, and close both the rule and classification windows.
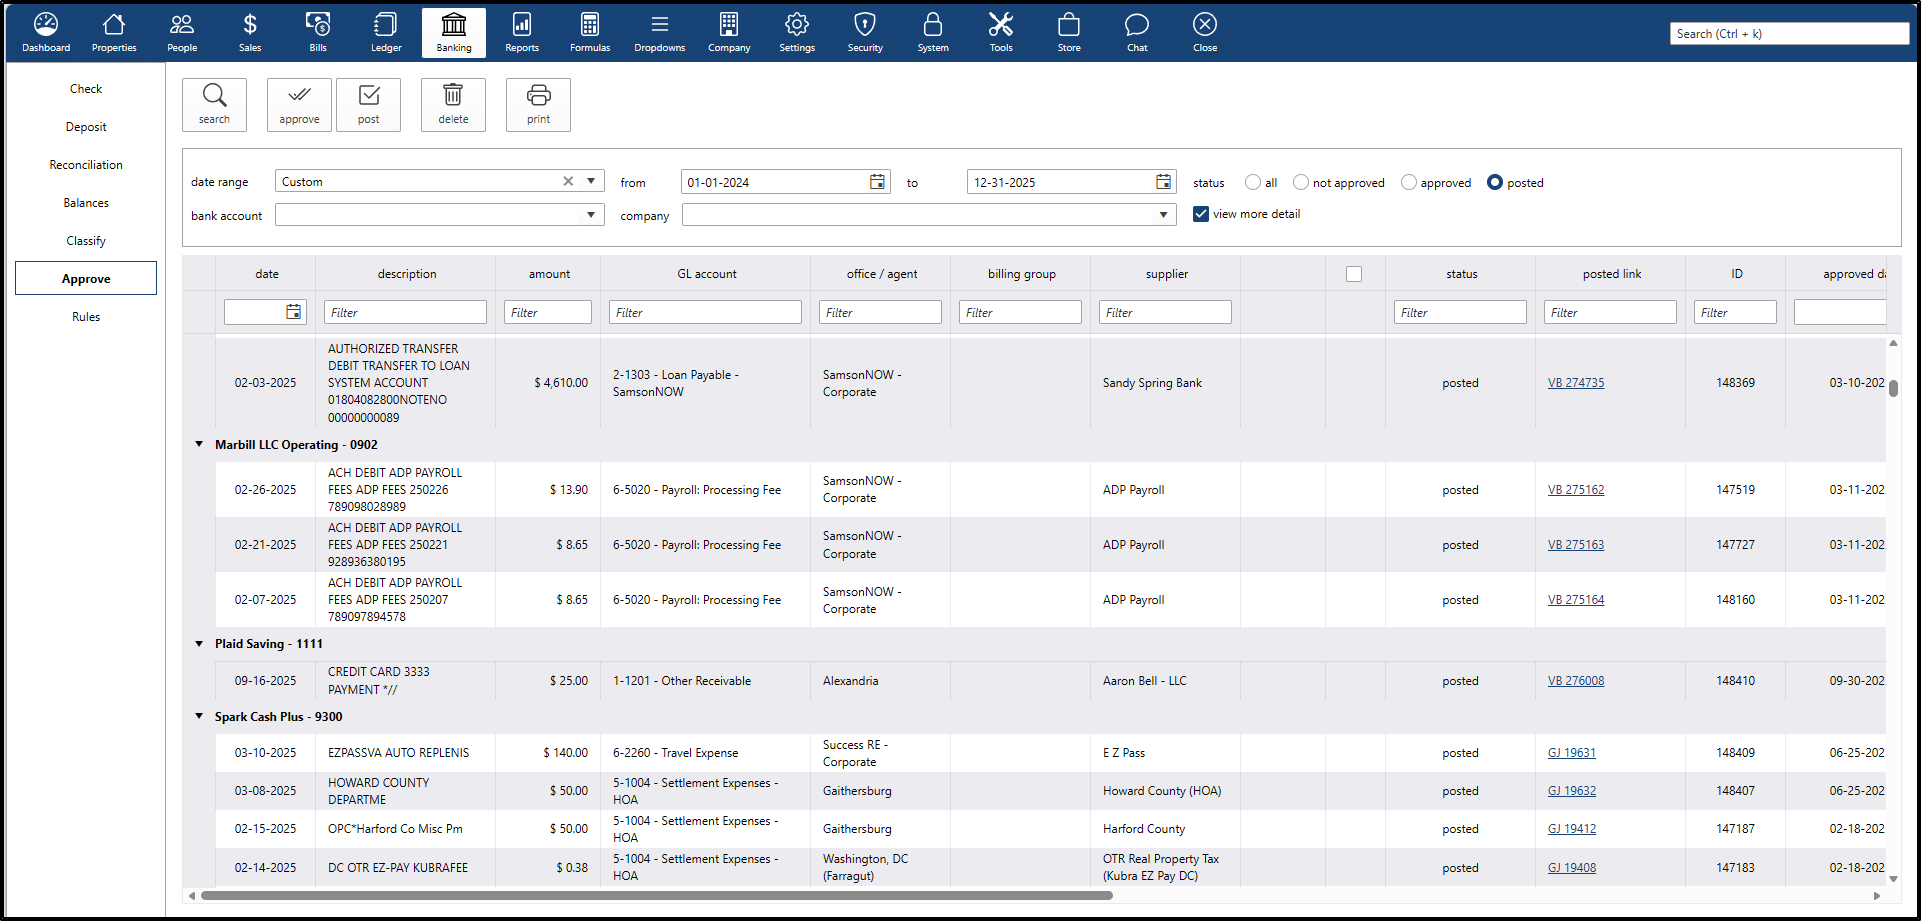
Approve and Post
After transactions are classified, they move to the Approve screen. This is where users review, approve, and post them so they appear in the accounting records (books).
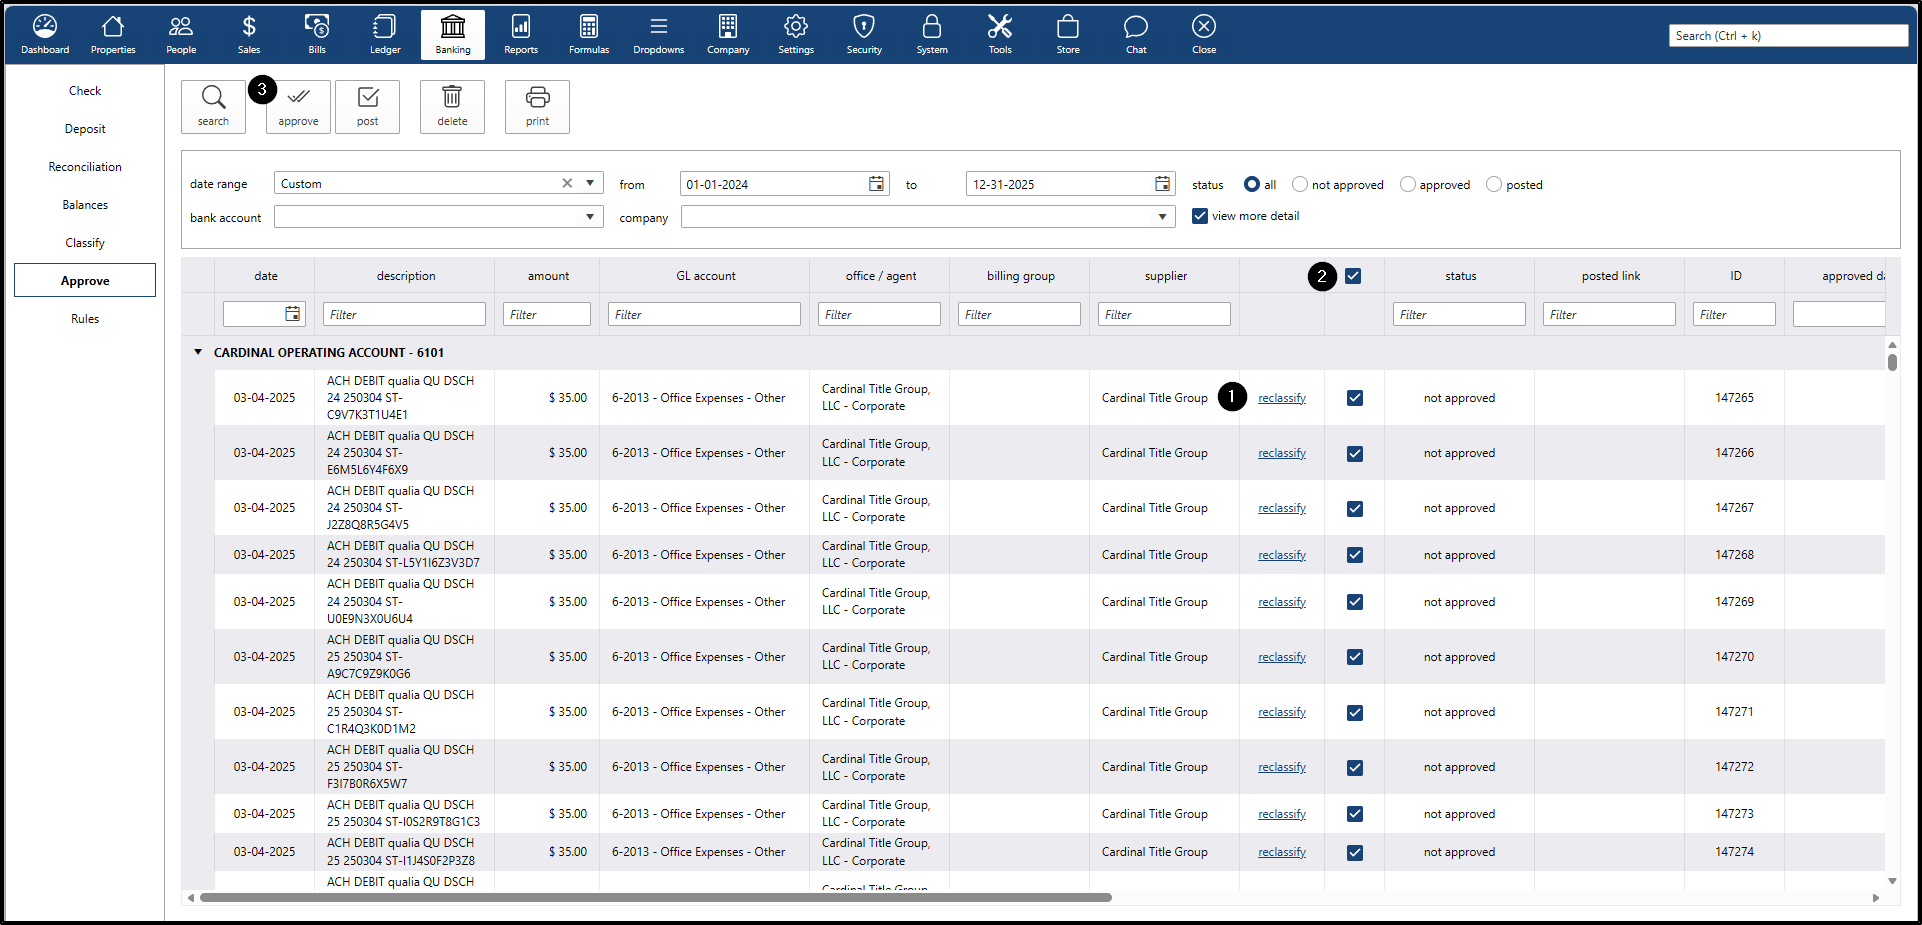
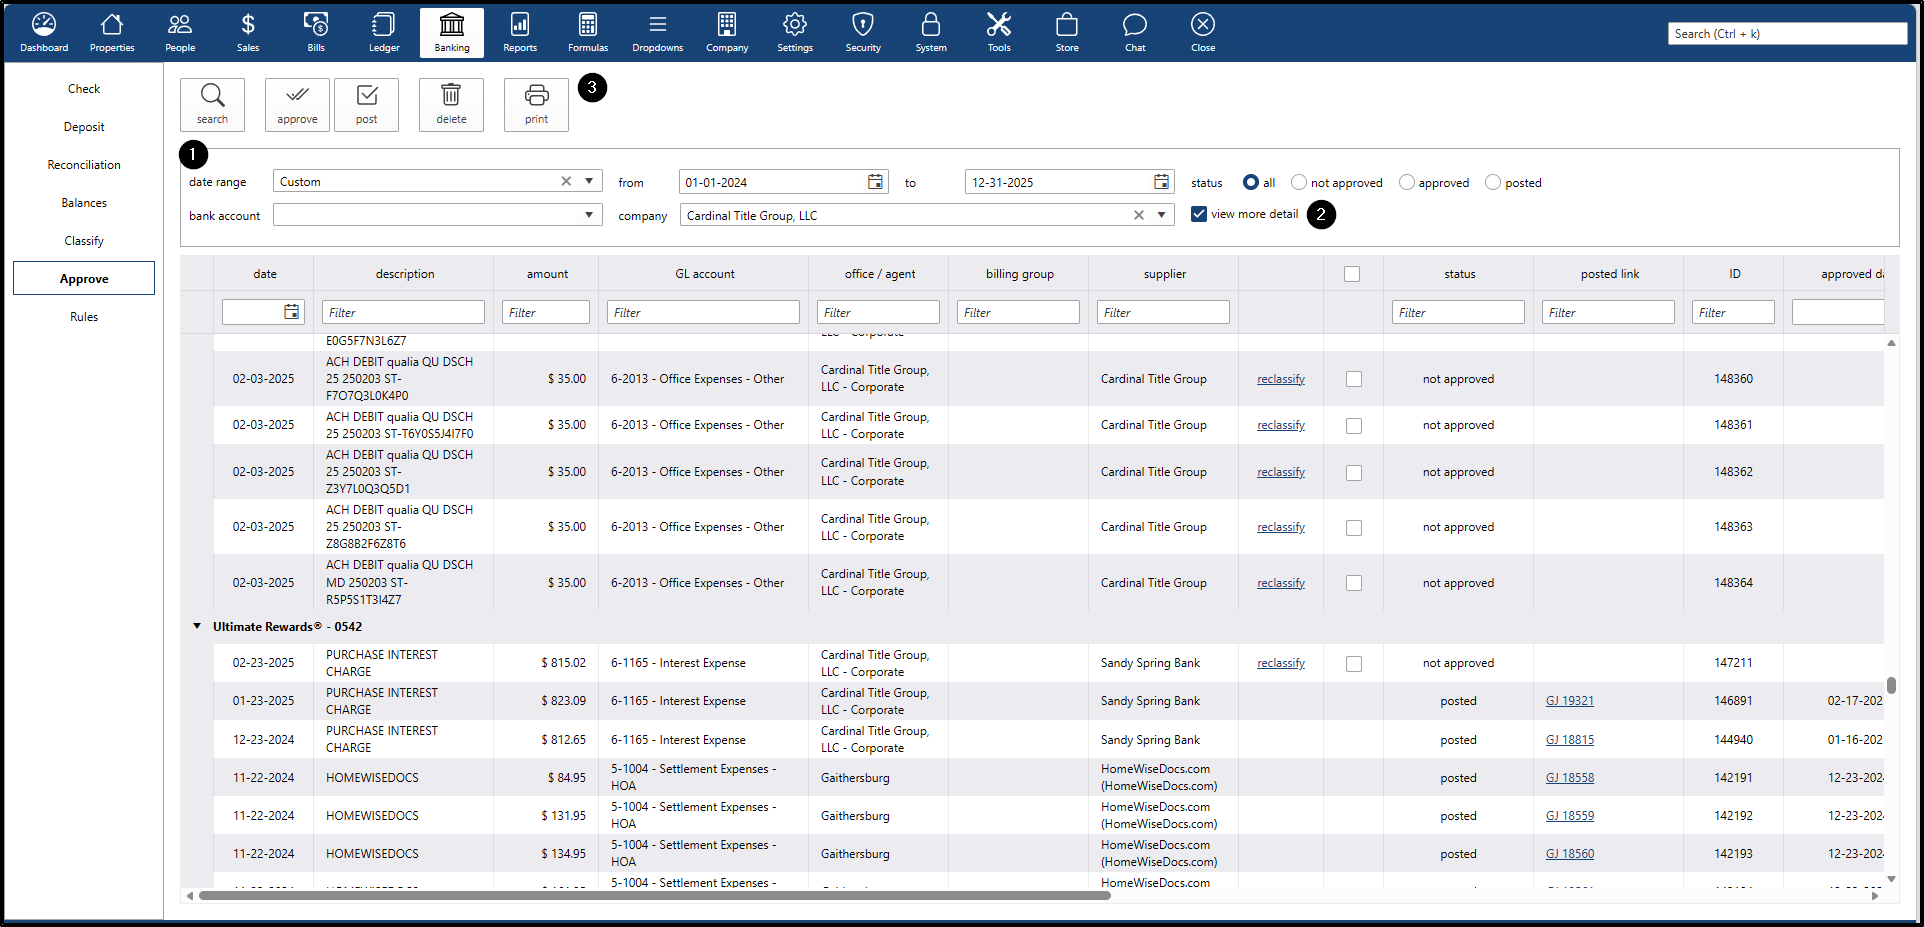
Approve
- Confirms that all classified transactions are accurate, legitimate, and free of duplicates before hitting the books.
- Reclassify - any not approved transaction can still be reclassified
- Select all or select some items
- Click the Approve button
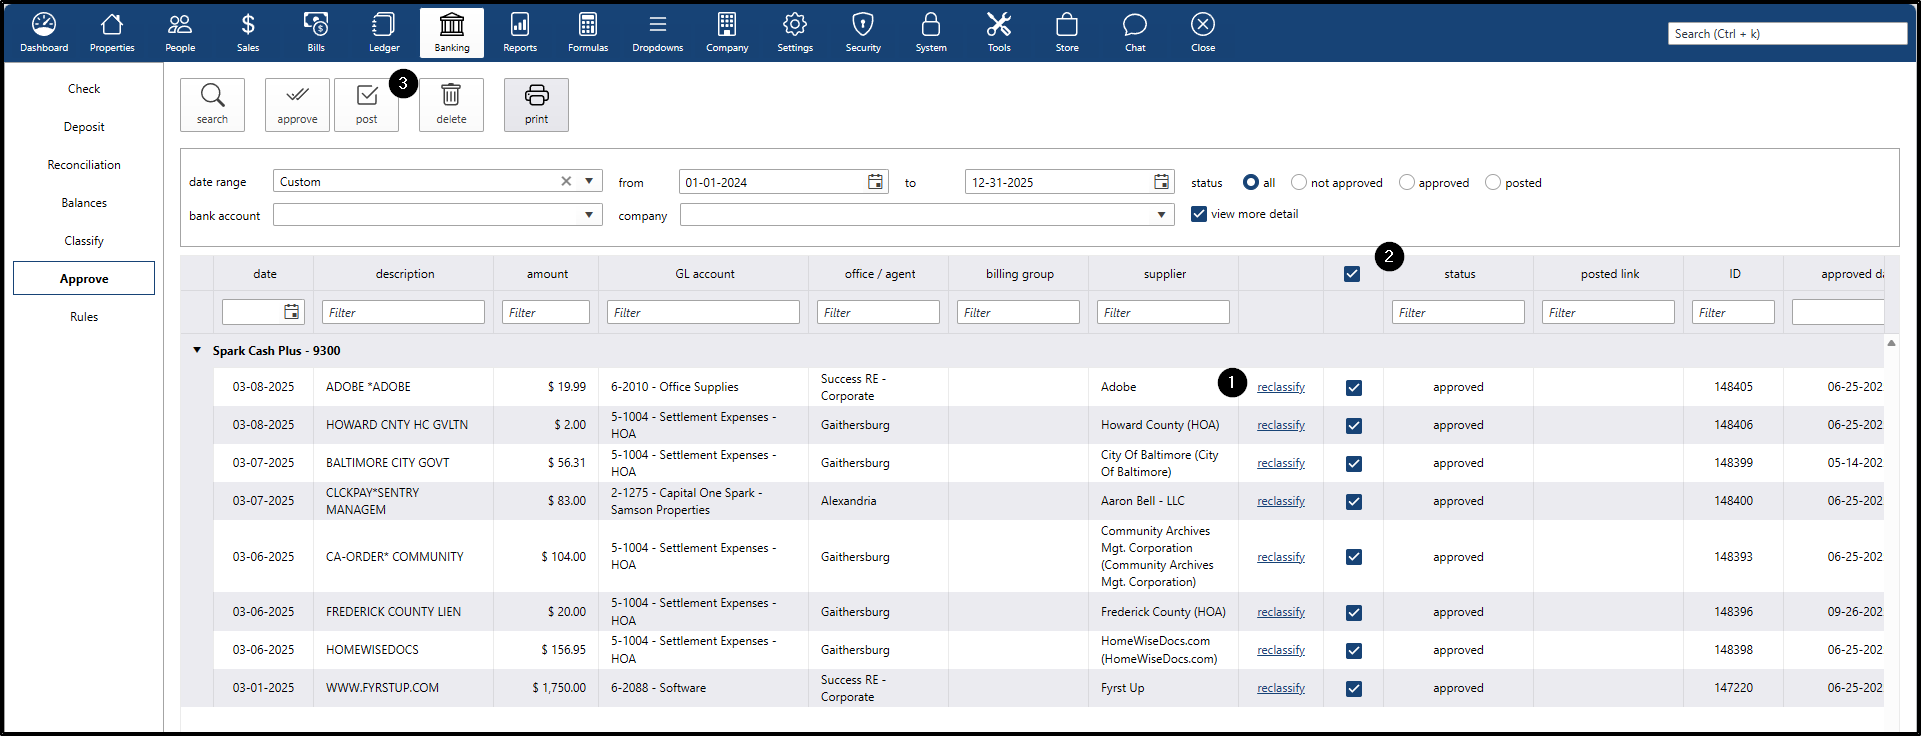
Post
- Finalizes the transactions and commits them to the ledger, making them available for reconciliation and reporting.
- Reclassify - any approved transaction can still be reclassified
- Select all or select some items
- Click the Post button
- Bank Transactions: Posted as Payables
- Credit Card Transactions: Posted as Journal Entries
👥 Workflow Flexibility: The two-step Approve ➔ Post process is designed for larger brokerages where separation of duties is required (two different people review and post). If a single user is responsible for the entire workflow, they can bypass the separate Approval step and Post directly.
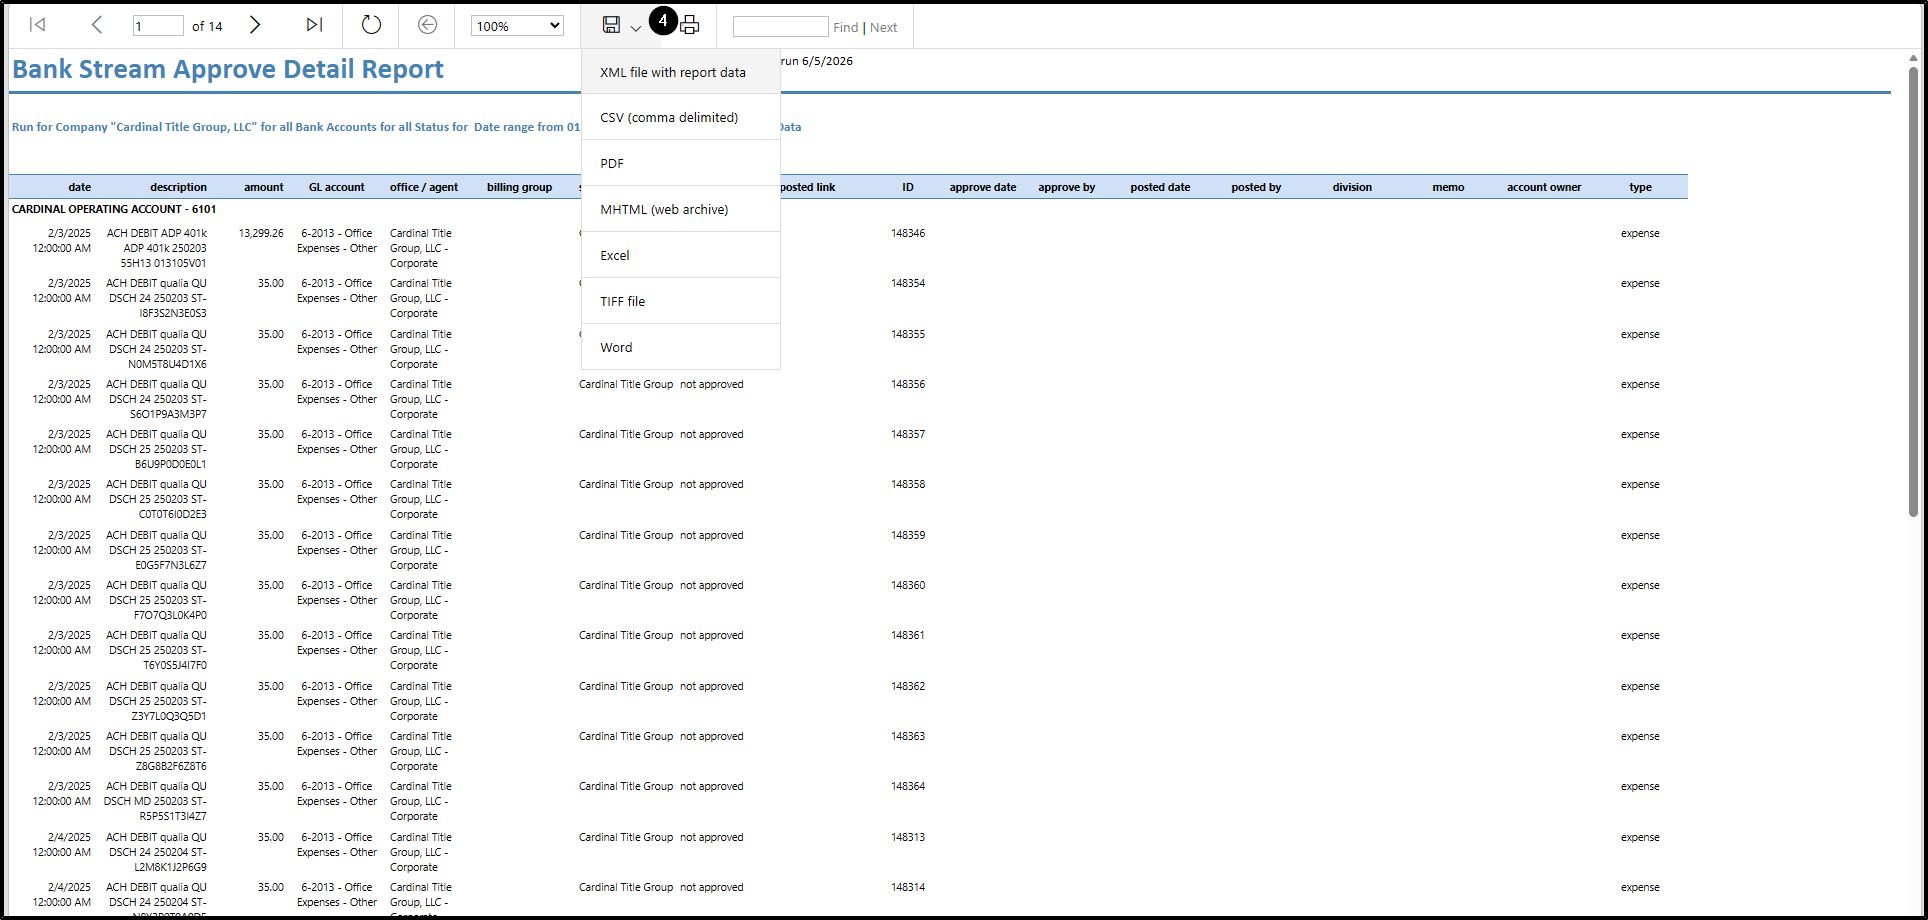
Generating the Bank Stream Approve Detail Report
To generate a comprehensive spreadsheet-style report of your approved and posted transactions.
From the Banking > Approve screen:
- Set Filters – User applies desired filters (date range, bank account, company, status) as they normally would.
- Click “View More Detail” (optional) – User can expand the transaction details if desired.
- Click “Print” Button – Located in the Banking > Approve screen.
- Report Generation – System compiles the Bank Stream Approve Detail Report based on the applied filters.
- New Tab Opens – The generated spreadsheet-style report opens in a new browser tab.
- User Saves/Prints – User can download or print the report for record-keeping.
Rules
Bank Stream allows users to create rules that automate the classification process. Rules can be created in two ways:
- While Classifying – Create a rule directly when classifying a transaction so similar future transactions are handled automatically.
- Manually – Set up a rule from scratch without having to classify a current transaction.
Once a rule is created, the system will automatically classify matching incoming transactions and move them directly to the Approve submenu, skipping manual classification.

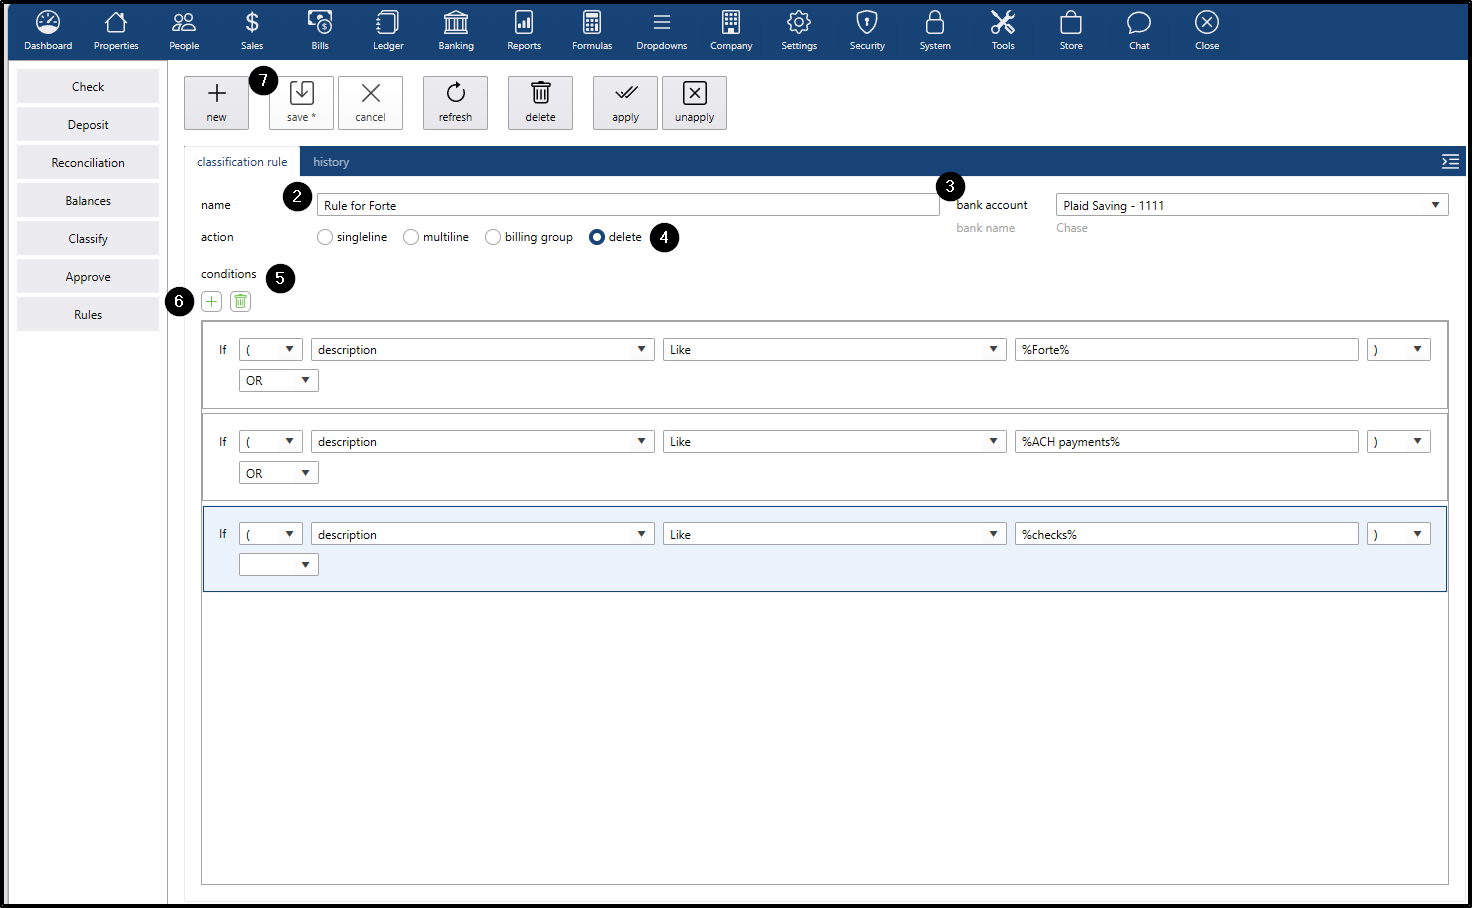
Creating a Delete Rule
A Delete Rule is crucial for filtering out transactions that have already been handled inside darwin.cloud (such as commission checks or Forte direct deposit payments), preventing duplicate records when they appear on the bank feed.
Steps to create a Delete Rule:
- Click the New button.
- In the Name field, enter a label for the rule.
- In the Bank Account field, select the bank account that the rule should be tied to.
- In Action Type, select Delete.
- In the Conditions field, click the + button.
- Enter one of the following conditions:
- description LIKE %Forte%
- description LIKE %ACH payments%
- description LIKE %checks%
- Click the Save button.
How to Delete an imported transaction from the Bank Stream
If an individual transaction needs to be manually removed from the feed without creating a permanent automation rule:
- Go to the Banking menu
- Go to the Classify submenu
- Date range: filter the dates
- Checkbox: select the transaction by checking the checkbox of that row
- Click the delete button