Feature Overview
Process to apply a fix to a property
The logged-in user must have the Modify Closings role.
If the user does not have it, follow these steps:
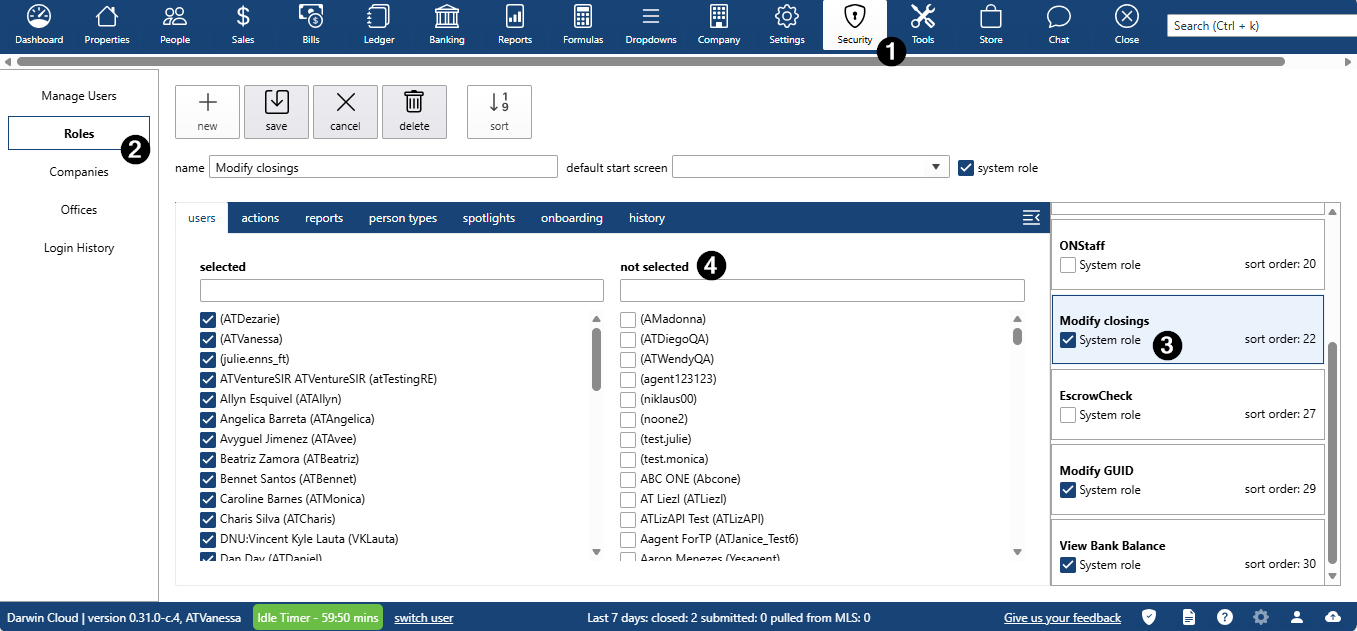
- Go to Security and open the Roles tab.
- On the right side, all roles will be listed. Find the “Modify closings” role.
In the Users tab, under “Not selected”, find the user’s name and assign the role.
- Go to Property.
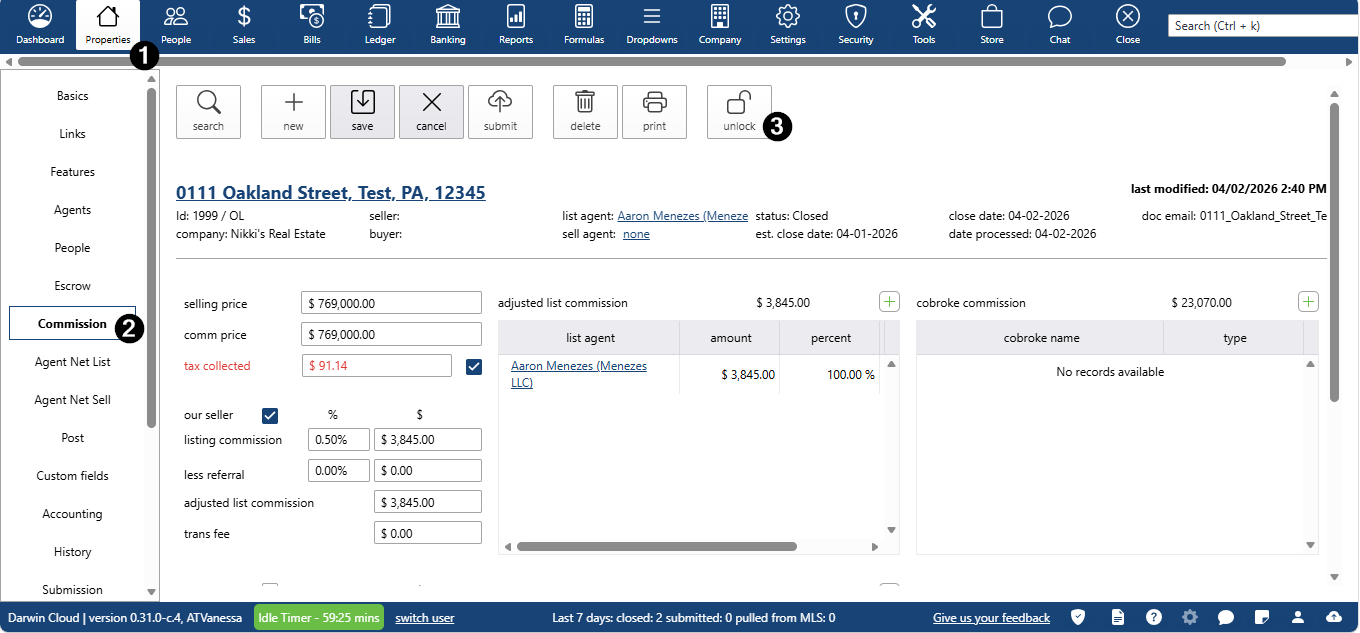
- Search for a closed property with commission, where vouchers and invoices have not been paid yet.
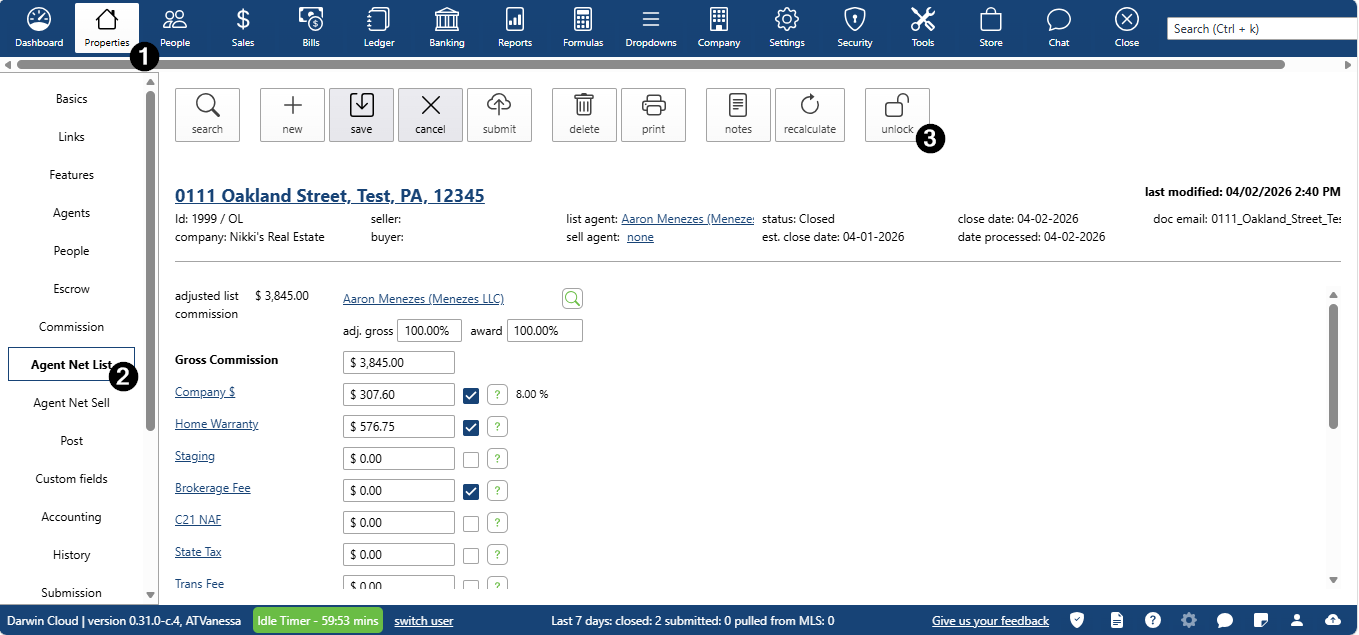
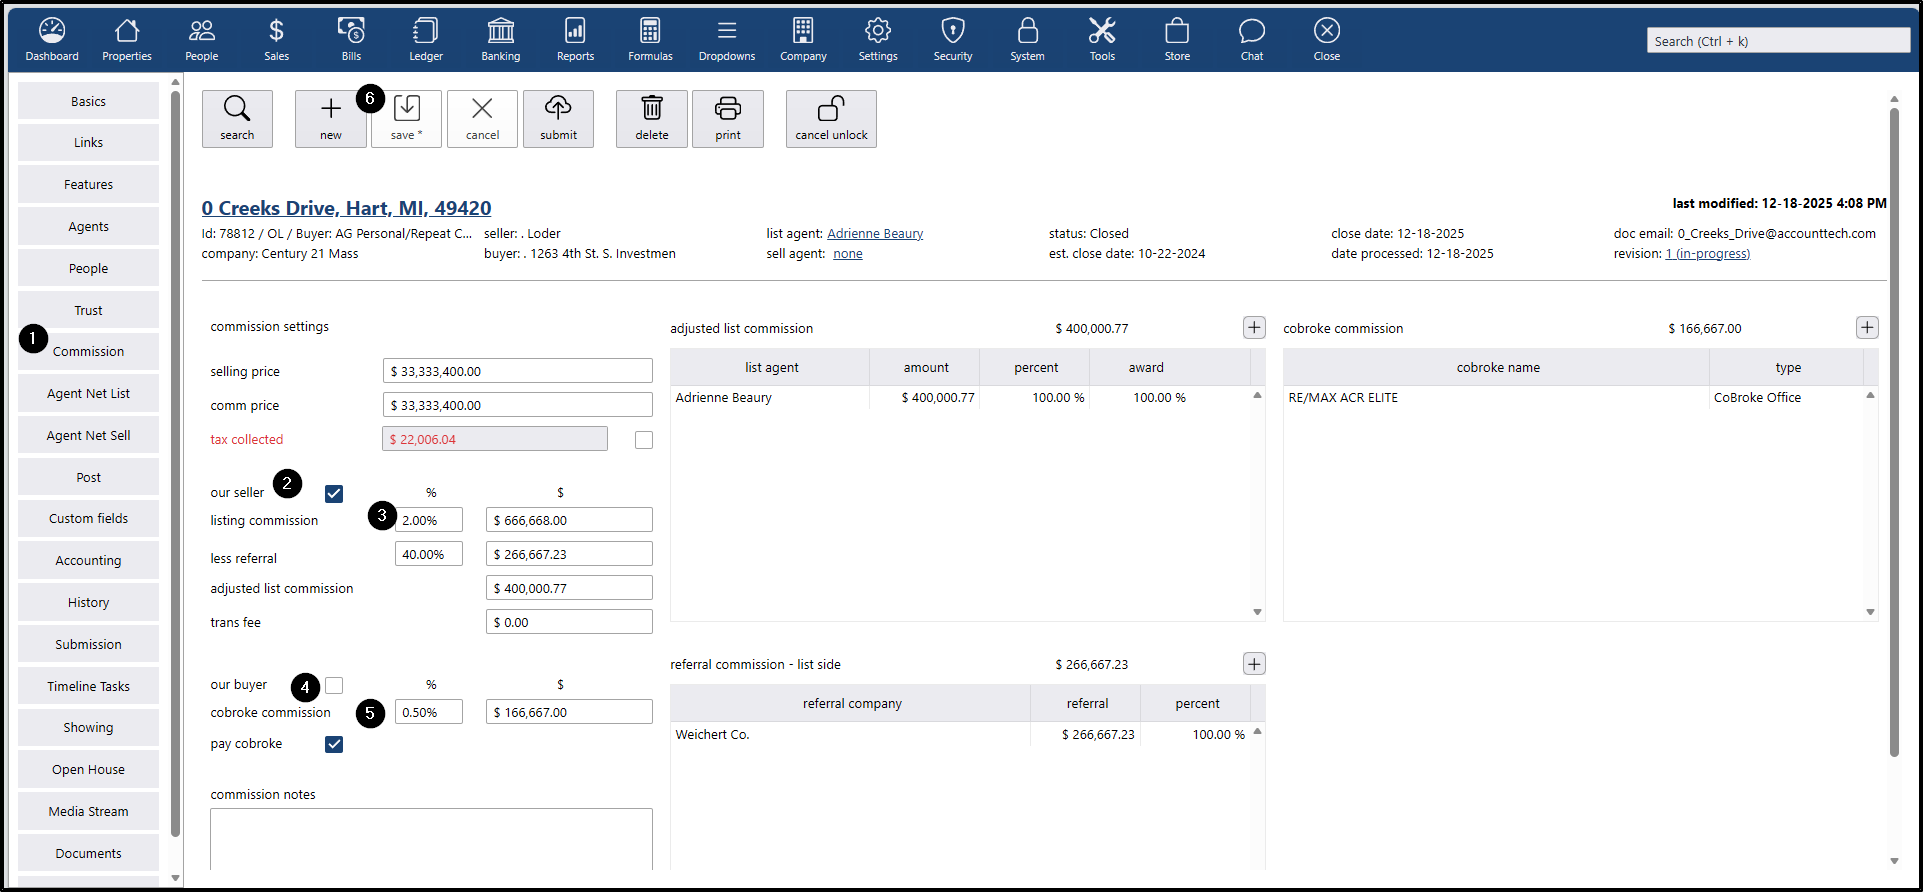
- Go to the Commission tab or Agent net list/sell tab, In one of these three tabs, you will be able to access the Unlock button
Commission tab
Agent net list/sell tab
A confirmation message will appear; click Yes to proceed.
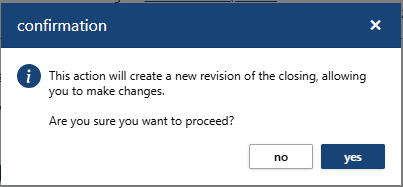
- All locked fields will be unlocked once the Unlock action has been confirmed.

- To edit commission amounts:
- Go to the Commission tab.
- If you want to change the commission percentage for the listing agent
- In the OUR SELLER section, enter a new percentage in the Listing Commission field.
- If you want to change the commission percentage for the selling agent:
- In the OUR BUYER section, enter a new percentage in the Selling Commission field.
- To save your changes, click the Save button.
The following steps are the same for both the listing agent and the selling agent.
- To edit an agent on the list or sell side
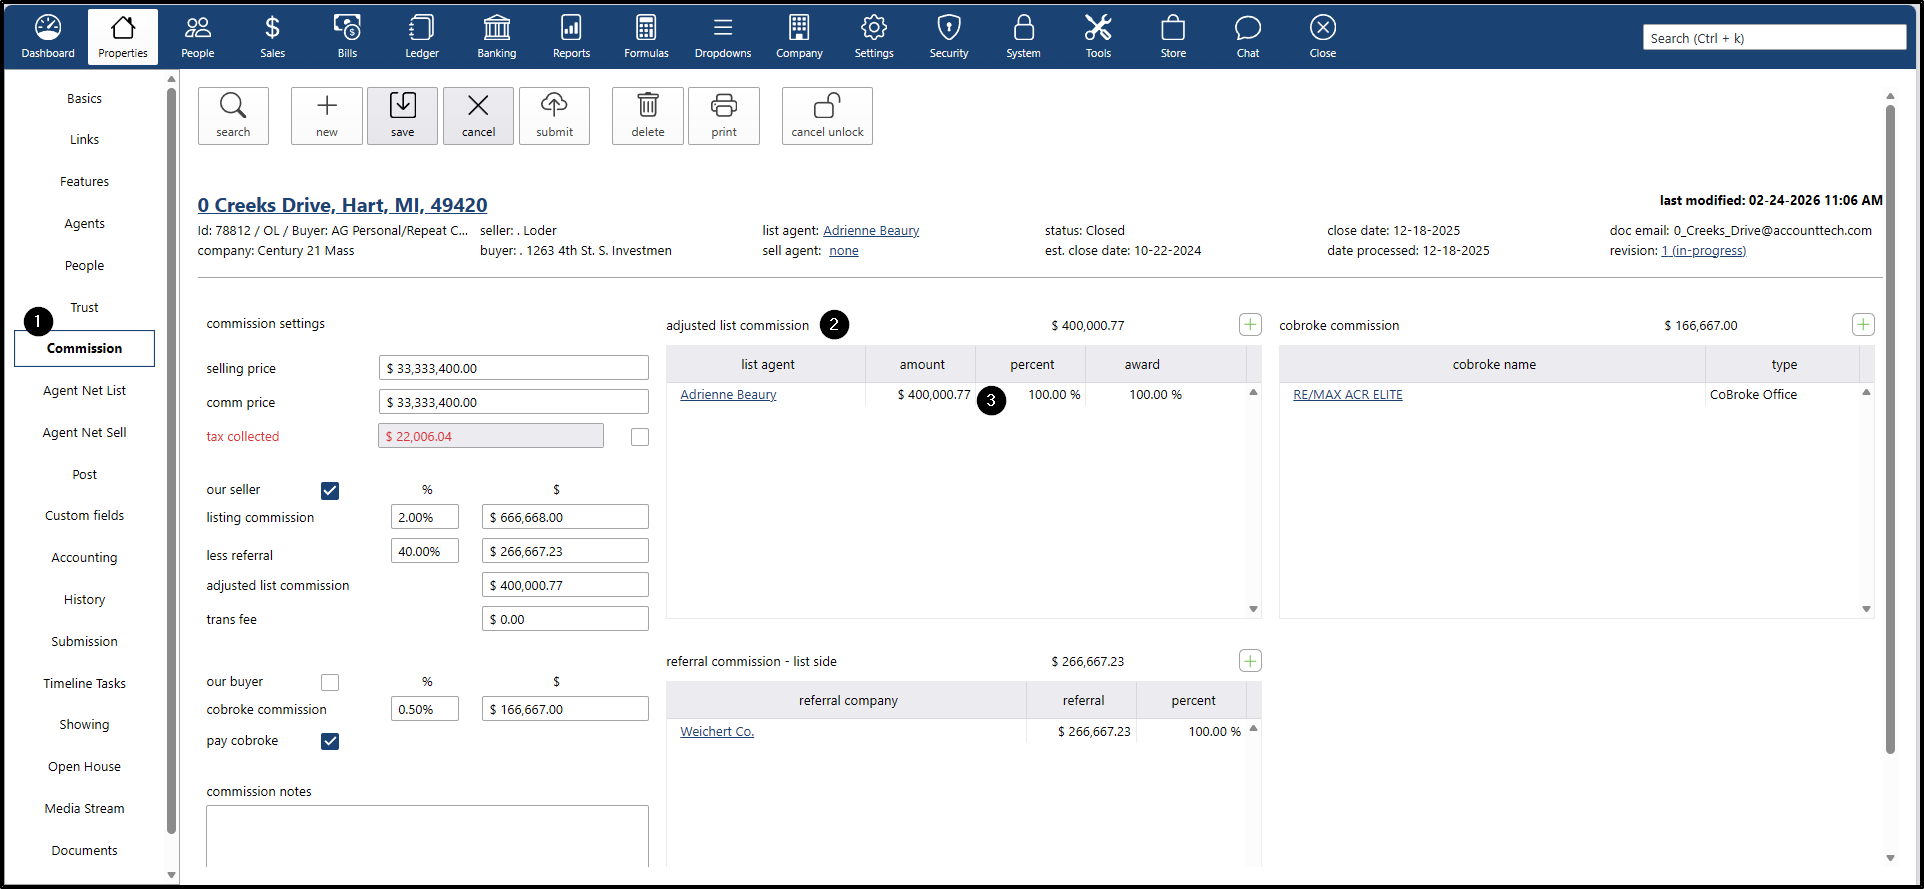
- Go to the Commission tab.
- If you want to change the agent on the listing commission side or sell commission.
Click on the agent’s record.
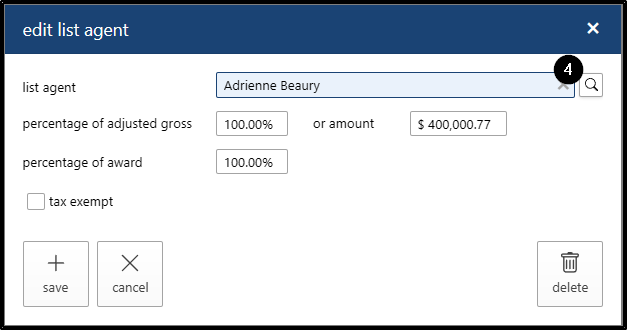
The system will open a pop-up window to search for another agent and replace the current one. Click on the search icon.
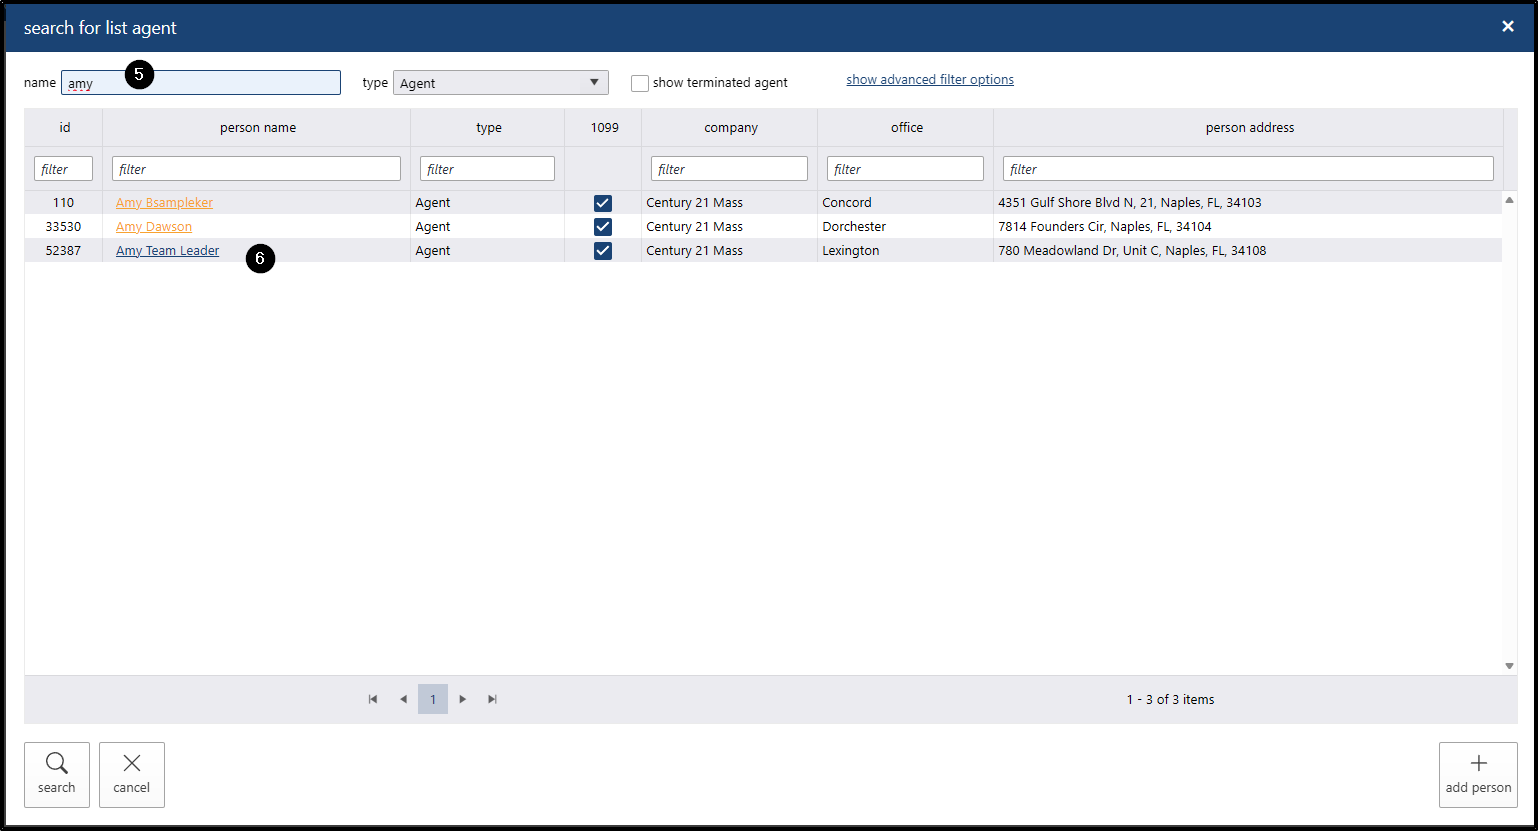
- A modal window will open to search for the new agent.
Search and select the agent
- You will return to the “Edit List Agent” window.
Click Save to save the new agent.

- To add a referral on either the listing or selling side:
- Go to the Commission tab.
- Navigate to the listing or selling side, depending on where you want to add the referral.
- Click the “+” button to add.
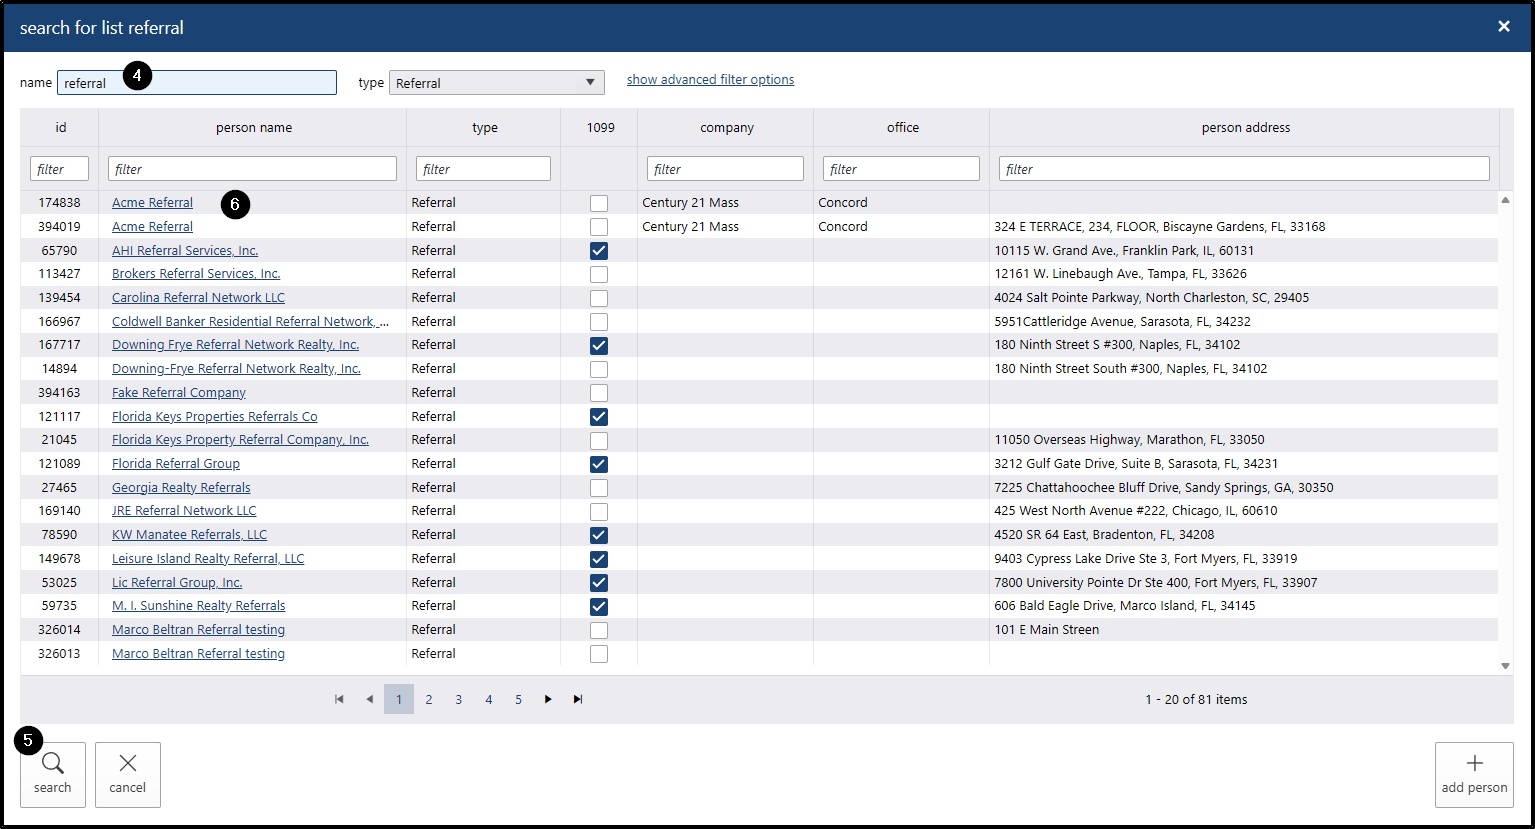
A window will appear to search for a referral; click the search icon.
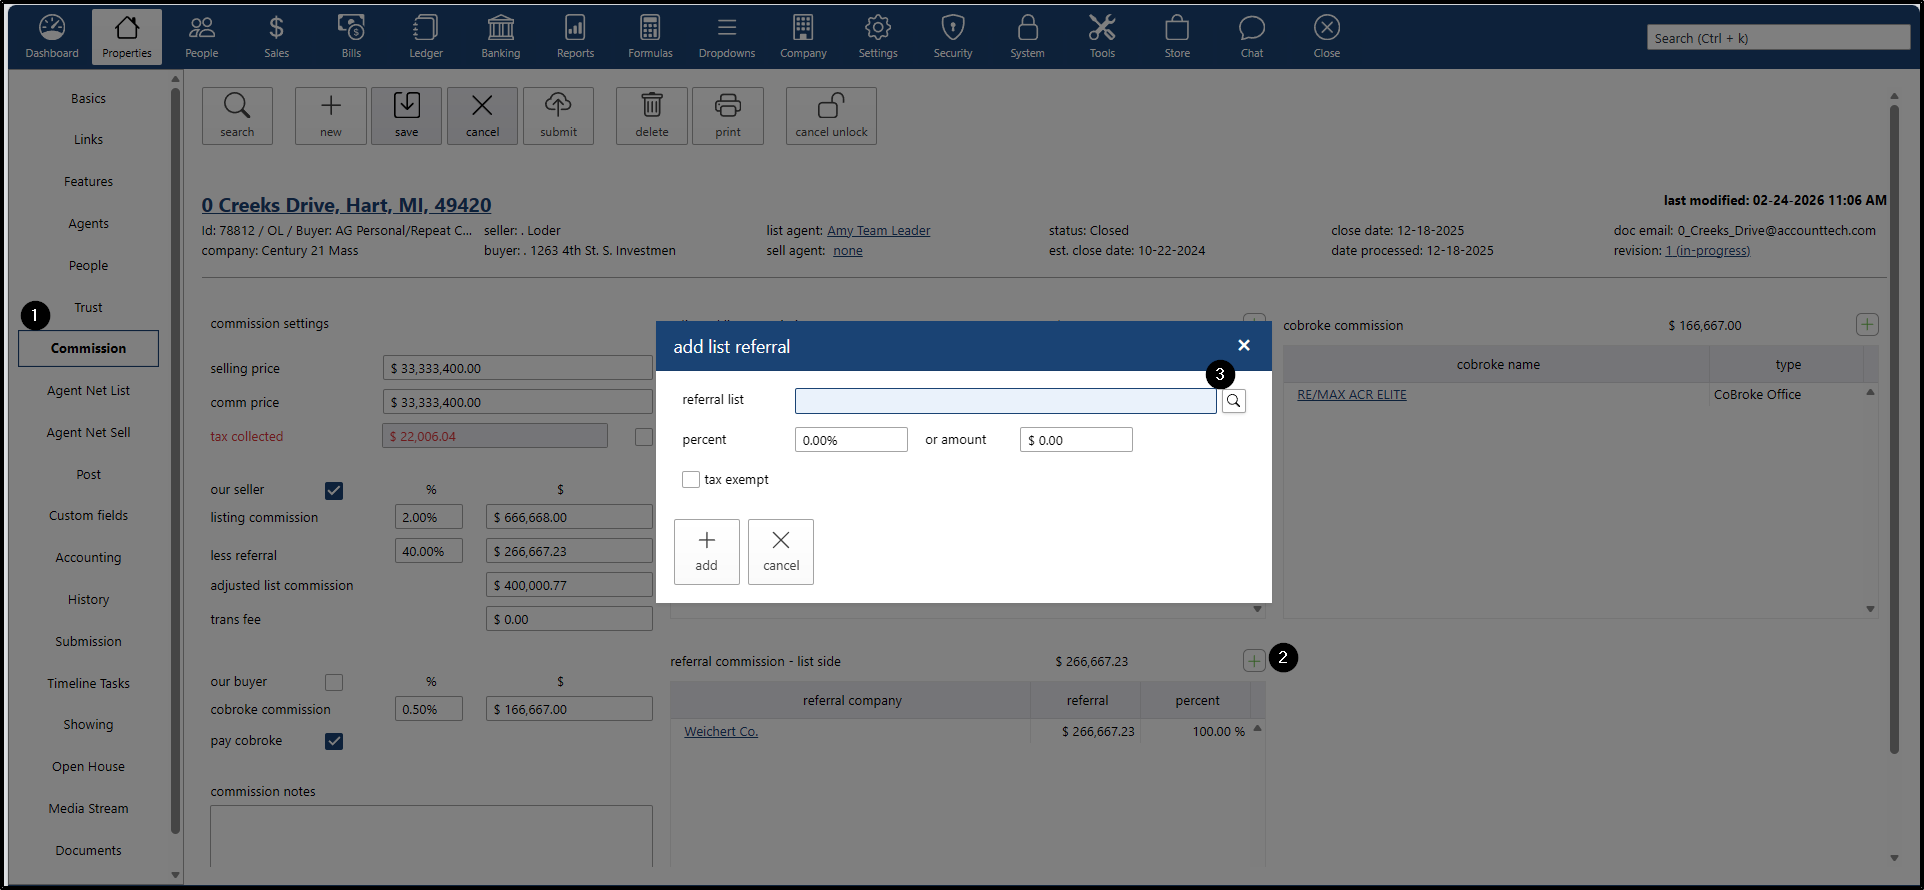
- A search window will appear; click the search icon.
Select the name of a referral.
- The referral will be added in the “Add List Referral” window.
Click Save to save and add the referral.

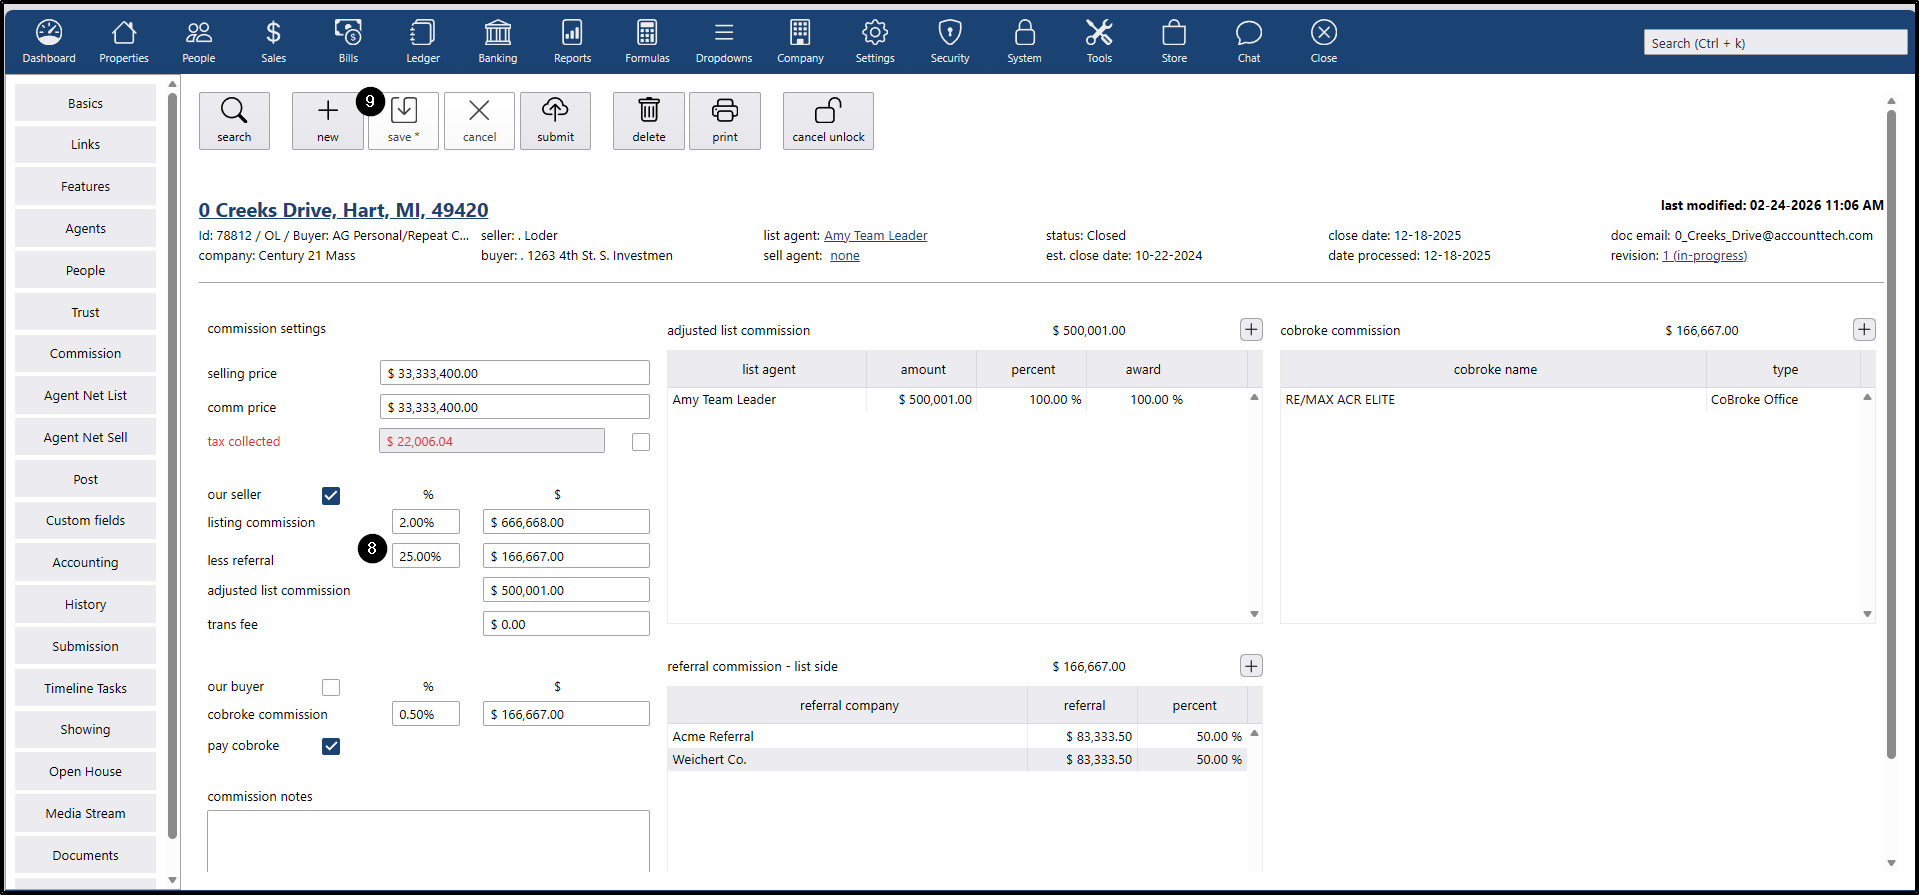
- After adding a referral:
- Go to the “Less Referral” field on either the Our Seller or Our Buyer side (depending on which side the referral was added).
- If you enter a percentage in the Less Referral field, the system will not allow you to add another referral until you save.
- Click the Save button, and the amount that the referral will receive will be displayed.
When the corrections are ready to proceed with the fix, go to:
- Click Post on the property.
Click Apply Fix.
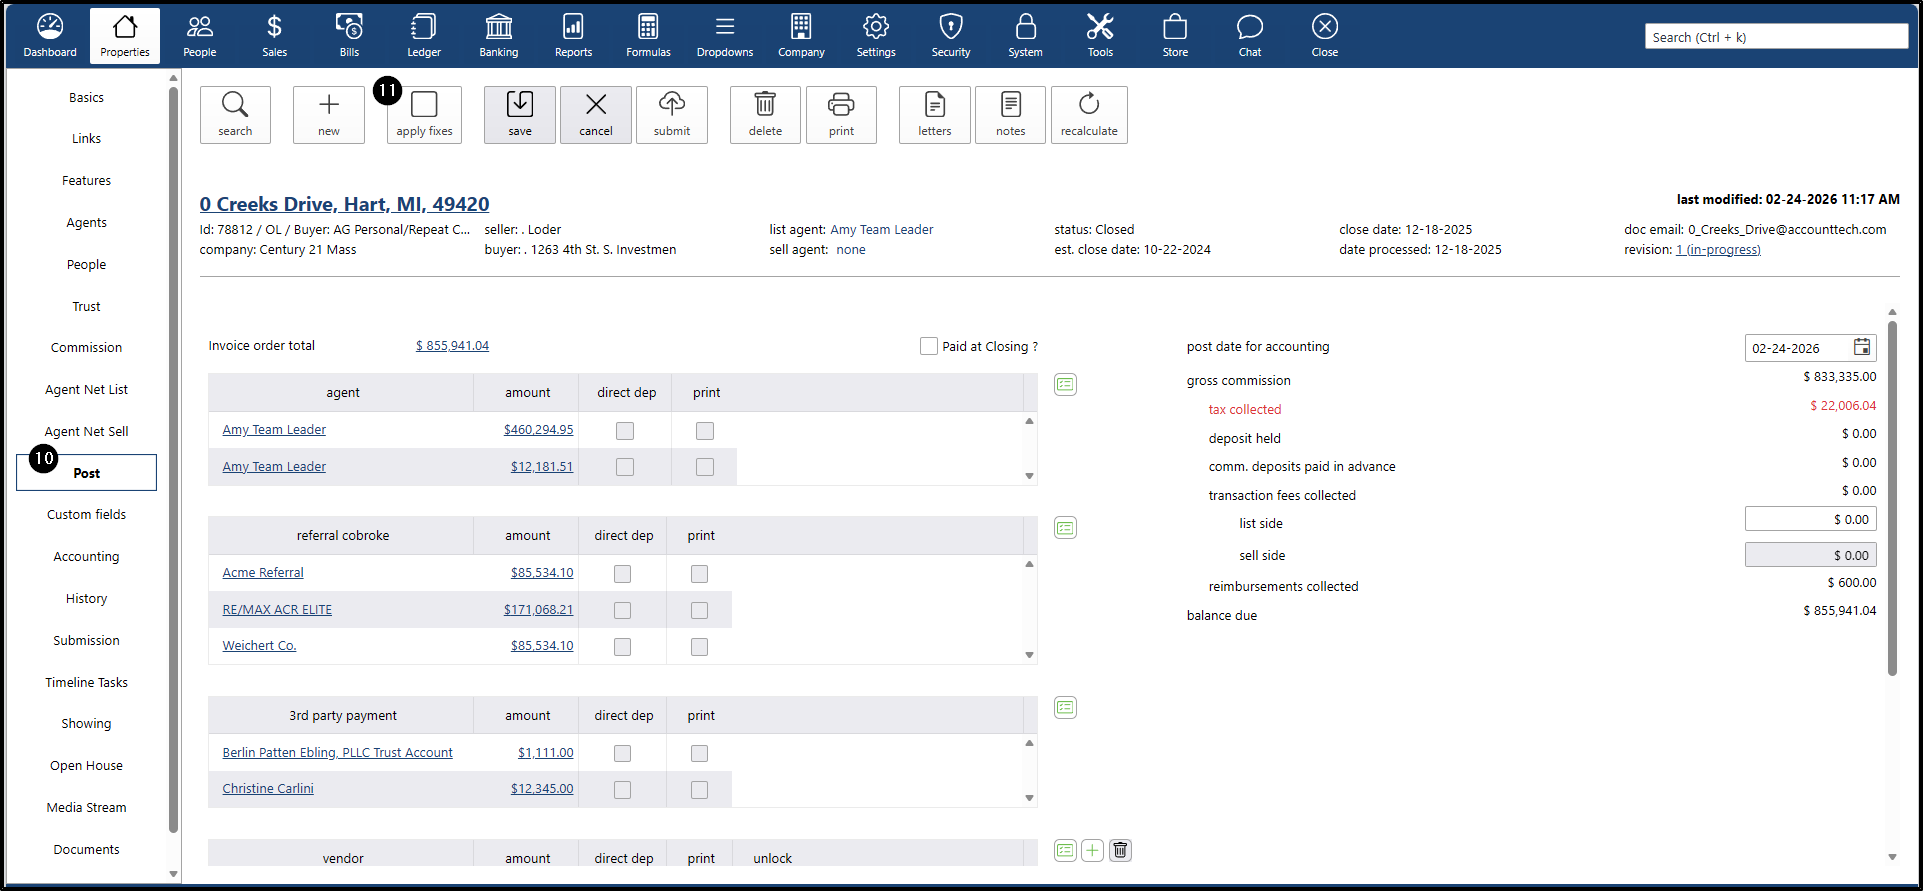
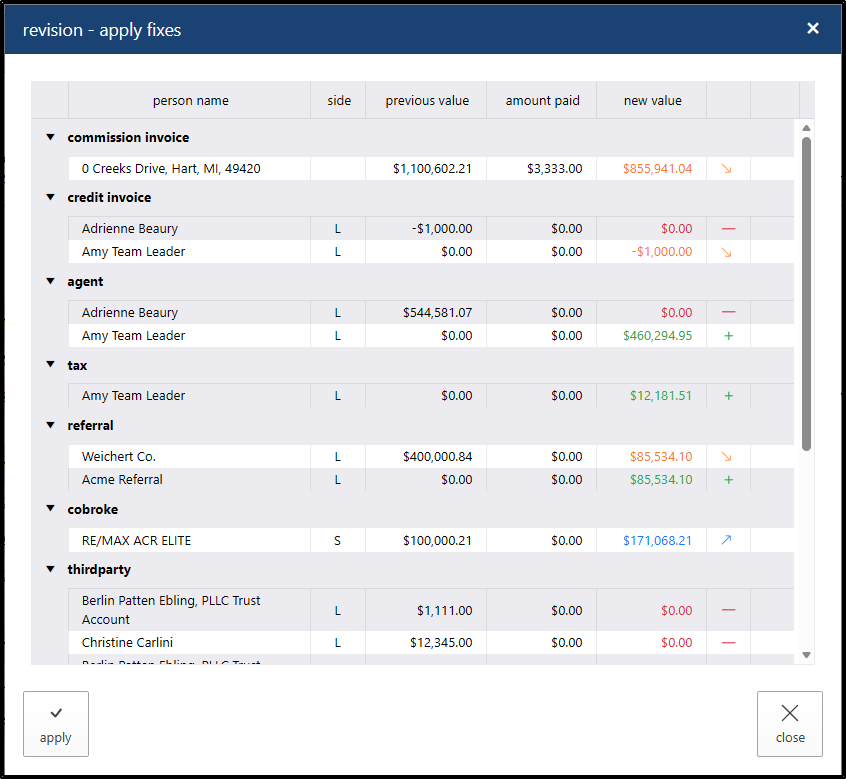
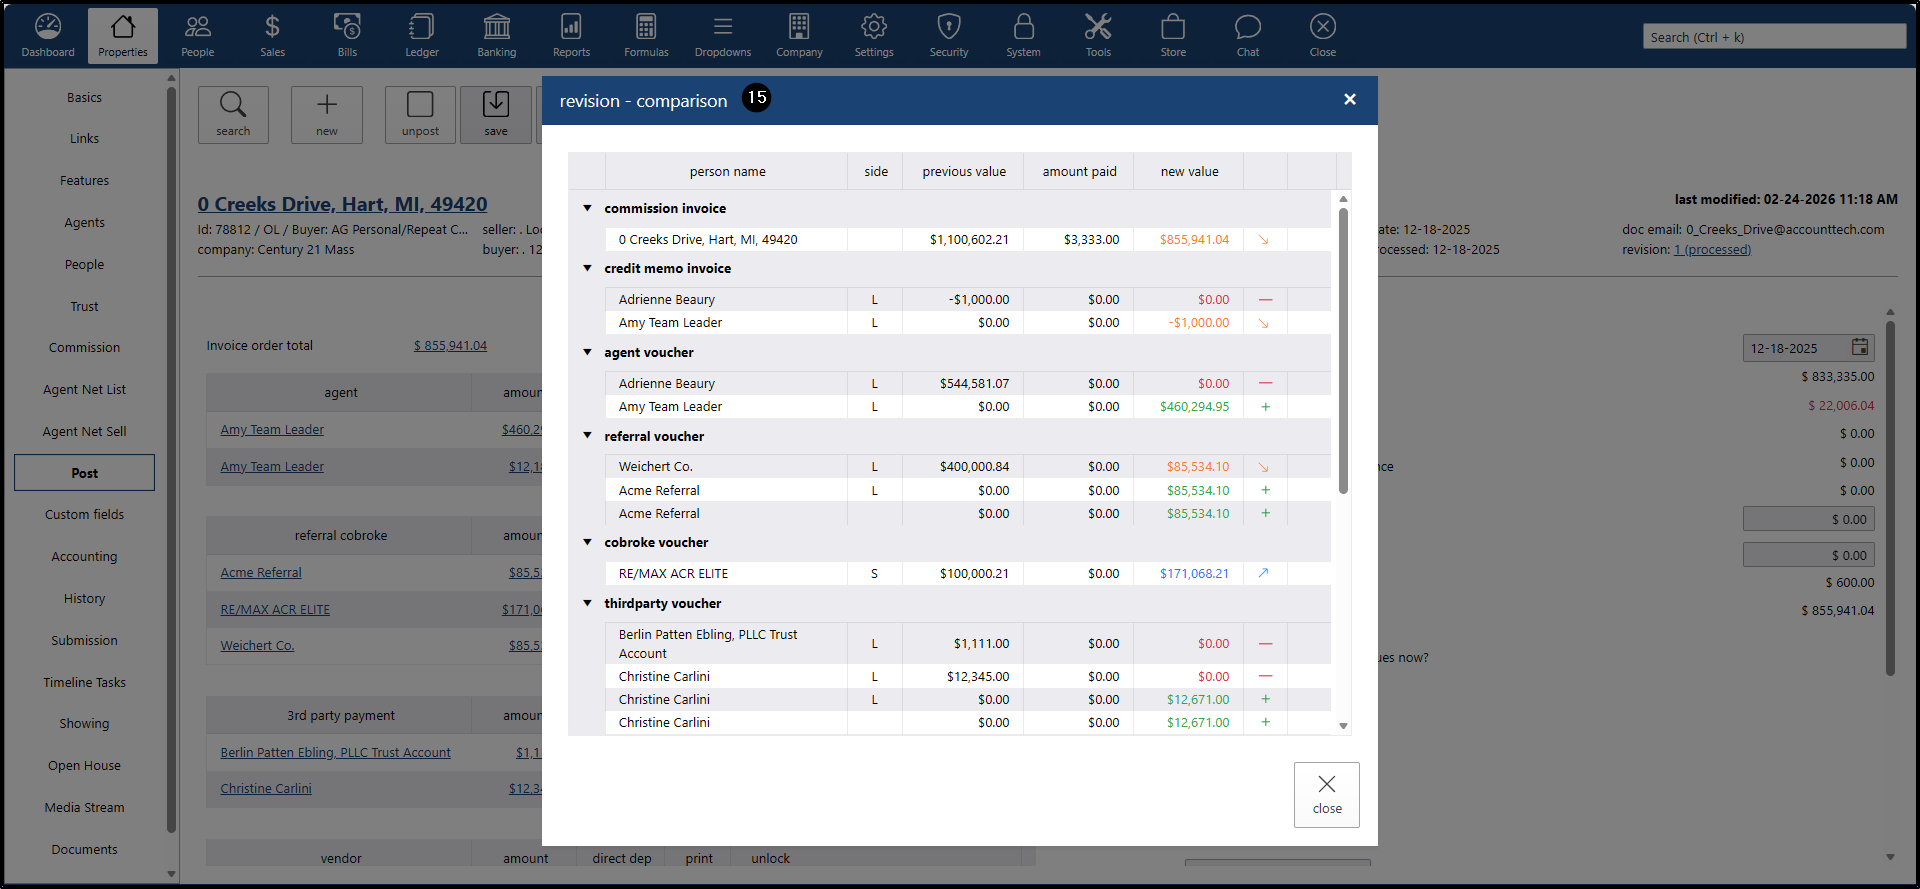
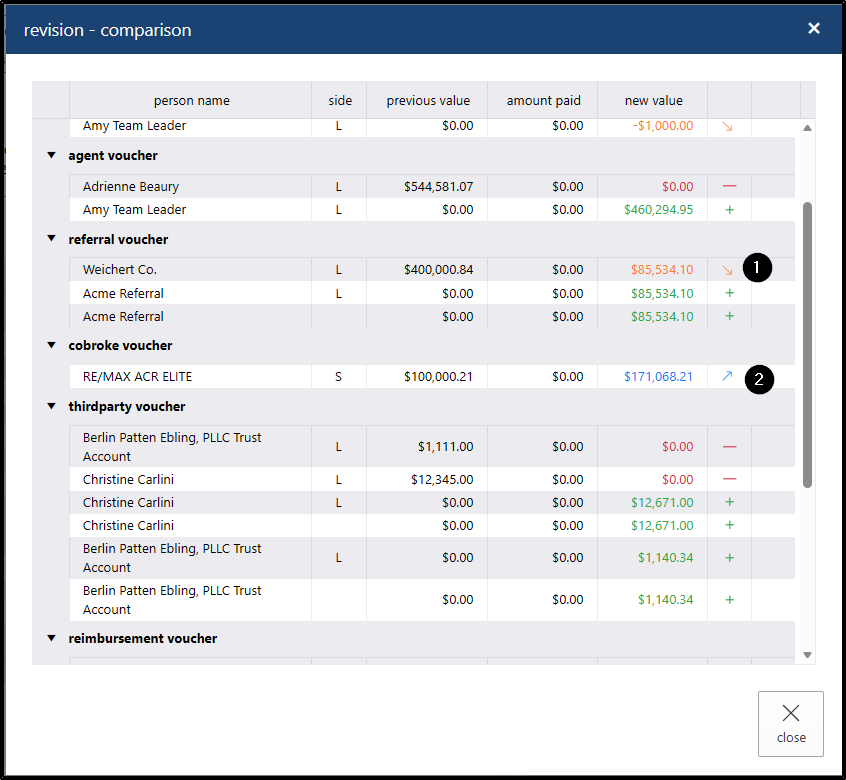
- The system will display a pop-up window showing all the vouchers for the people involved in the property, displaying the new values:
- The blue upward arrow indicates that the previous voucher amount was increased.
- The gray value means that the voucher or credit memo was not modified during the fix process and the amount remains the same.
- The red “–” sign means that the person was removed from the property and a voucher will no longer be generated for them in the new process.
- The green “+” sign indicates that a new person was added during the property fix process.
- The yellow/orange arrow indicates that the original voucher amount decreased.
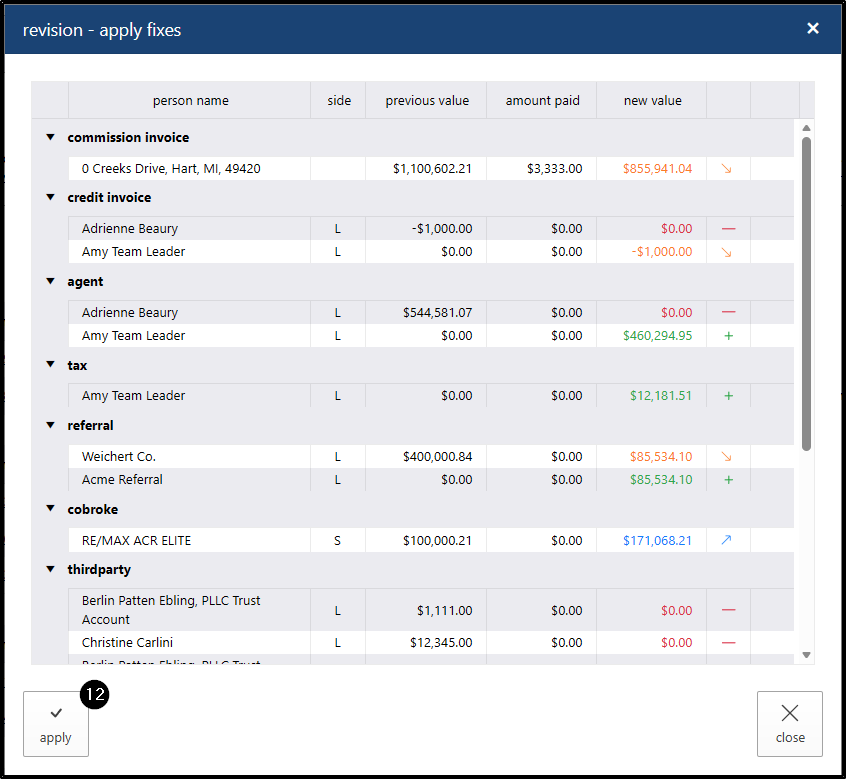
We click the “Apply” button to continue.
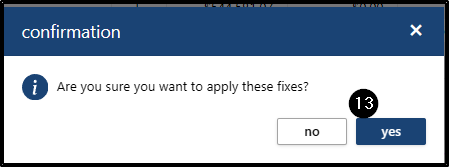
A confirmation message will appear; click Yes to apply the fix. The system will process the fix.
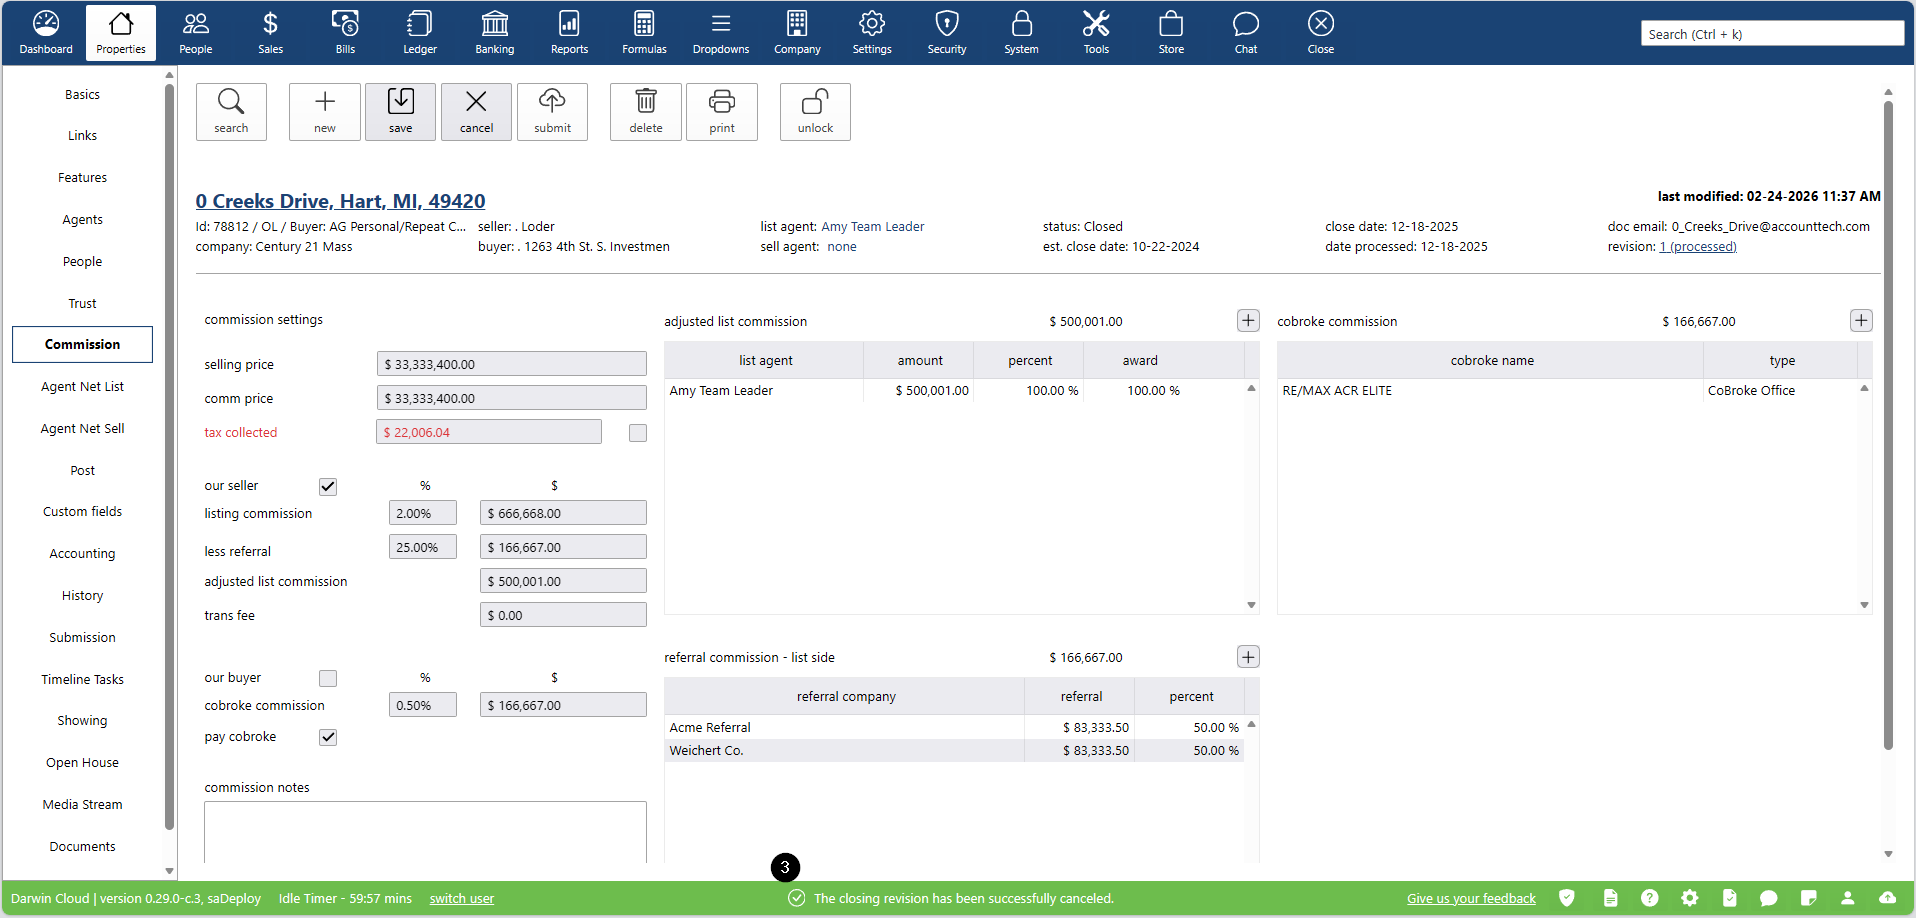
- Once it has been processed, a link will be displayed at the top indicating “1 processed.” This field shows how many times a property has had a fix applied. If the property had three approved fixes, it would display “3 processed.”
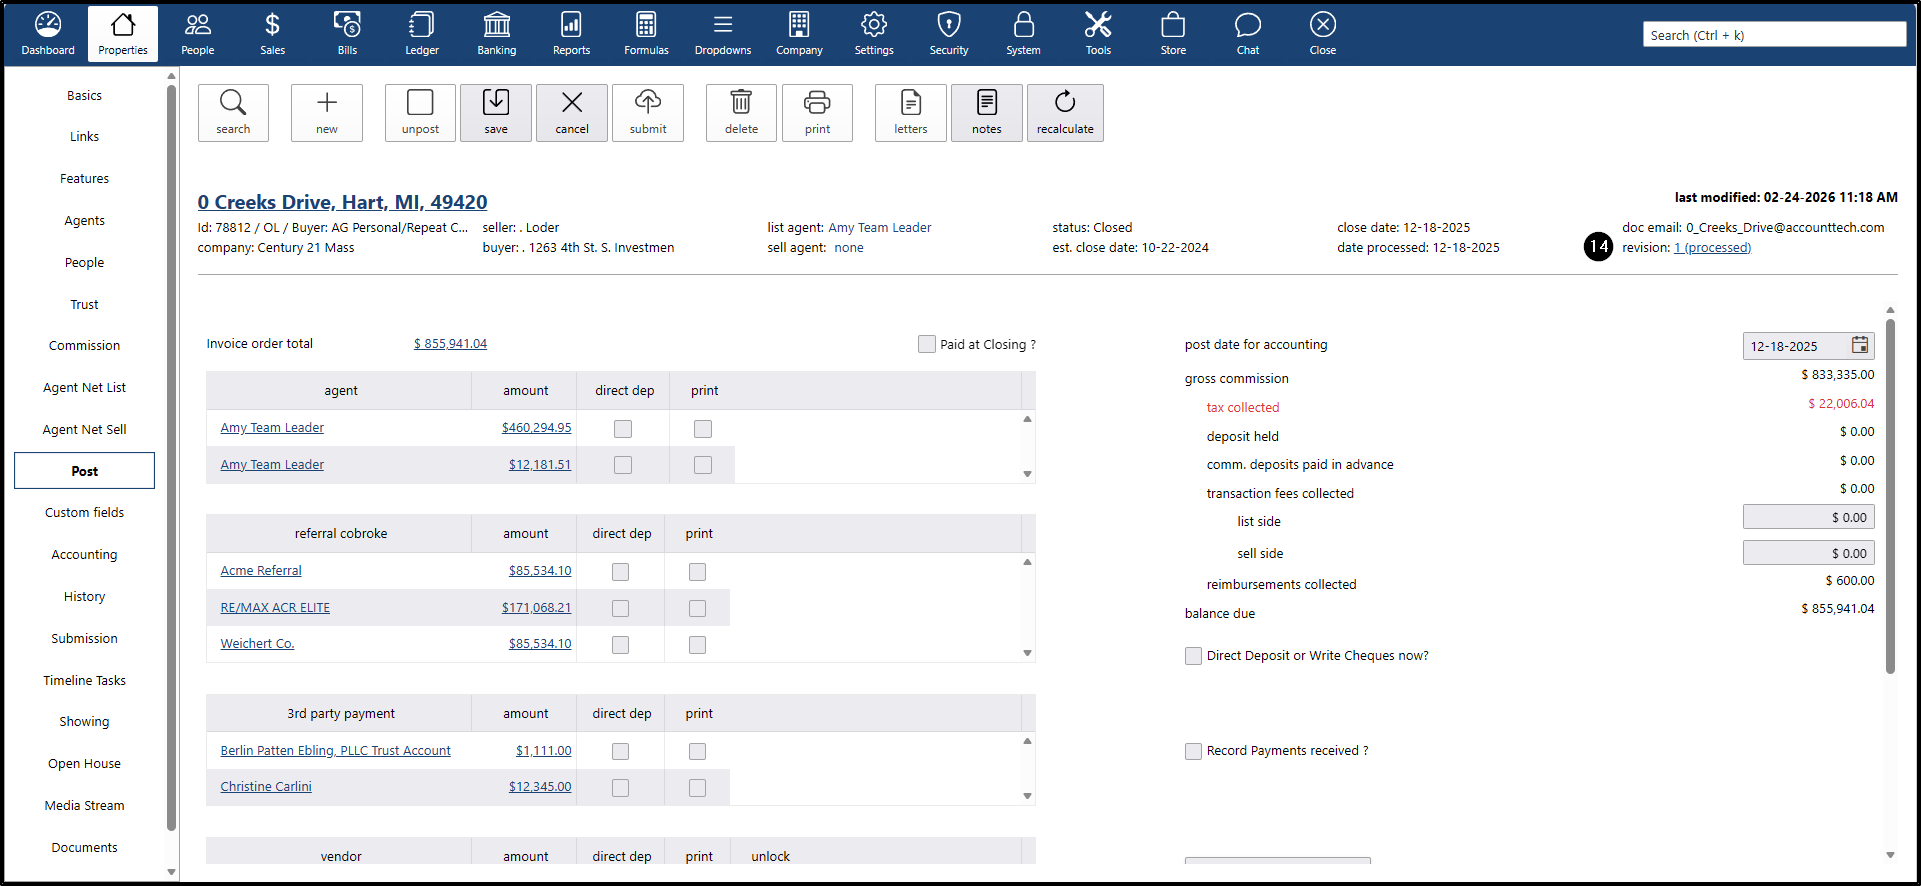
If you want to view the changes made to the property, click the “Revision” link. The system will display a pop-up window showing the change details, with icons indicating whether amounts were increased, decreased, or if people were removed from or added to the property. This pop-up window only shows data from the latest review.
Once the system has applied the changes to the property
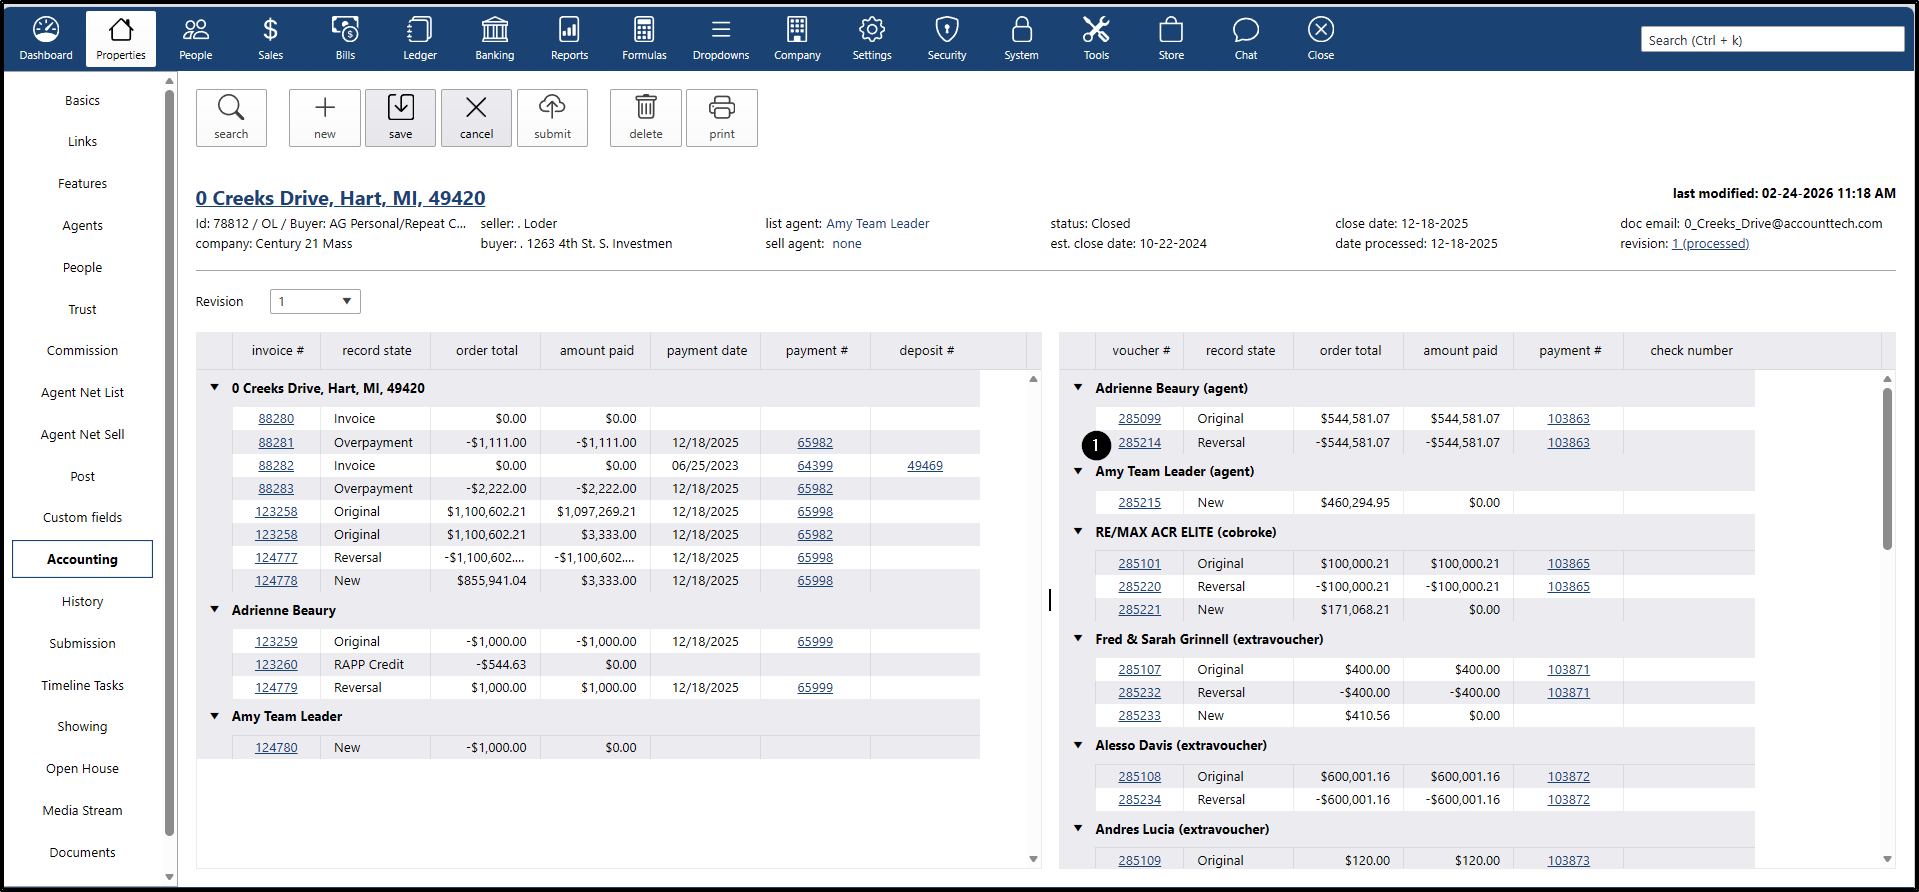
- You will will be able to validate the new vouchers created during the fix:
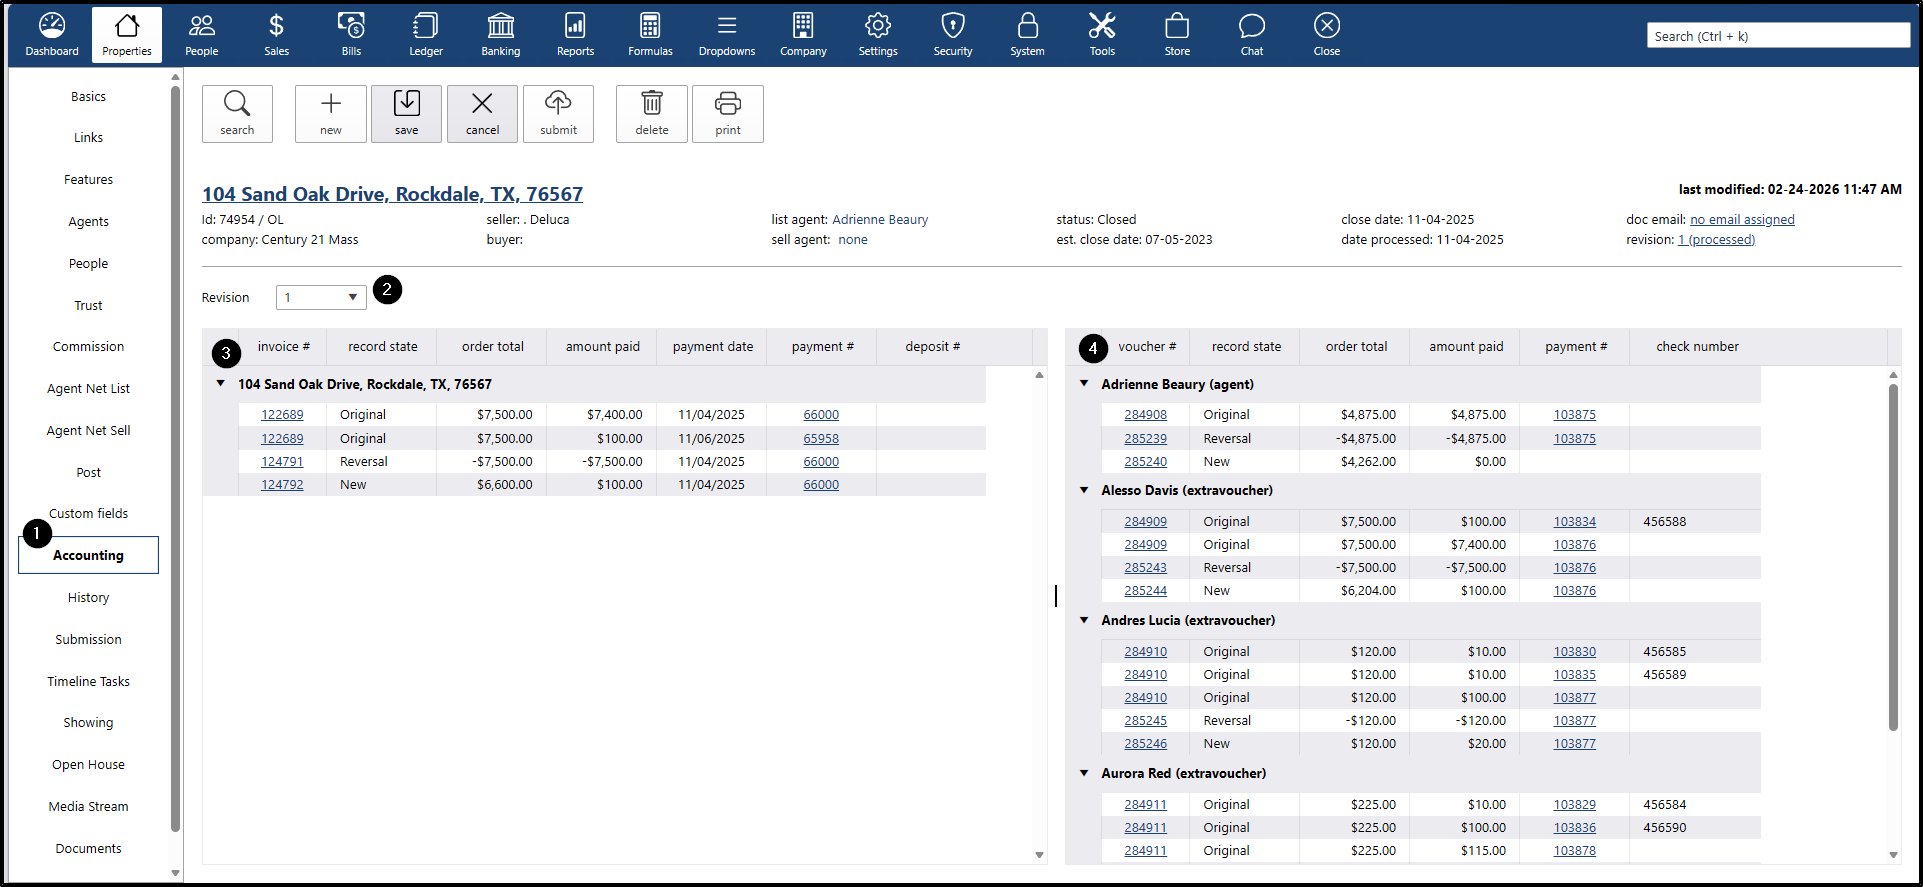
- Go to the Accounting option.
- The system will load all the vouchers created, grouped by person and by revision
On the left side, there will be a Revision dropdown that contains all the revisions associated with the property. When a revision is selected from the dropdown, the system will display the vouchers involved in that specific revision.
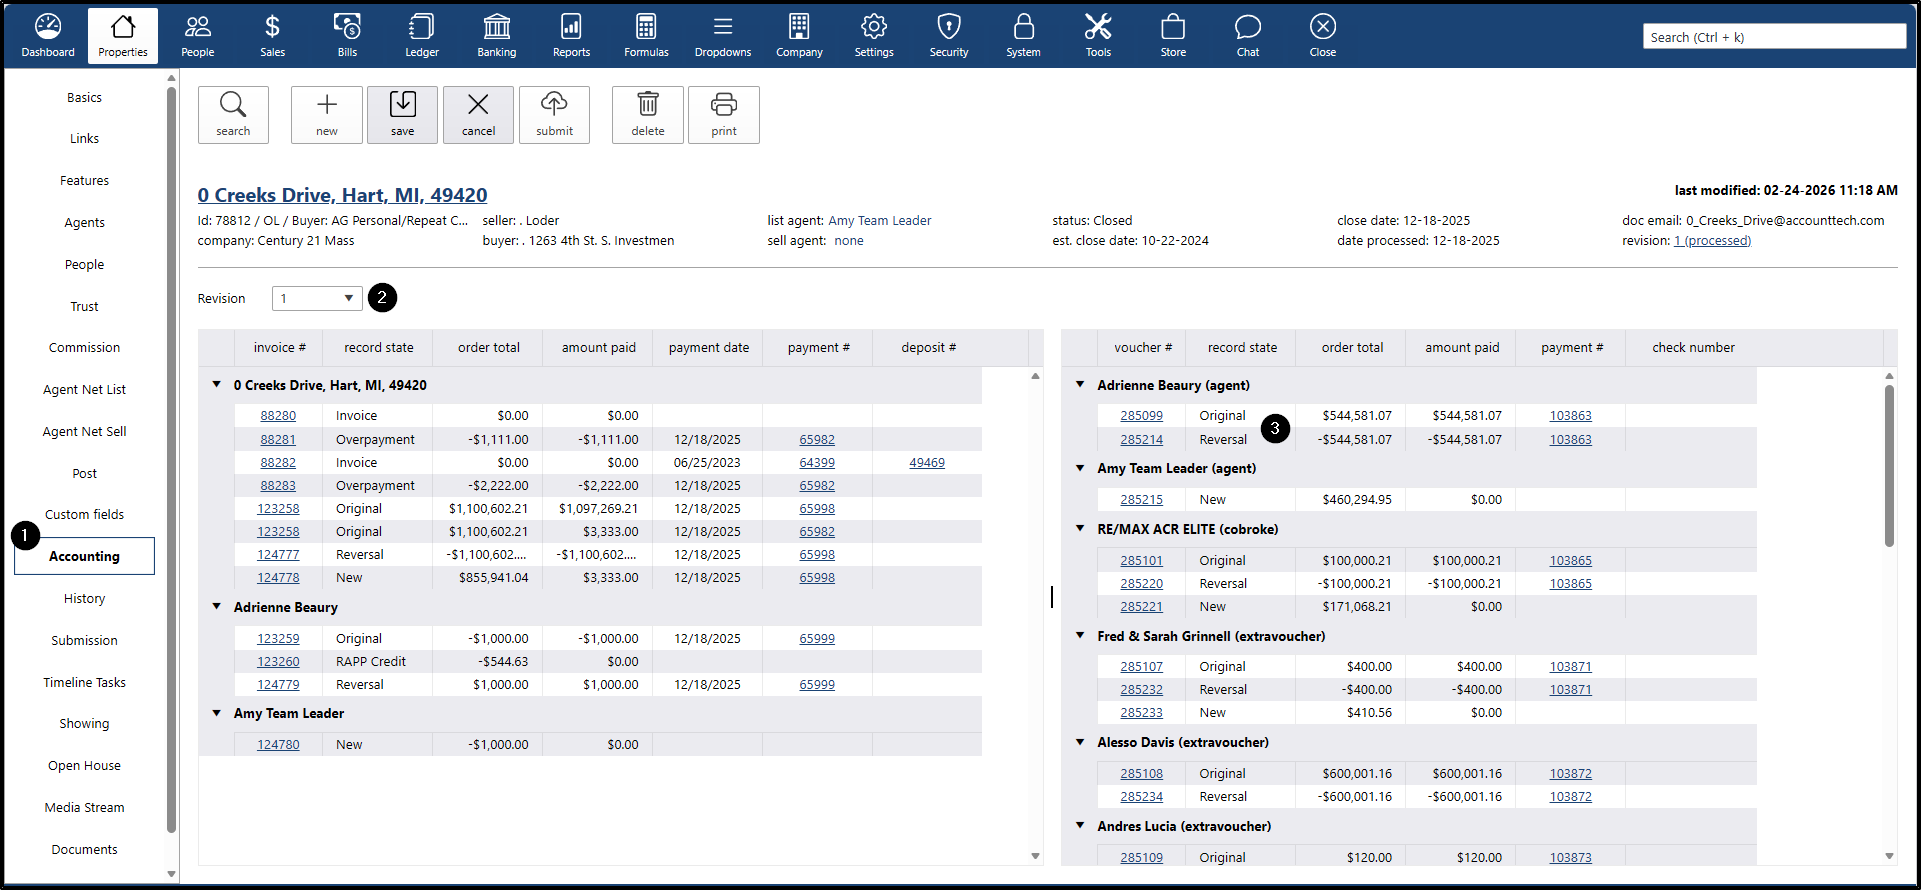
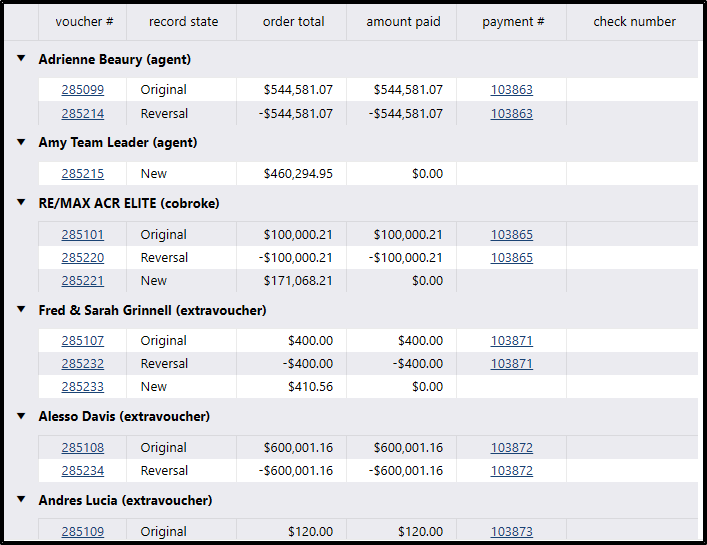
- On the right side, all vouchers will be displayed as follows:
- Original: Displays the original voucher used when the property was closed, before any fix was applied. Next to it, a link to the payment used to reverse it will be shown, allowing it to be mapped at the accounting level.
- Reversal: Represents the reversal of the original voucher amount, ensuring that the original amount is properly voided, with its corresponding payment applied.
- New: Displays the new voucher amount resulting from the property fix. If there was a payment applied to the original amount, it will be applied; otherwise, it will not have a related payment.
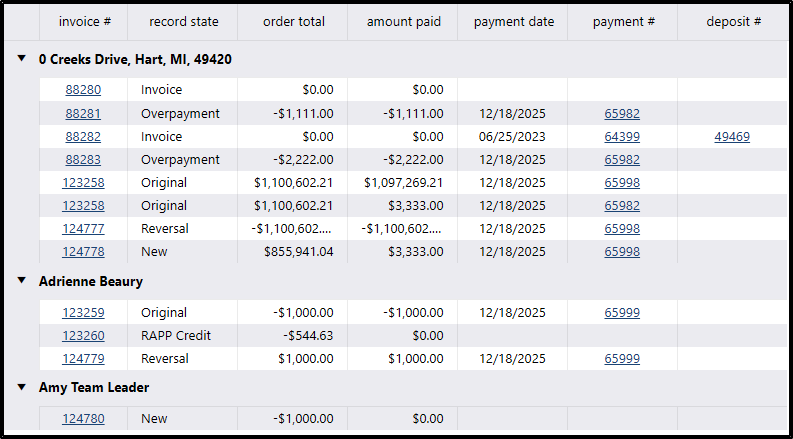
- On the left side, invoices will be displayed:
- It will list the invoices in general, showing the Original, Reversal, and New records.
- If a credit memo (bill deduct) is added or edited, it will also be displayed with Original, Reversal, and New records.
It will show as Paid if the credit memos were used.
When a property fix is applied and a credit memo is modified, the icons will be displayed as follows:
- The downward date icon indicates when the credit memo amount was increased.
The upward arrow indicates when the credit memo amount was reduced.
- All vouchers that are under review should not be allowed to be deleted, and neither should the payments associated with those vouchers.
For example, this property has Revision 1. If we click on the link for voucher 279528, it will redirect us to Bills.
If we attempt to unpost that voucher, which belongs to Revision 1, the system should not allow it.
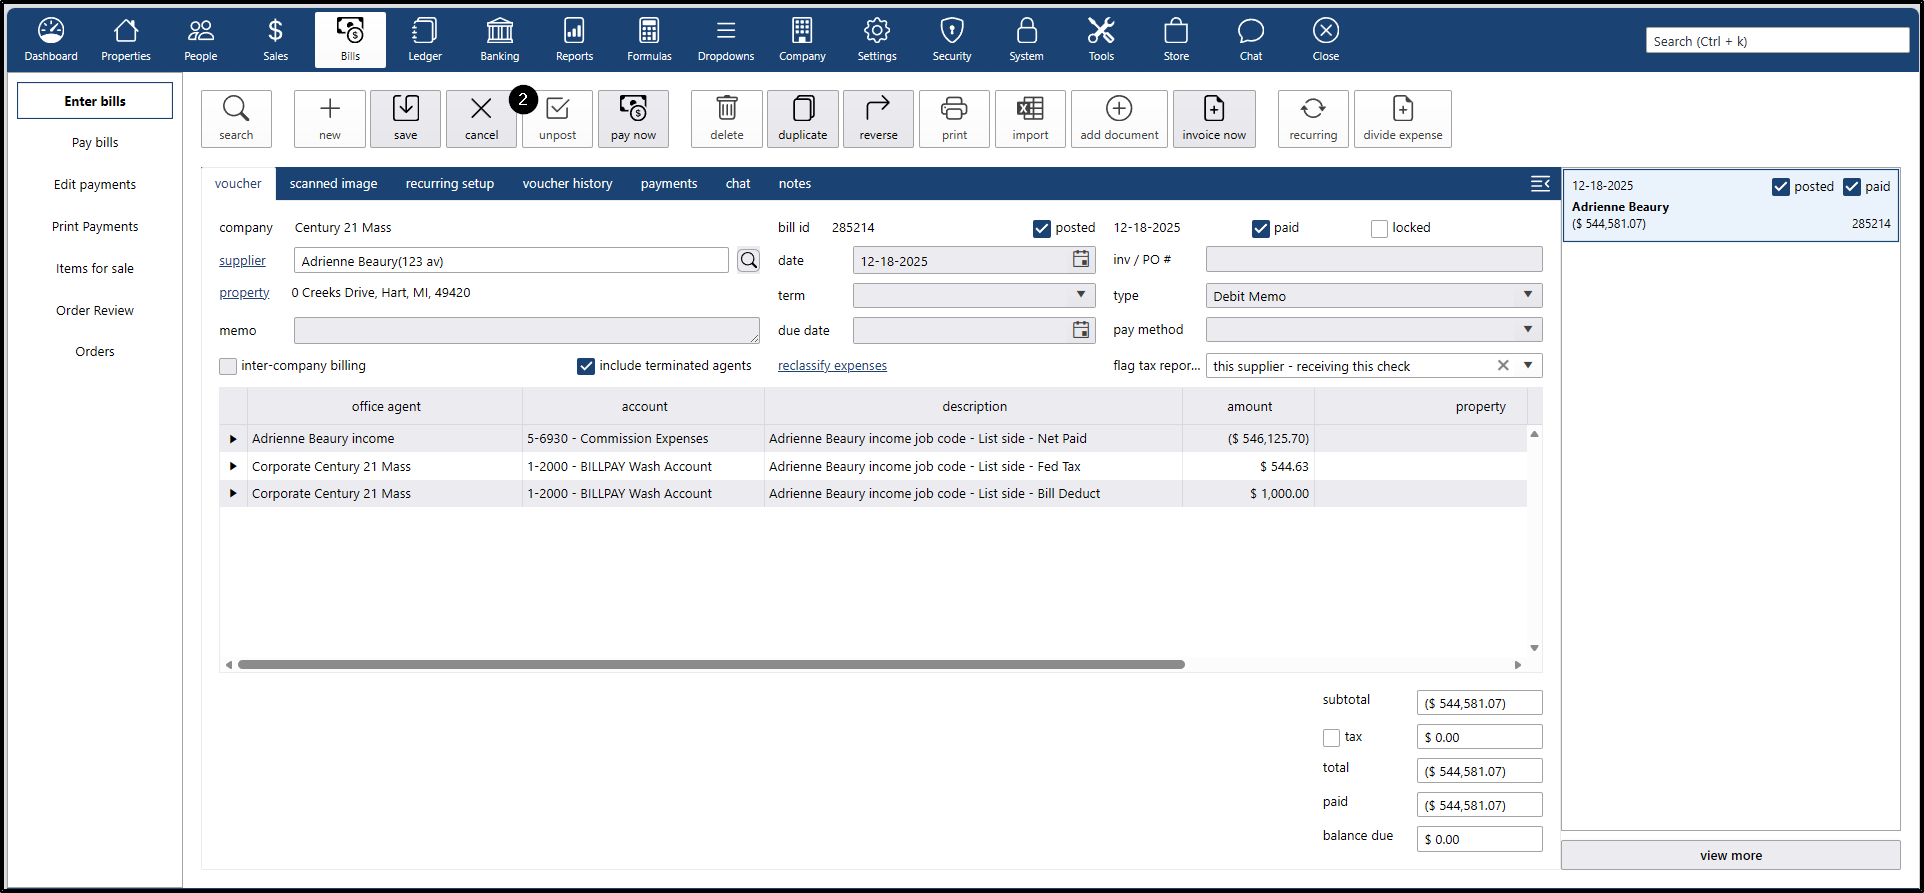
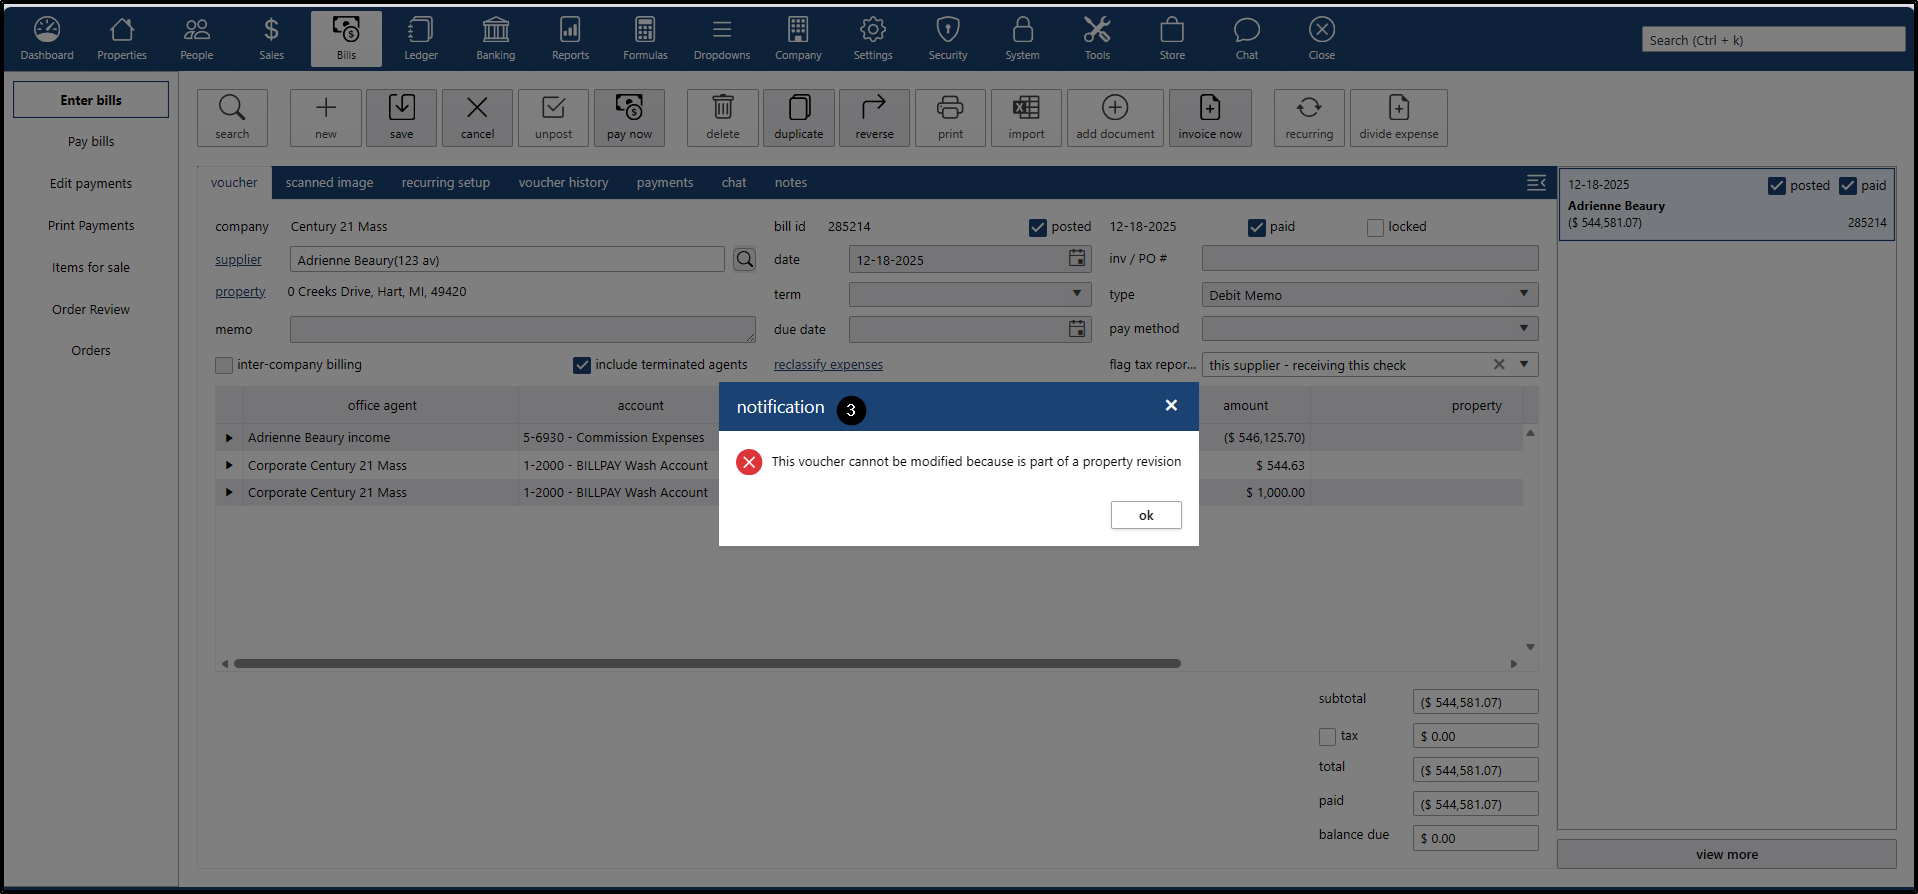
- All documents (vouchers, invoices, reversals, etc.) created within that revision should not allow the unpost action.
Process to cancel a fix on a property
- If you want to cancel a revision:
- Go to Commission or Agent Net List / Sell.
- Click the “Cancel” button.
- A confirmation message will appear, click “yes”

The system cancels the revision and does not apply the changes that had been made.
Revision process when decreasing paid amounts
- Look for a closed property that has paid vouchers.
- Go to Commission and decrease the agent’s commission.
- Example: the agent’s commission voucher for 24,855 is already paid; the commission is reduced, creating a new voucher for 12,700.
- The decrease of voucher amounts depends on how the vouchers were created. If you want to decrease the amount of an override voucher, you must go to the profile of the agent who triggered the override and modify the amount. Likewise, for an extra voucher, you must go to Settings, locate the extra voucher, and modify it, etc.
- Go to Post.
- Click Apply.
- Accept the alert message to proceed.
- In the modal window, the changes made will be displayed. In this case, an alert icon will appear indicating that the paid voucher amount was reduced from the original.
- Click APPLY.

We verify the new voucher amounts:
- Go to Accounting.
- The current revision will be loaded.
- On the right side, the voucher with the original amount will be displayed. In this case, since it was a paid voucher and the new amount is lower, a new “adjusting” record will be created. This record will appear on both the voucher side and the invoice side.
- On the voucher side, the adjusting record should be fully paid.
On the invoice side, it should be unpaid, since it represents the excess amount the agent received and must return to the company.
Period Locks
- To verify that the date is correct when closing a property, go to:
- Go to Ledger.
- Click on Periods.
Check the last locked period for the company where you are applying the property fix.
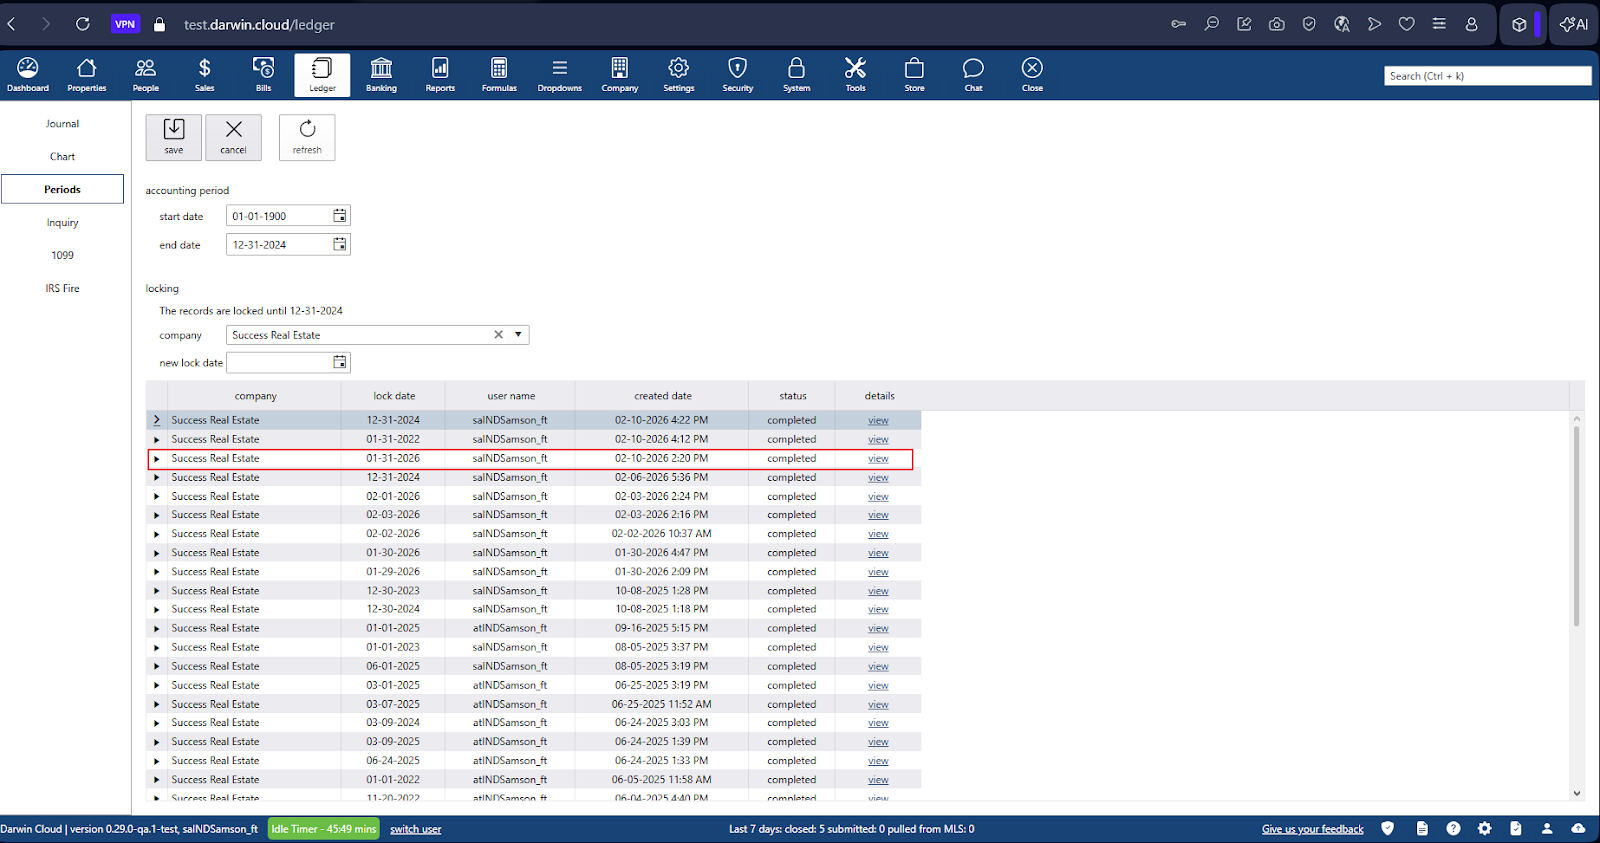
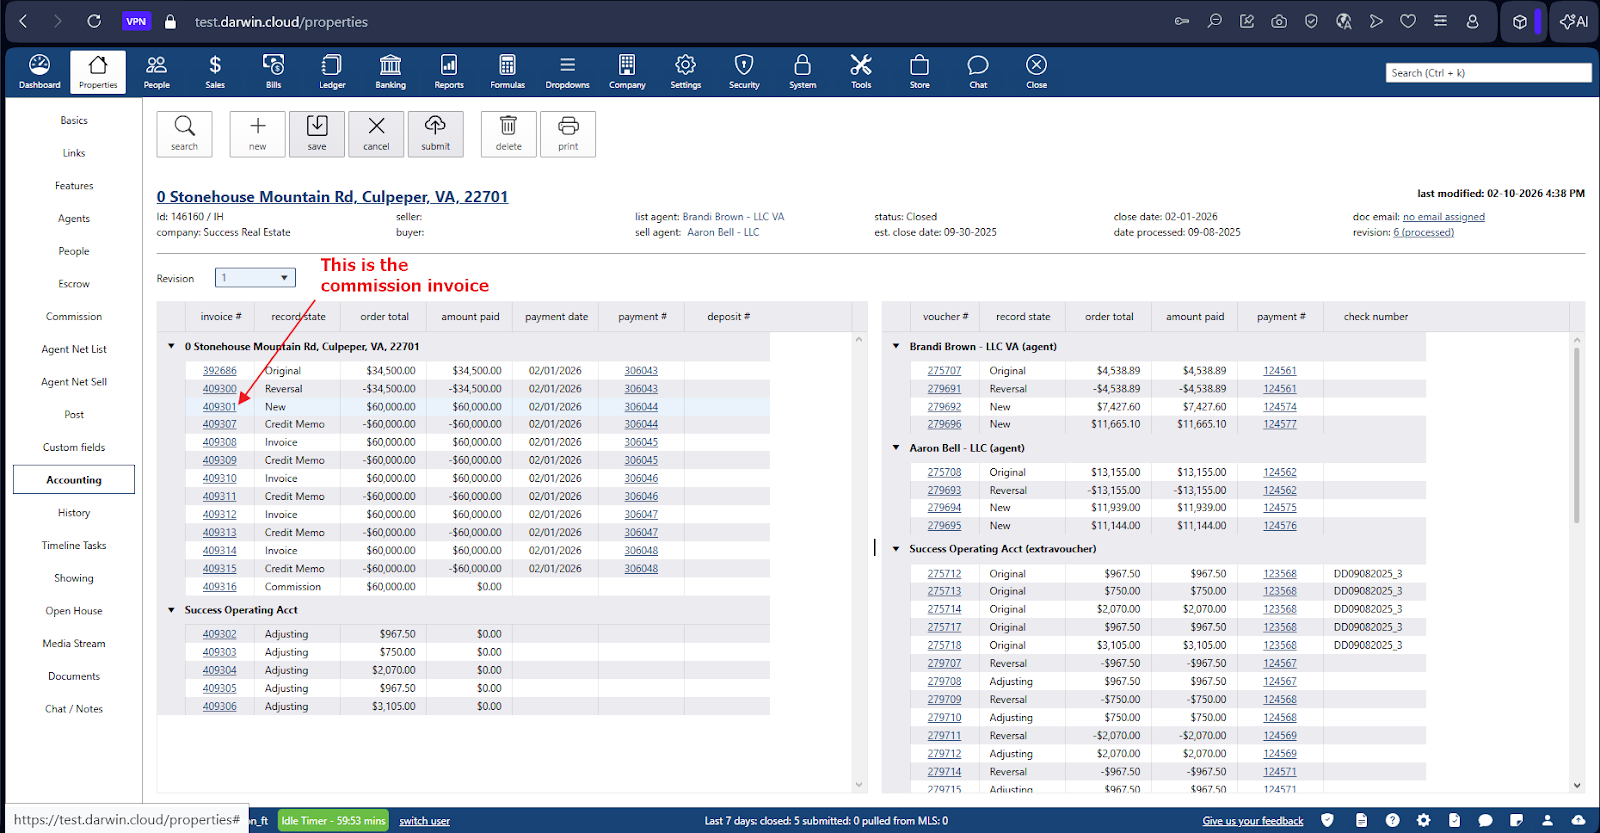
We will use property 146160 as an example.
This property was closed on 09/08/2025, and the locked period covers up to 01/31/2026. This means the property falls within the locked period. Therefore, the following will happen in the Property Fix flow:
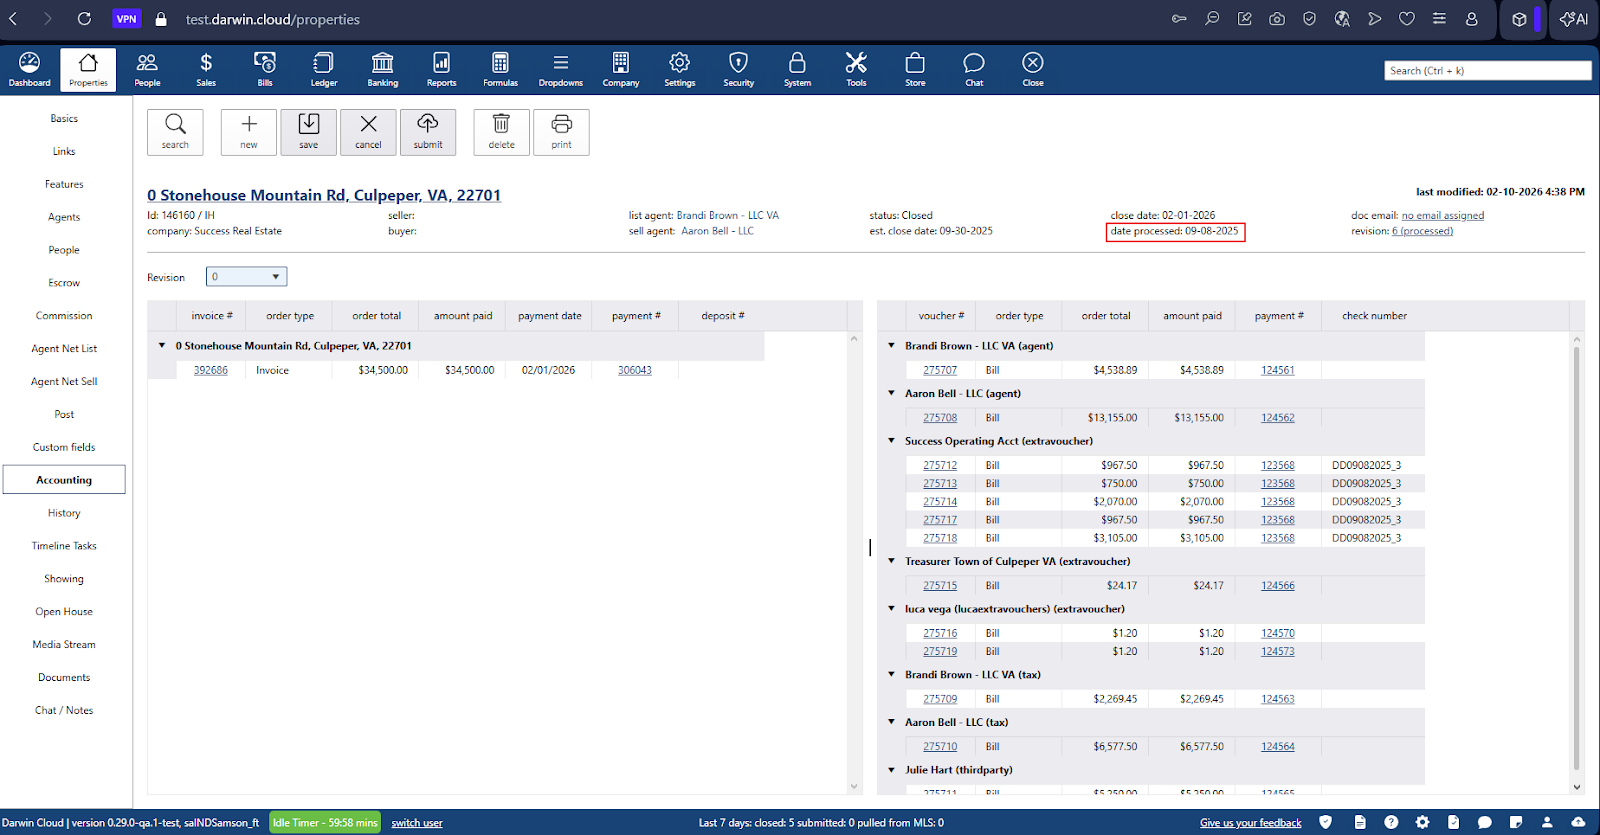
- If the user attempts to change the date in POST to a future or past date, it must be saved with a date after the locked period—in this case, 02/01/2026.
- The first revision of this property was created with the date 02/01/2026 because it is outside the locked period (01/31/2026).
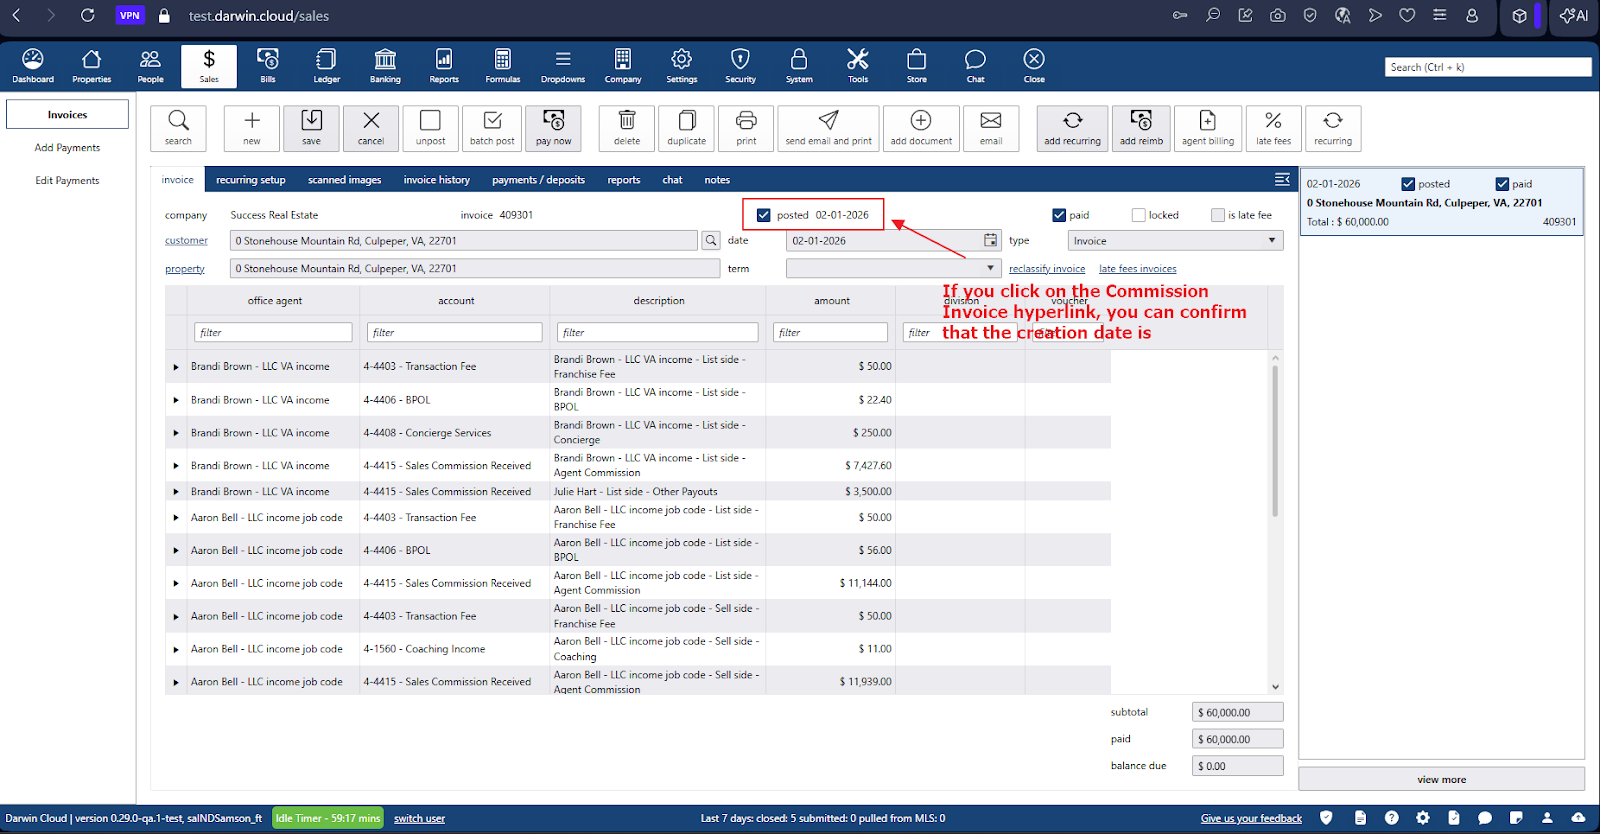
If the user performs a second revision, the system evaluates the original date of the commission invoice. In this case, the commission invoice has the date 02/01/2026, and the system then evaluates the latest locked period. If we check the latest locked period and it is up to 12/31/2024, then the date 02/01/2026 does not fall within a locked period. This means the second revision will continue using the same date.
- The system will continue evaluating the revision dates in the same way—only if a date falls within a locked period will it assign the next available date after the locked period.
- For this example, the dates of the six revisions are correct because they do not fall within a locked period.