Overview
We have updated our functionality to allow users to disburse escrow overages directly from the Properties > Post screen.
Purpose
This update eliminates the need to navigate back to the Properties > Escrow screen, streamlining users' posting workflow and saving valuable time.
Workflow
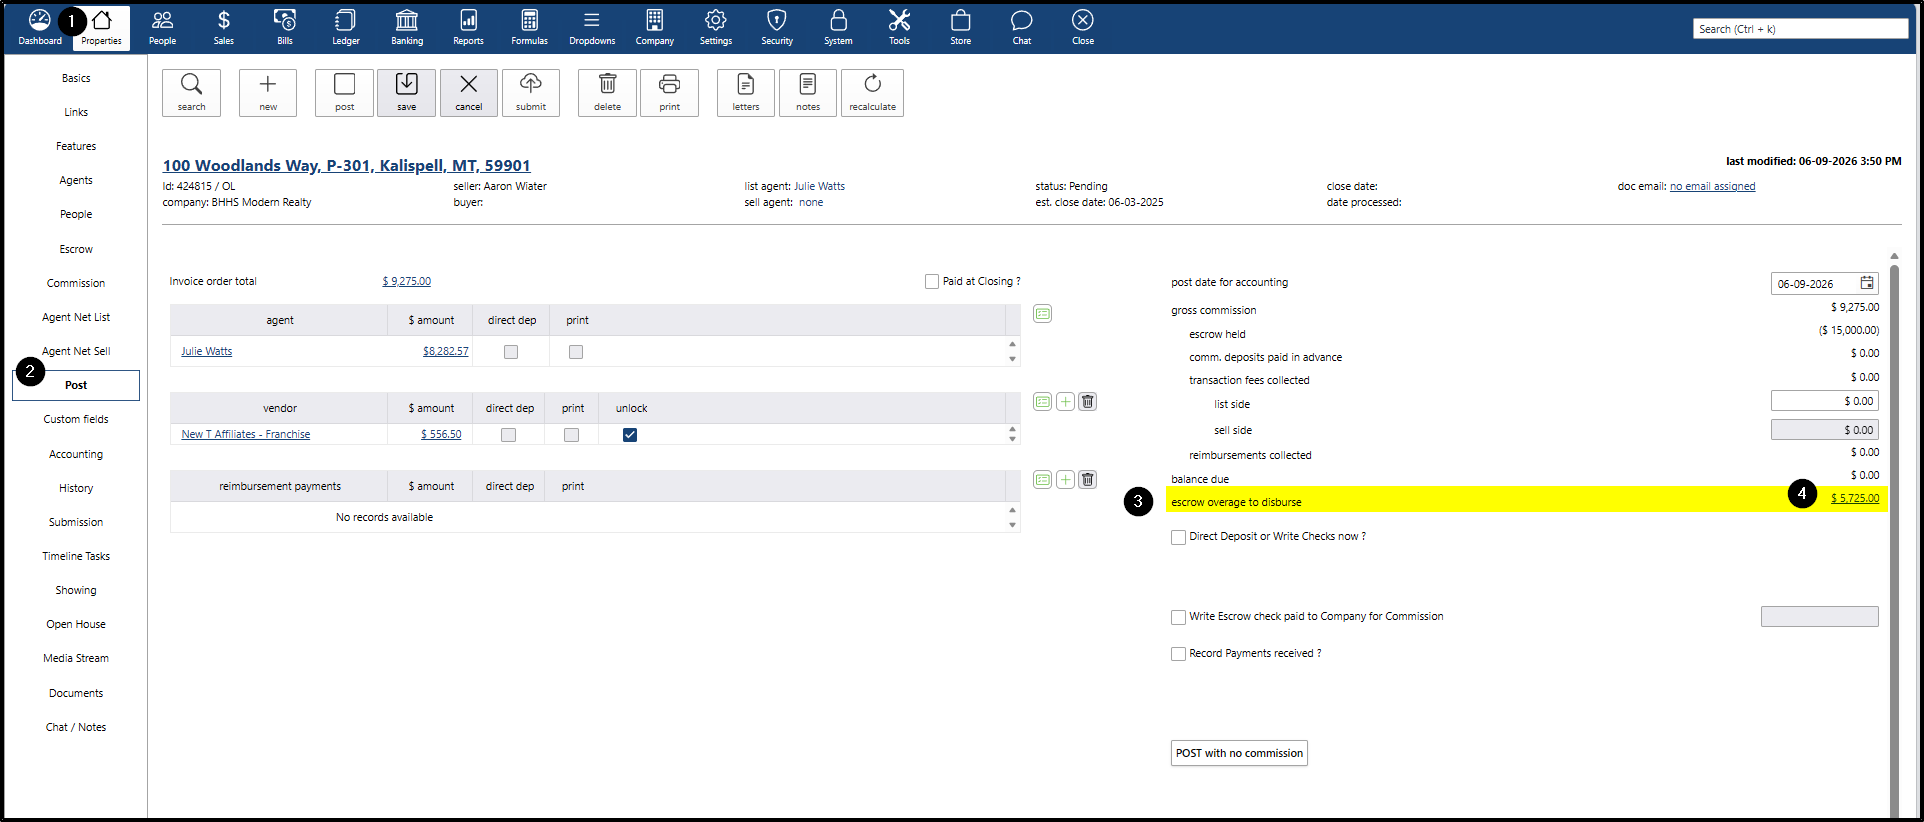
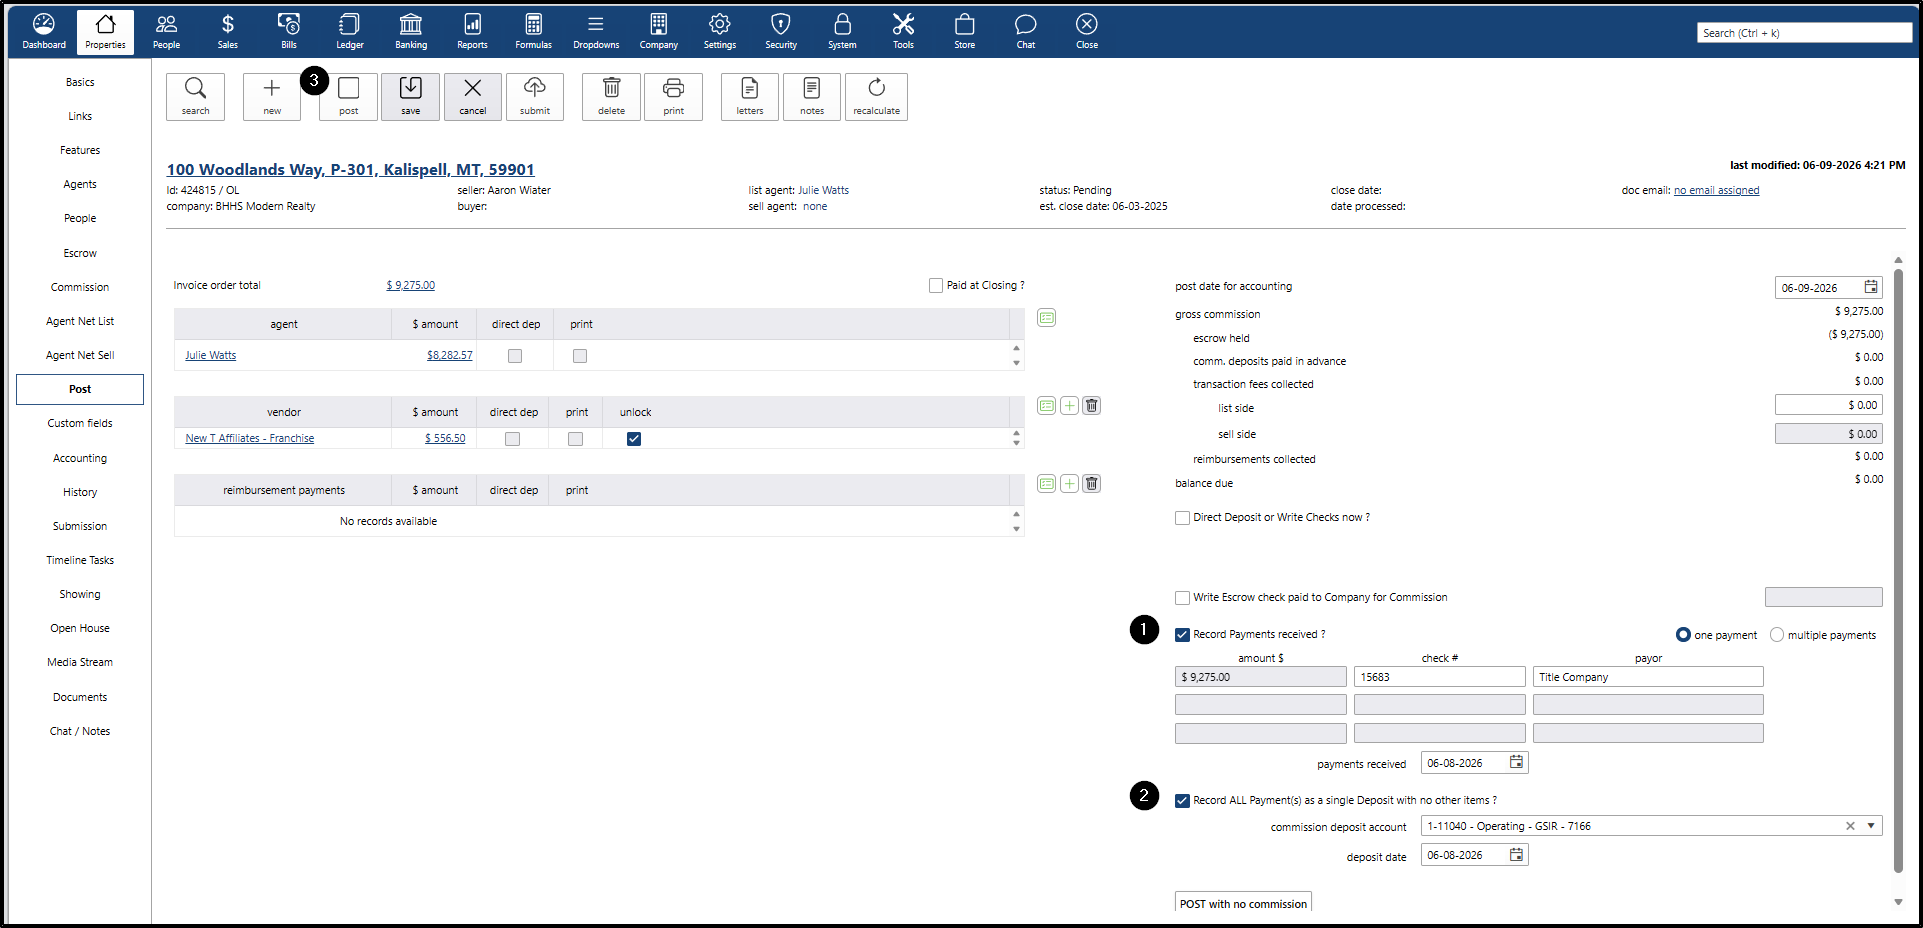
Step 1: Navigate to the Post Screen
- Go to the Properties menu and open a pending property that has an Escrow Deposit.
- Once the property is open, navigate to the Post screen.
- Locate the Escrow Overage to Disburse section.
- Click the dollar amount hyperlink to initiate the refund process.
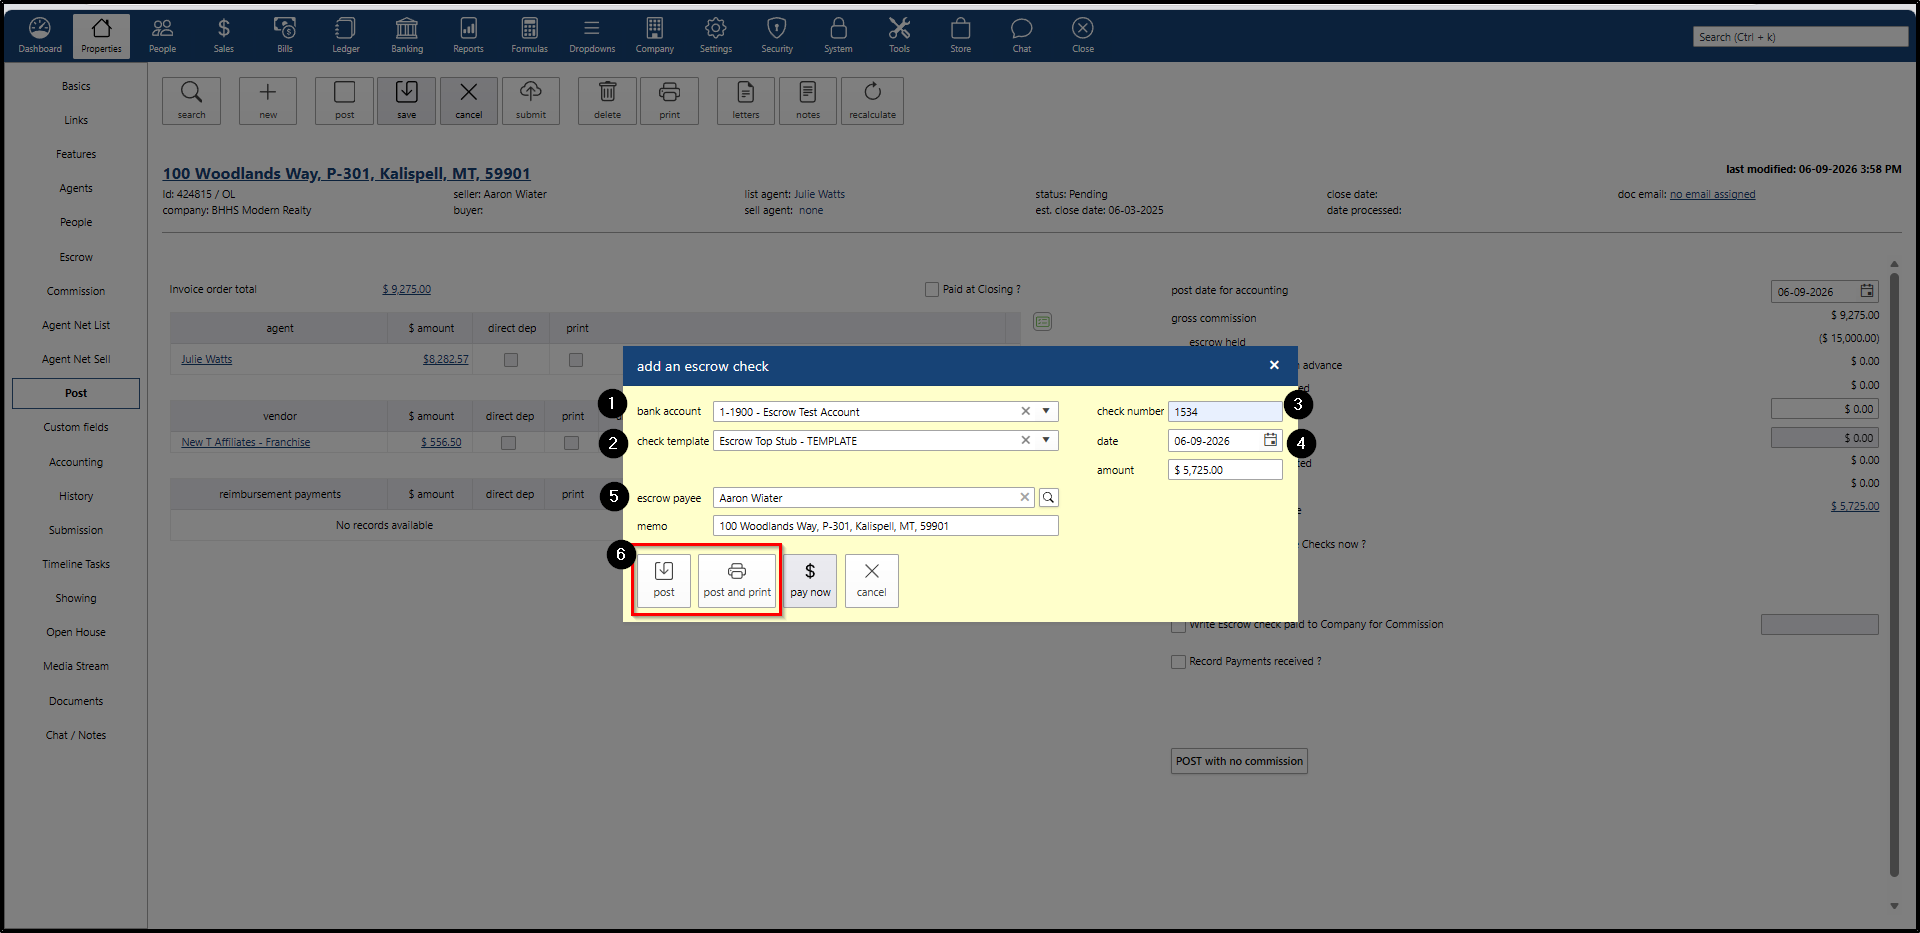
Step 2: Complete the Escrow Check Details
Review and complete the check details in the pop-up window:
- Escrow Bank Account: Pre-filled (editable).
- Escrow Check Template: Select a preferred template from the dropdown.
- Check Number: Enter the check number.
- Date: Pre-filled (editable).
- Amount: Pre-filled (editable).
- Memo: Pre-filled (editable).
- Escrow Payee: Search for and select the appropriate payee.
- Finalizing the Check:
- Click Post (do not need to print a physical check).
- Click Post and Print (need to print a physical check immediately).
Step 3: Review Post-Screen Updates
- A notification pop-up will appear confirming that the escrow check was added successfully.
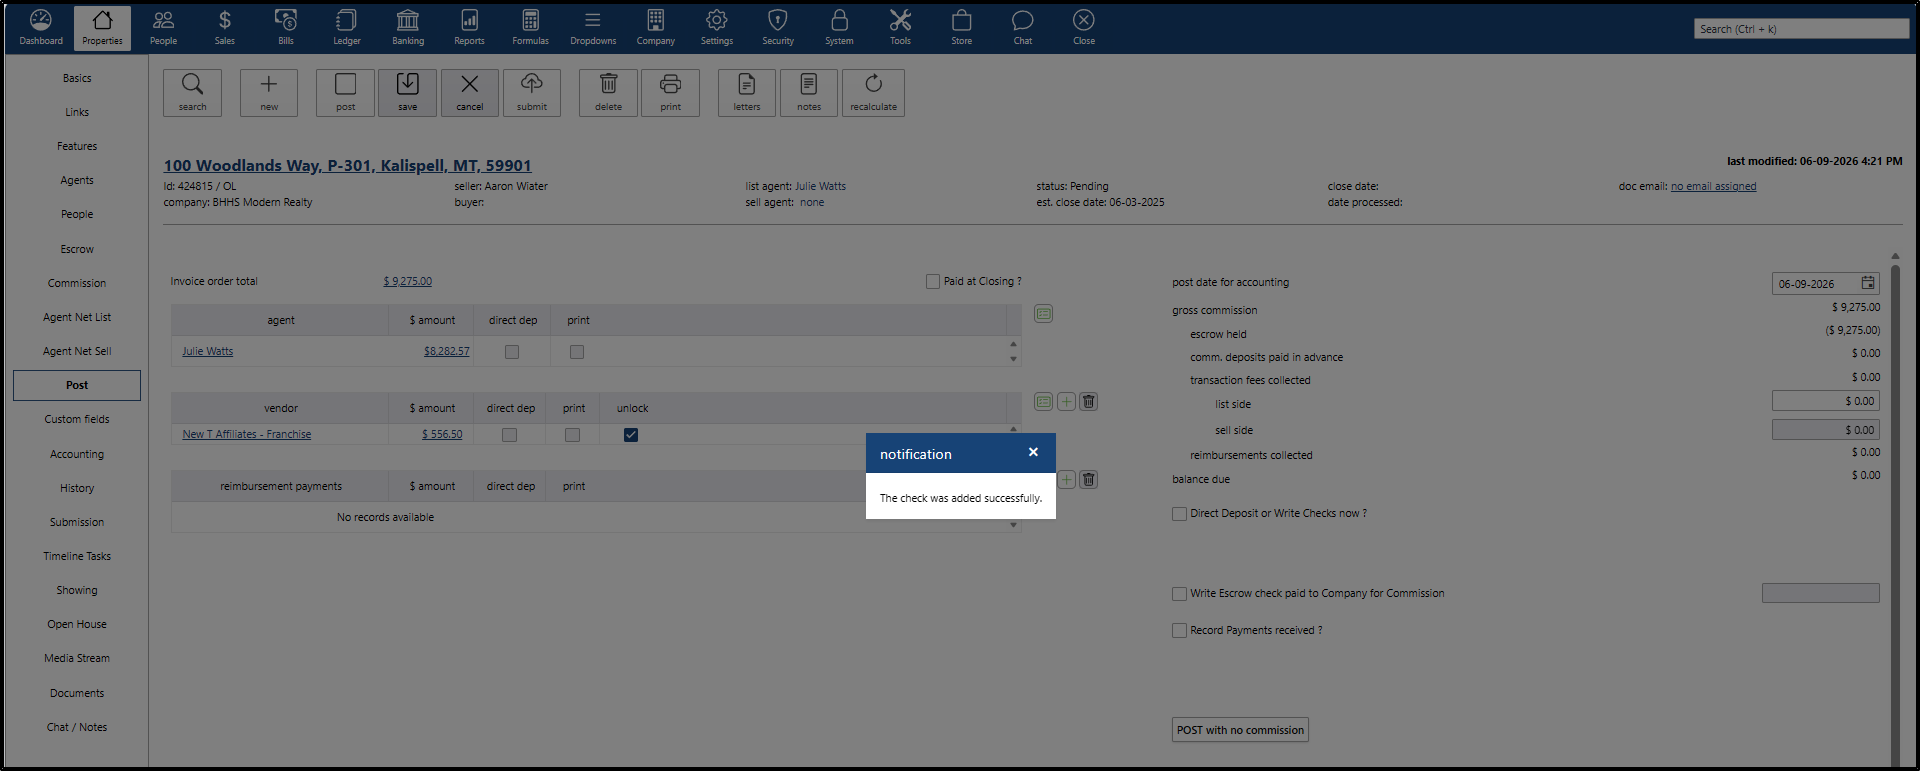
- The Post screen will automatically refresh, and the Escrow Overage to Disburse section will no longer be visible.

Step 4: Close the Transaction
Users can now proceed to close the transaction as normal, or follow one of the two workflow paths below based on the operational needs:
Option A: Standard Closing (Writing an Escrow Check for the Balance to a Different Entity)
Follow these steps to proceed with a normal closing and issue the remaining escrow balance to an outside party:
- On the Post screen, check the Record Payments received checkbox.
- Check the Record all payments as a single deposit checkbox.
- Click the Post button.
- Navigate to the Escrow submenu screen.
- Click the Check button.
- Review and complete the check details in the pop-up window.
- Final Step: Click Post (if no printing is needed) or Post and Print (to print a physical check).

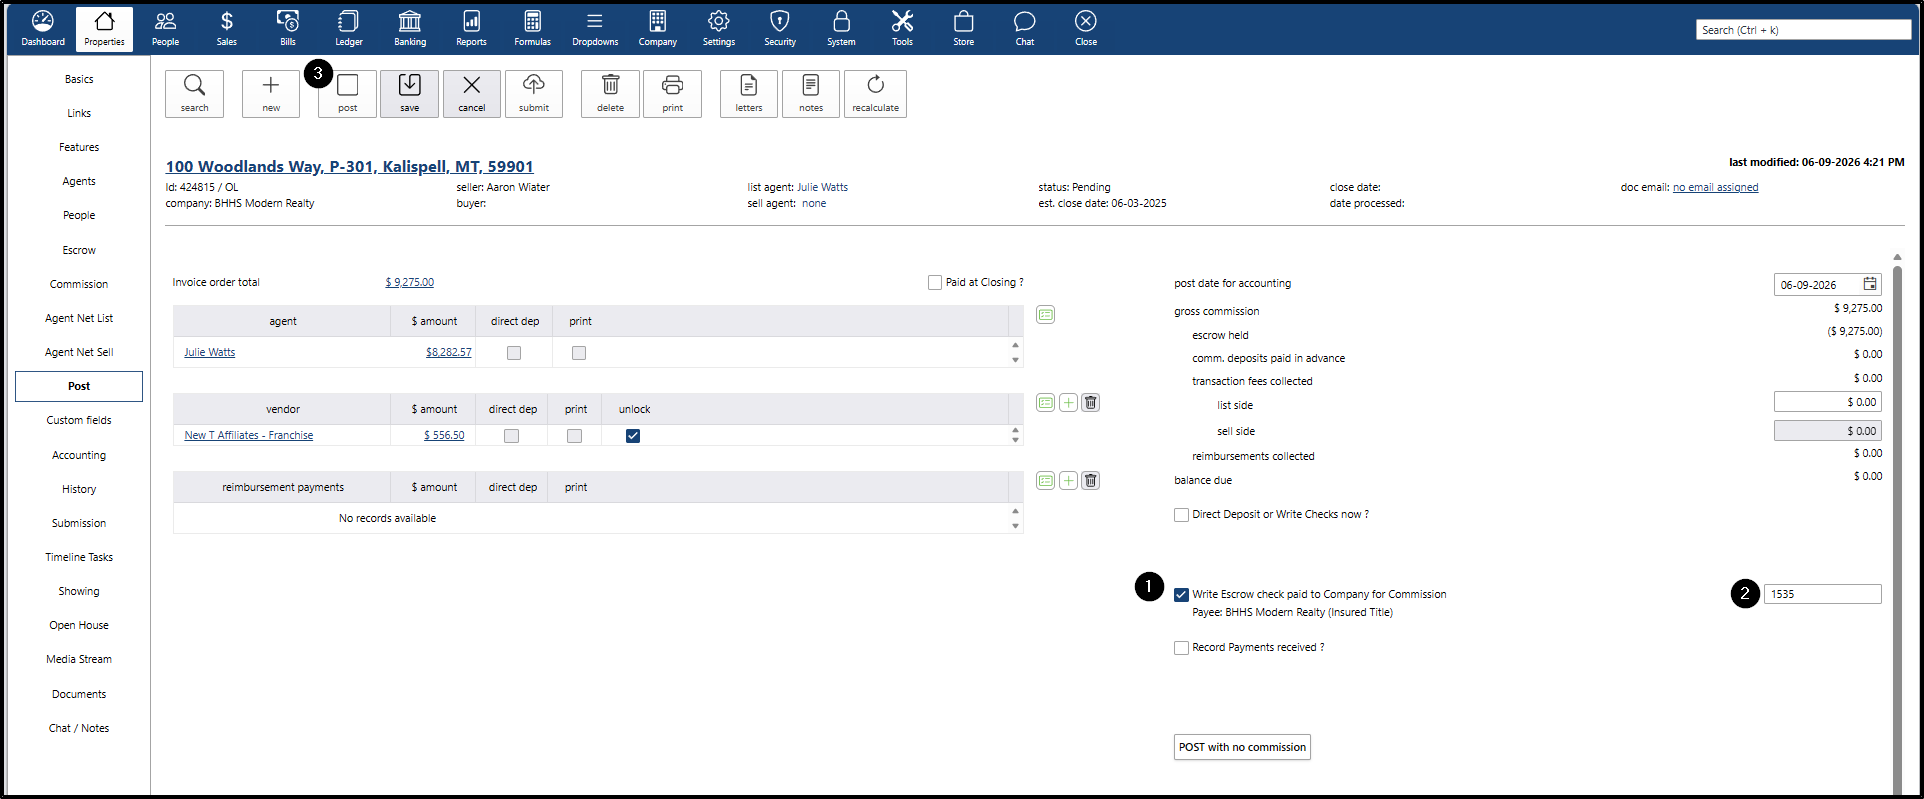
Option B: Writing an Escrow Check to the Company for Commission
Follow these steps if your workflow requires transferring the remaining escrow balance to your company for commission:
- On the Post screen, check the Write Escrow check paid to Company for Commission checkbox.
- Enter the Check Number.
- Click the Post button.