Overview
Darwin AI Training can be configured to automatically assign a default check template based on the transaction office.
This enhancement allows companies with multiple offices to ensure that the appropriate check template is automatically populated when posting a transaction, based on the office associated with the lead agent.
Use Case
Some companies have multiple offices, and each office may use a different check template when processing closing checks.
Previously, Darwin AI Training allowed users to specify check layouts for a company, but there was no way to assign a specific check layout based on an individual office. As a result, users had to manually select the appropriate check template when processing a transaction.
With this workflow, administrators can configure Darwin AI Training to assign default check templates at the office level. When a transaction is posted, Darwin will use the check template assigned to the office associated with the lead agent.
This helps reduce manual steps and ensures that the correct check template is used consistently for each office.
Set Up
To configure the Darwin AI workflow:
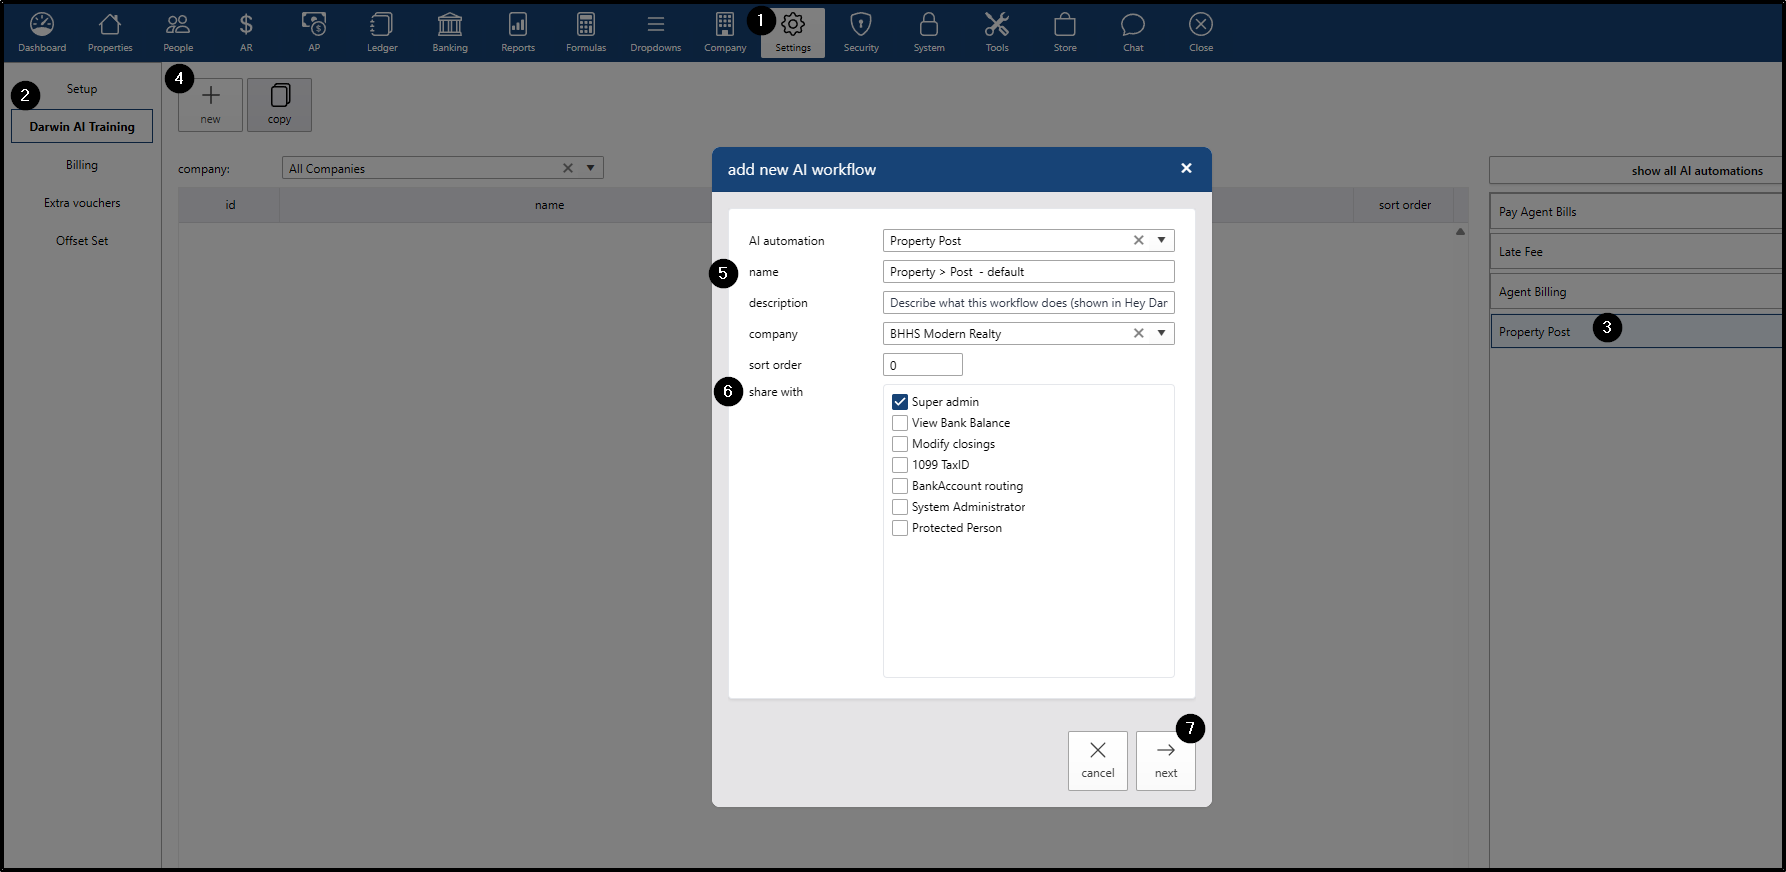
- Navigate to the Settings menu.
- Go to the Darwin AI Training submenu.
- On the right side, click the AI automation for Property Post
- Click New to create a Property Post AI workflow for the company.
- Enter the AI workflow name: Property > Post - default
- Assign a Security Role to determine which users can access the workflow.
- Click Next.
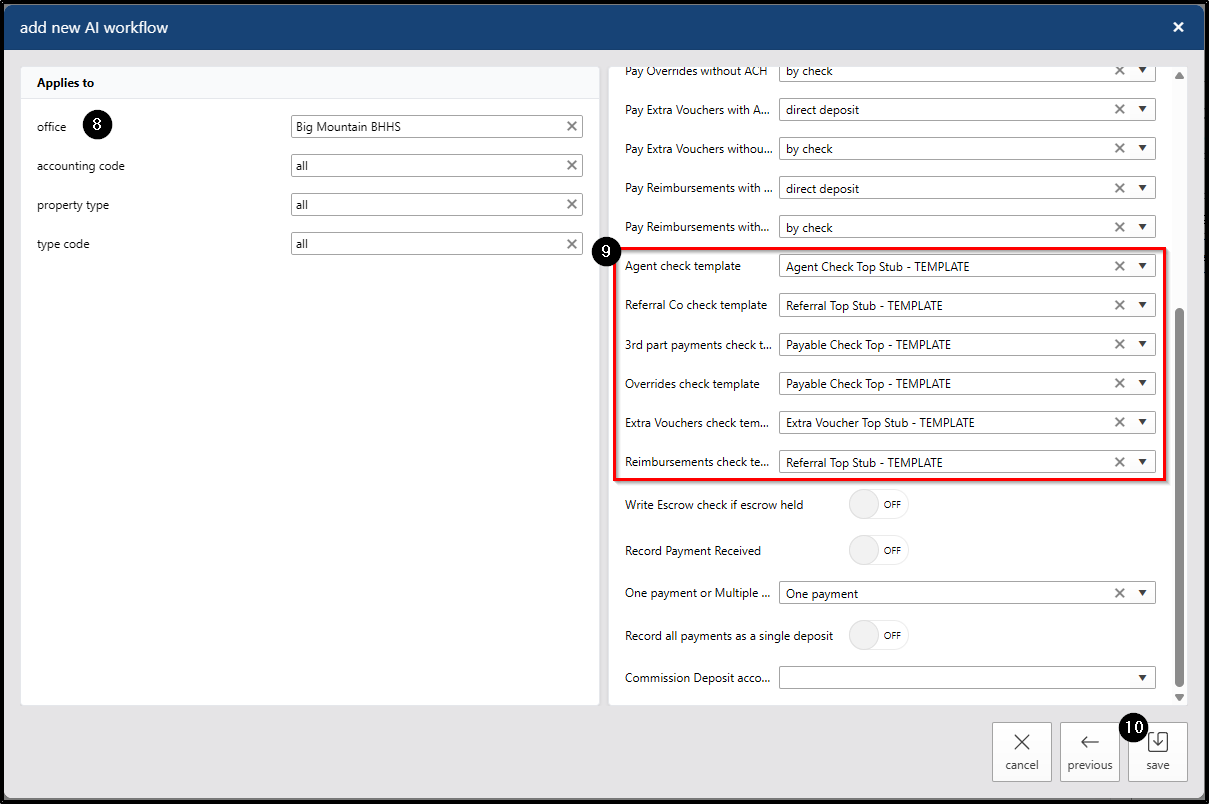
- In the Applies To section, select the appropriate Office from the dropdown.
- In the Settings section, assign the check template(s) that should be used for that office.
- Click Save.
Using the Workflow in Property Post
Once the workflow has been configured, Darwin will automatically populate the assigned check template when posting a property.
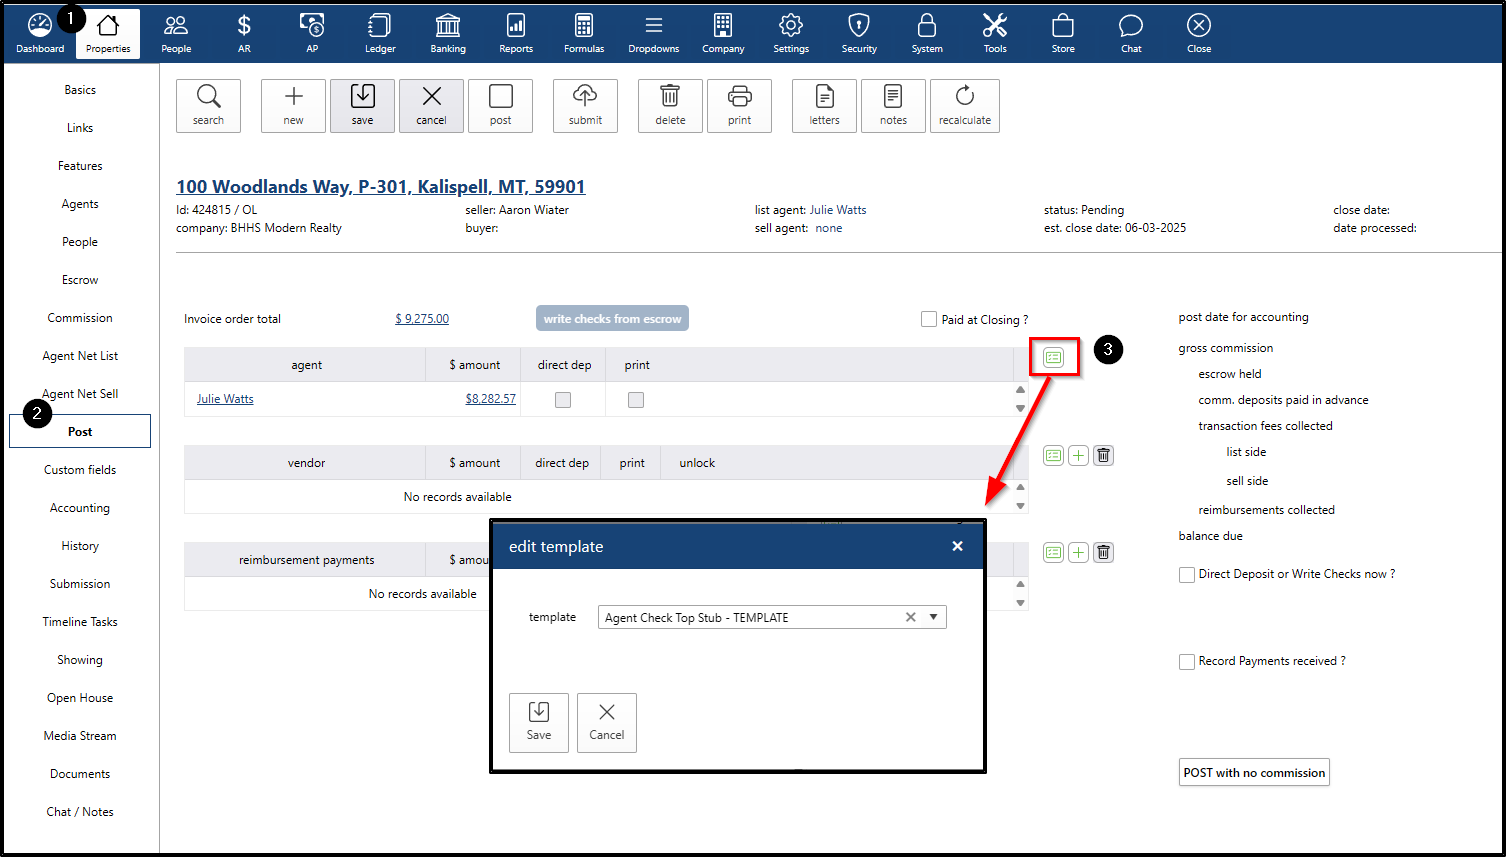
To verify the assigned template:
- Navigate to the Properties menu.
- Search for and open a Pending Property.
- Navigate to the Post submenu.
- In the left section, select the checkbox next to the appropriate agent in the agent table.
- The Edit Template window will open.
- The check template assigned to the agent's office should be automatically populated.
- The Edit Template window will open.